Using the Disbursement Voucher
Contents
Document Overview
Description: The description appears on the general ledger and in Action Lists. For reconciling purposes, please begin all DV Descriptions with the Payment Reason Code of the disbursement. Failure to do so can slow the audit and approval processes. For more information regarding Payment Reason Codes, please see Payment Reason Codes.
- Organization Document Number: This is an optional field for departments, if they would like to make up a number to track/tie in multiple documents during lookups.
- Explanation: The explanation is required to justify the reason for the expense and the disbursement. This field should explain the who, what, when, where, why, and how of the DV. If departments have a long explanation that cannot fit, they can have the remainder of their explanation go into the Notes and Attachments tab
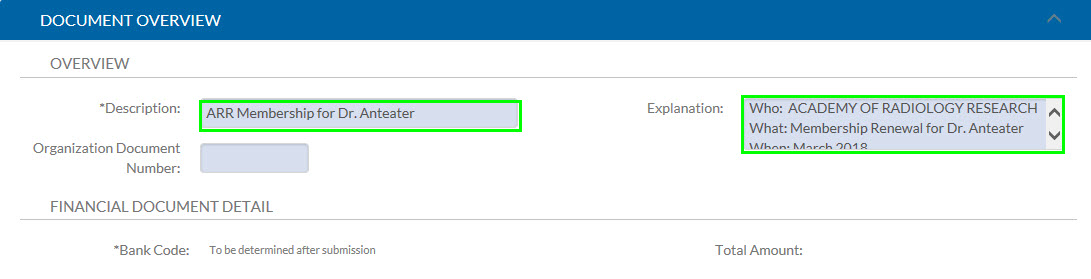
Image Scanning
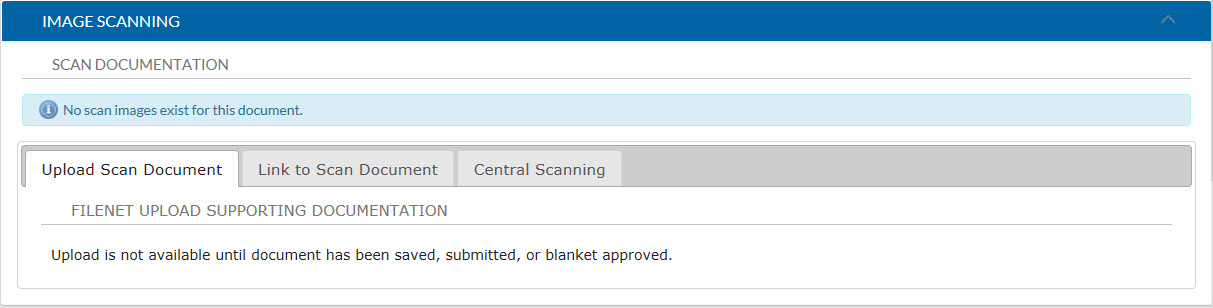
There are currently 2 options on uploading supporting documentation relating to the reimbursement. For more information on what supporting documents are required, see the Reference Guide.
The maximum allowable attachment size is 5MB.
Option 1: Upload supporting documentation
Follow these steps to upload your supporting document images to FileNet:
- Upload is not available until document has been saved, submitted, or blanket approved.
- Before you upload any images, make sure that any sensitive or personal data is redacted. Files cannot be deleted after they are uploaded.
- Scan or photograph your documents into one of the following file formats: .pdf, .jpg, .jpeg, .bmp, .png, .tiff, or .tif.
- Go to the Image Scanning tab and click the Browse button to select the image from your computer.
- Click the Add button to upload your image to FileNet. No coversheet is needed.
The Notes and Attachments Tab should never be used to upload supporting documentation items to a TEM or DV e-document. Sensitive or personal information cannot be redacted or removed once uploaded in the Notes & Attachments tab.
Option 2: Link to scanned information on another document
If your supporting documents were scanned into a previously completed TEM e-document that was subsequently disapproved, link that disapproved eDoc to the new one you are creating. Enter the document number of the disapproved document into the Scanned Document Number field in this section.
You can find more information on Image Scanning by clicking on the following link: Supporting Documentation Guide
Payment Information
Payee ID
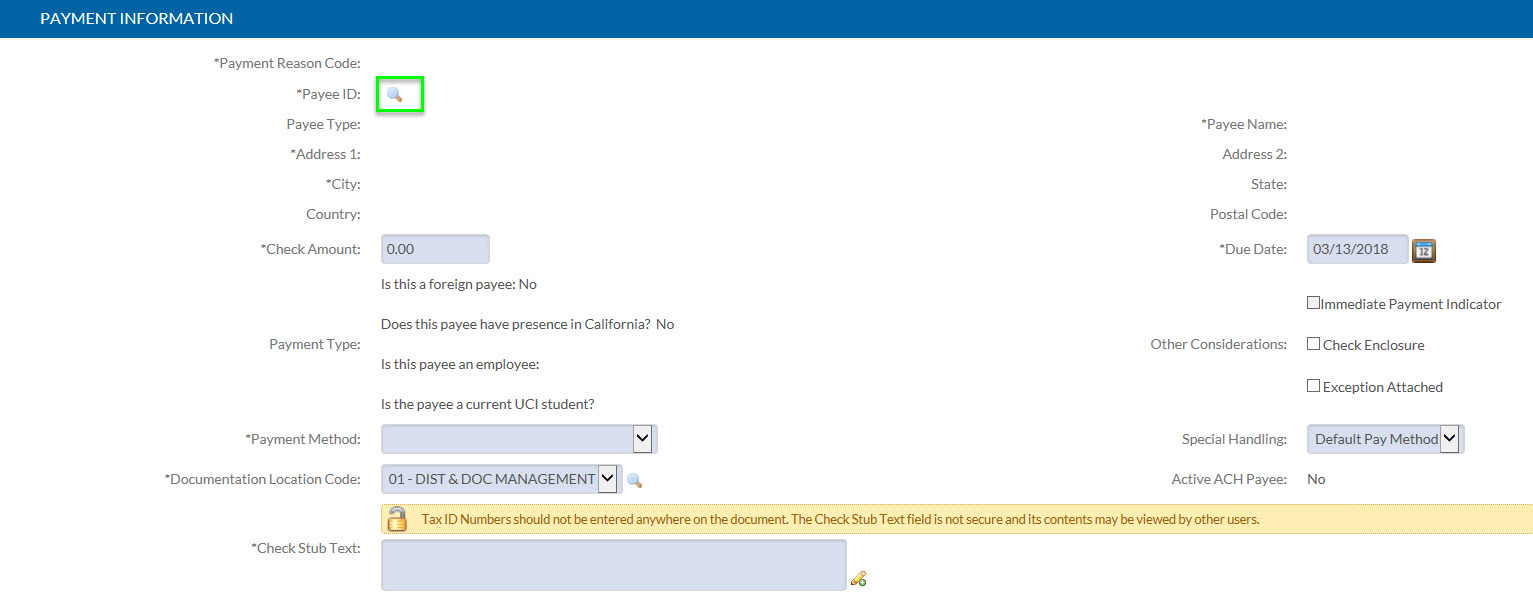
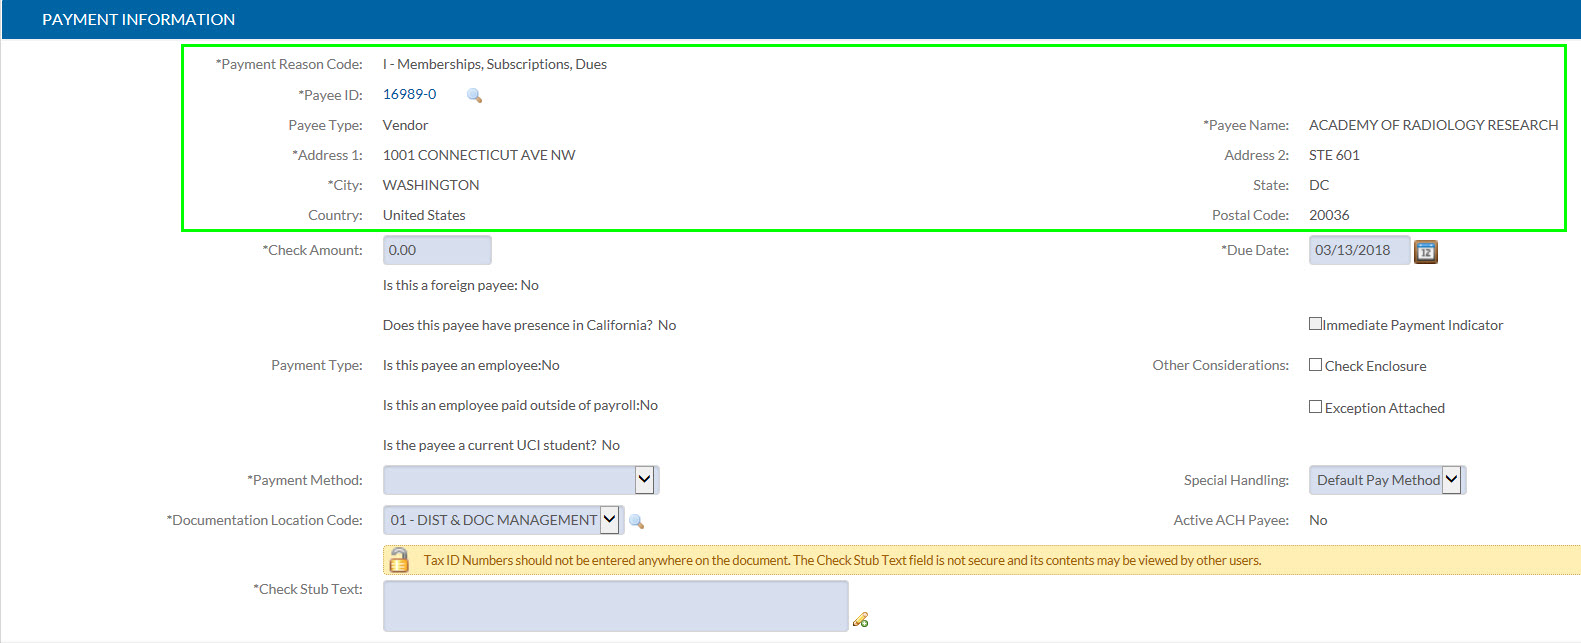
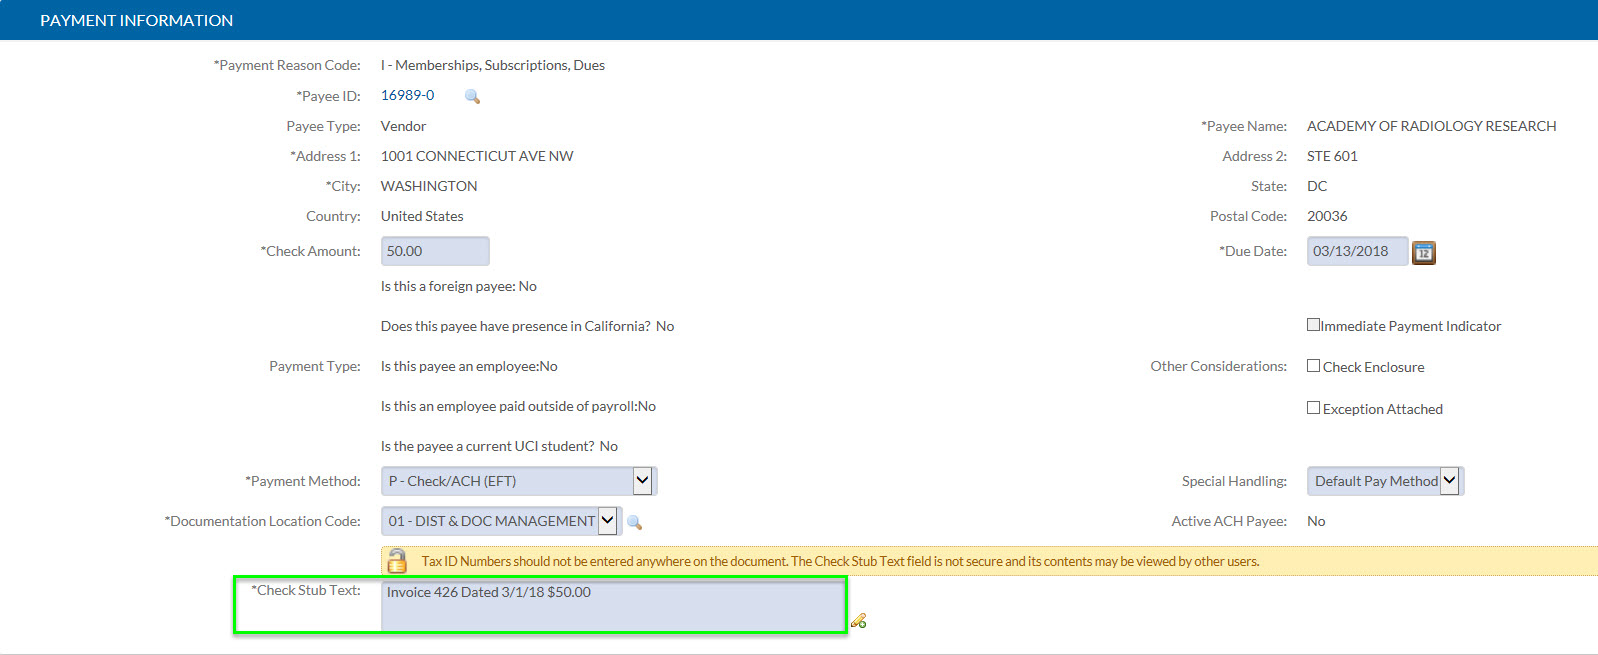
Select the Payment Reason Code from the drop down menu, to label the reason for the disbursement. Search for an Employee, Vendor, or Student ID (Payment Reason Codes B, L, I, P, Z only) fields. Select the return value link next to the name of the payee to populate your DV.
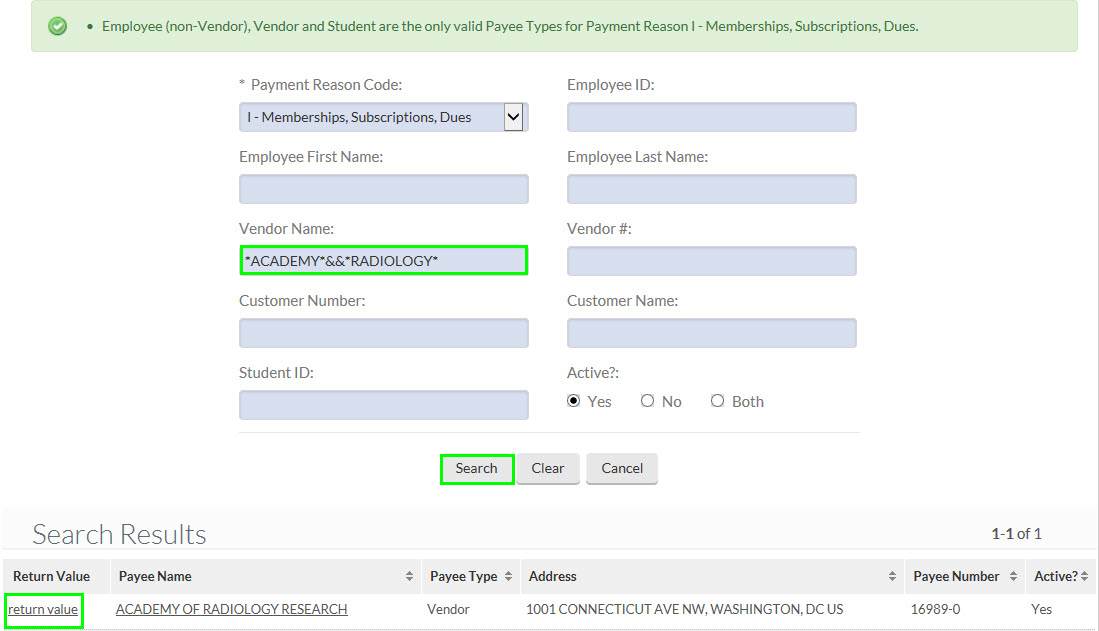
Some Payment Reason Codes are restricted to specific Payee Types. For example, Honoraria can only be paid to a Vendor. A message will appear at the top letting the user know which payee type(s) can be paid using the Payment Reason Code that was selected. If a payee type is selected that is restricted for the chosen Payment Reason Code, the Return Value link will not appear. For more information, please see Payment Reason Codes.
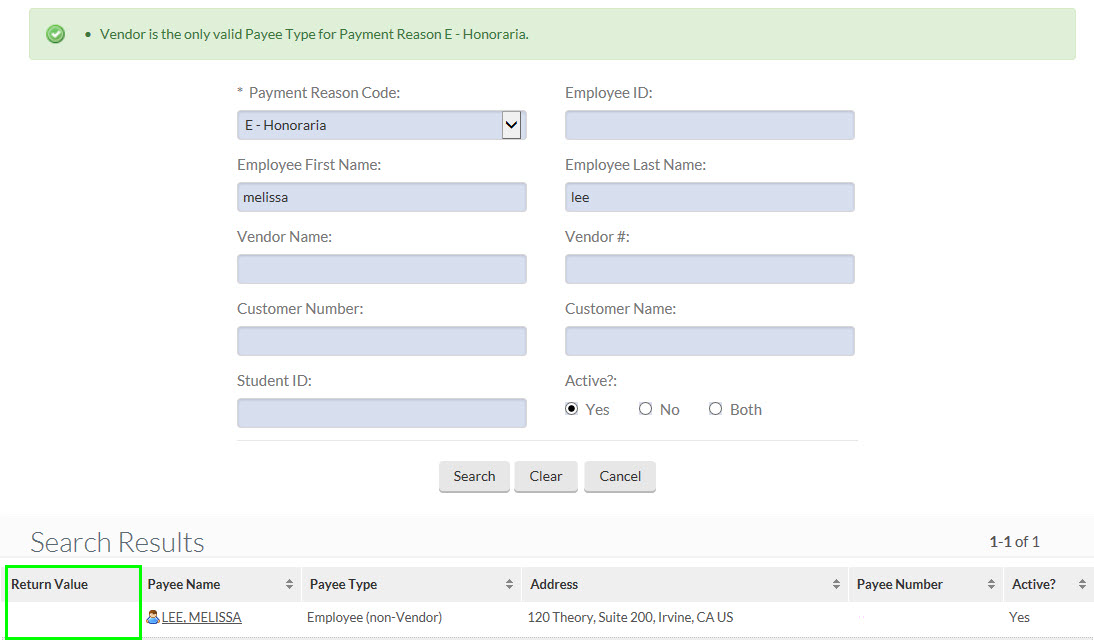
If a vendor is selected as the payee, a second screen will show the remit to address. Select the return value link.

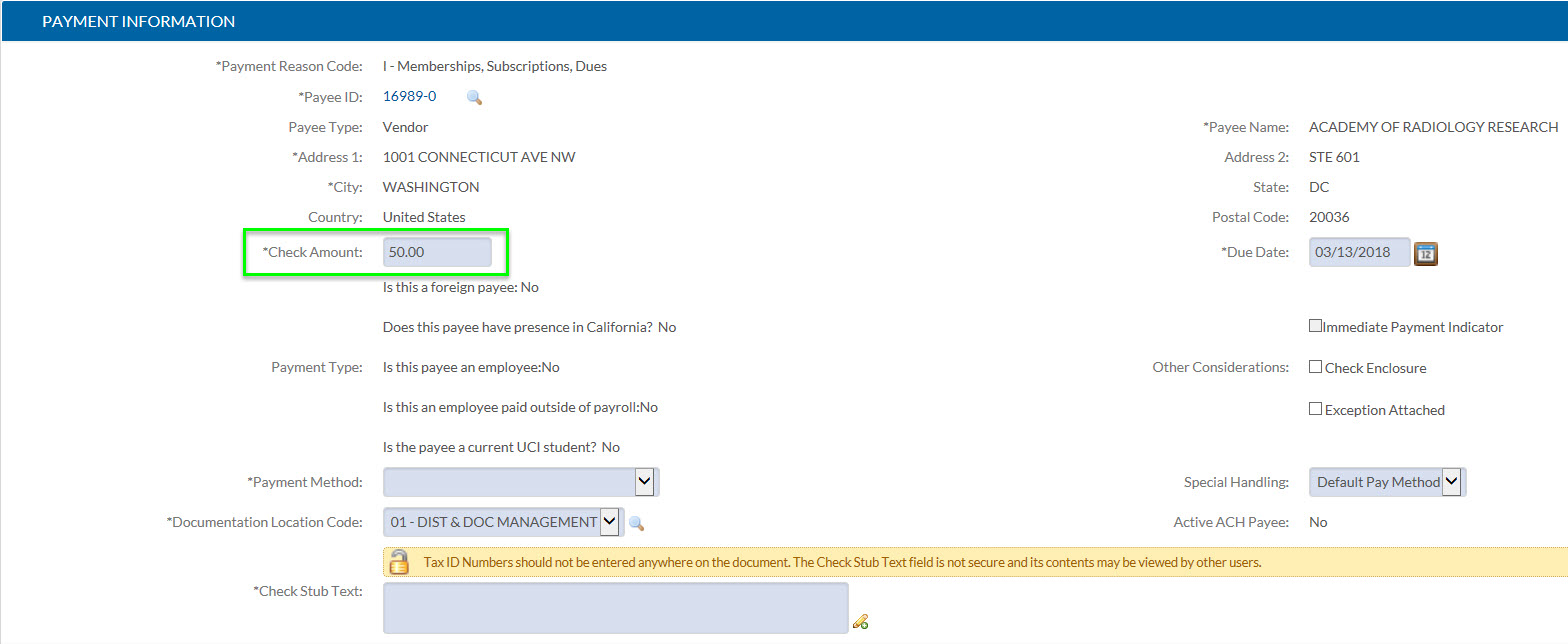
Check Amount
This is the total of the disbursement amount, which must match the account(s) being charged.
Payment Type
This information populates based on the payee’s information in the system and is not editable.
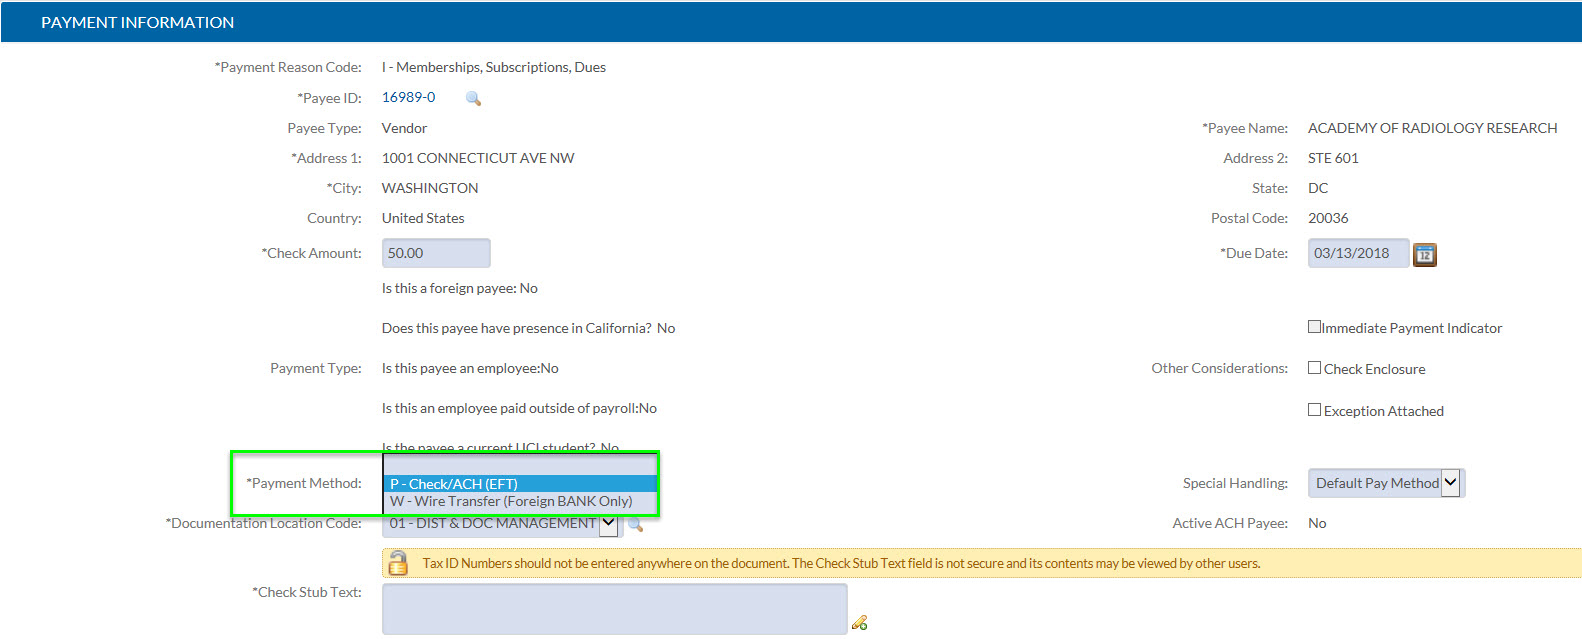
Payment Method
For most payees the drop down should be used to choose P-Check/ACH (EFT). Depending on how the payee chose to be paid in UCPath (employees only) or PaymentWorks (vendors only) a check or direct deposit (ACH/EFT) will be issued.
The W-Wire Transfer (Foreign BANK only) option should only be selected if the payment is to be sent to a foreign bank/foreign wire. This option is only for foreign payees who do not have a bank account in the United States.
Check Stub Text
Enter the text that should go on the disbursement, to the payee. This needs to be meaningful to the recipient of the check. For example: invoice number, reason for payment, dates, etc.
Due Date
Users should not edit this field unless trying to schedule a payment for a future pay date. Once the eDoc is Final, payment will go out the night of or the following business day after the "Due Date" or the finalization date, whichever is later. The only exception is eDocs that are finalized in the late evening after KFS has had batch jobs ran (usually after 8 p.m.). In this case the payment will go out two business days after the eDoc has been finalized.
Other Considerations
- Immediate Payment Indicator: Central Accounts Payable function only
- Check Enclosure: Select this box if something needs to be enclosed with the check. Check Enclosure documents are to be sent to the Accounting Office and must include the DV document number to match the appropriate check with enclosure. Best practice is for users to add enclosure after the check has been picked up as payments marked Check Enclosure may be delayed. For more information please see our Check Handling Guide.
- Exception Attached: Select this box if exceptional approval is provided for this document. Selecting this box indicates that you are uploading a justification statement to the image scanning tab.
Special Handling
Use this dropdown if a separate paper check should be cut (even if the payee has ACH information). Pick-up at Financial Services or Mail Check to the address in the Payment information tab are the only options possible for check processing. This dropdown should only be used if the check is to be picked up at Financial Services or sent to the payees department via campus mail. For more information please see our Check Handling Guide.
ACH Sign Up
ACH Sign Up Status indicates whether an employee or a vendor is signed up for ACH (direct deposit) of funds. This tab will only populate correctly once the Payee has been selected and the document saved.
Accounting Lines
“Chart”, “Account Number”, “Object” code, and “Amount” are all required fields, indicated by an asterisk (*).
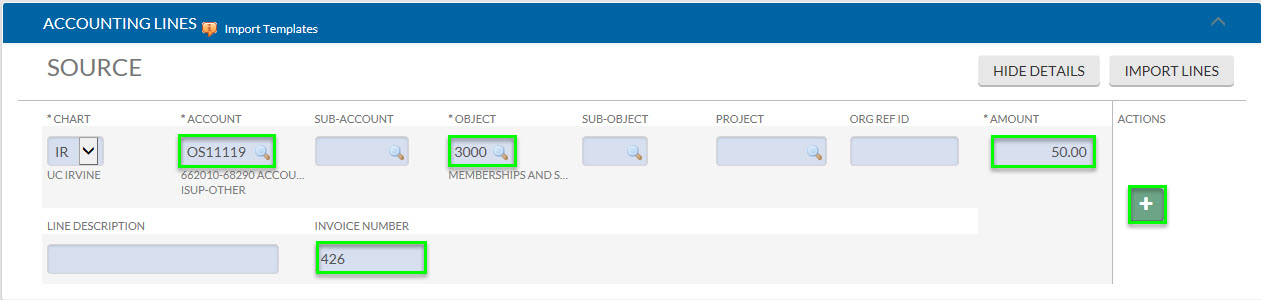
Line Description and Number: Line Description is optional and overrides the Description field input on a Document Overview tab, on the general ledger.
Invoice Number: If a vendor is being paid, please enter the Invoice number.
More Invoice Information: For invoice/reference/receipt numbers, the invoice number should also be put on the “Check Stub Text” (Payment Information tab), so the payee can identify the payment
Add Accounting Lines: Once all fields are completed for that line item, users must hit the “add” button to add the accounting line and indicate where the payment should be charged to. Users can add multiple accounts by selecting this button for each new account entered.
Accounting Lines Total: The total of all amounts added to the Accounting Lines is summarized on the bottom of the Accounting Lines tab. Once the accounts are populated and the totals of all accounts match the Check Amount (in the previous tab), users can move on to the next tab.
Object Codes
Object codes from certain object levels cannot be used with certain payment reason codes. If an object code is used that is not compatible with the selected the payment reason code an error message will appear. The error message will show object-level codes that can be used with the payment reason code that the user has selected.
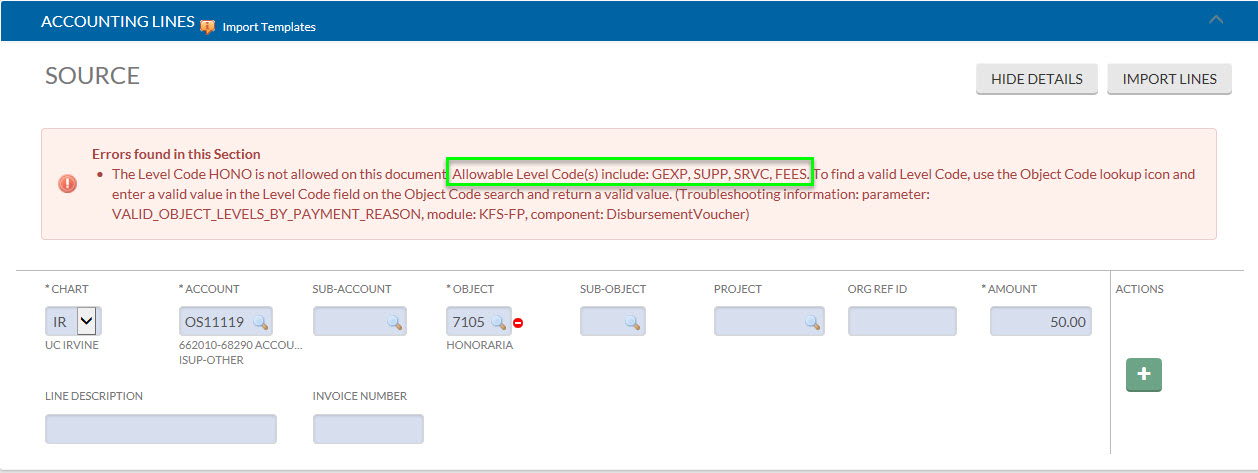
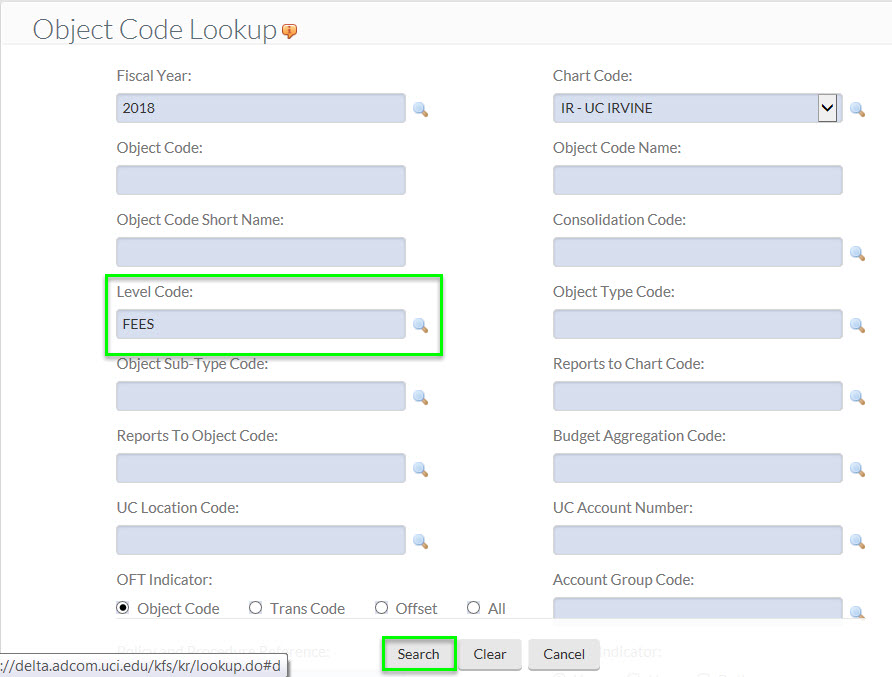
When this error message appears either the payment reason code or the object code must be changed. To select an object code from one of the object levels in the error message, go to the object code lookup in the accounting lines.
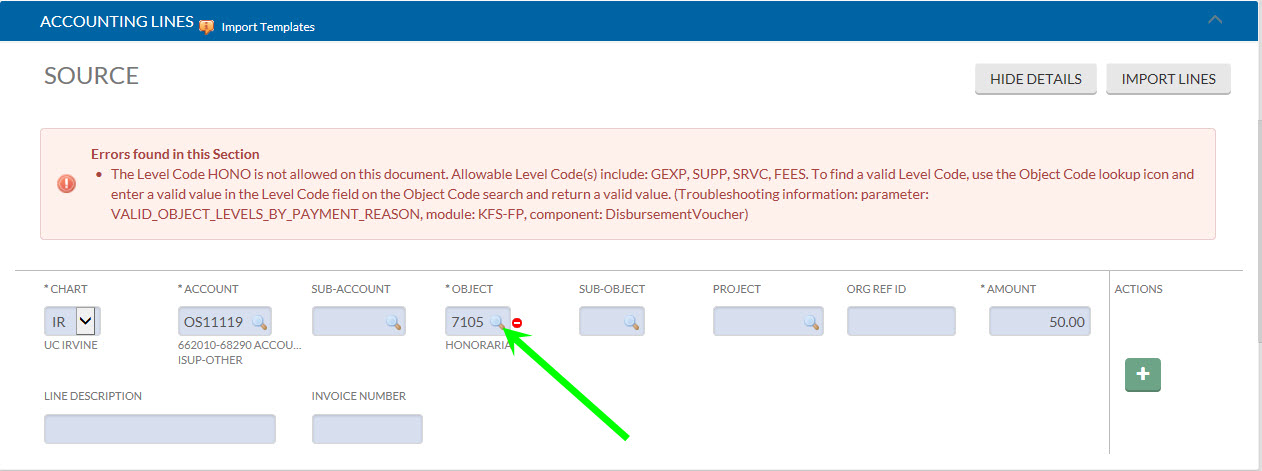
Enter a level code, then select the search button.
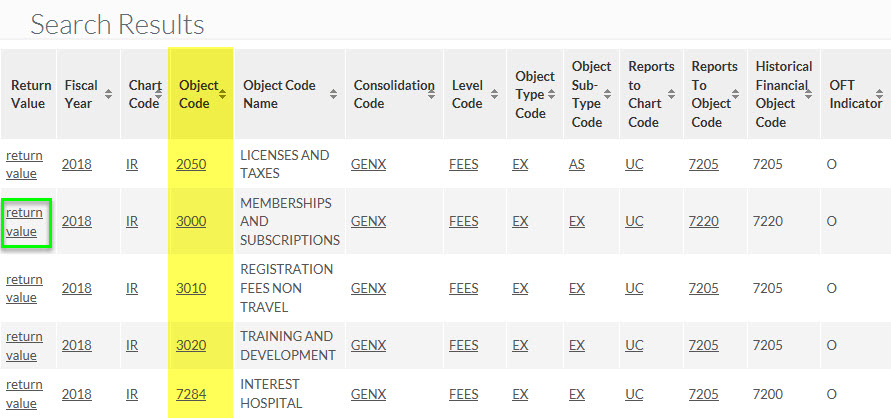
Select the return value link of the object code that is appropriate for the payment being processed.
Payee Certification
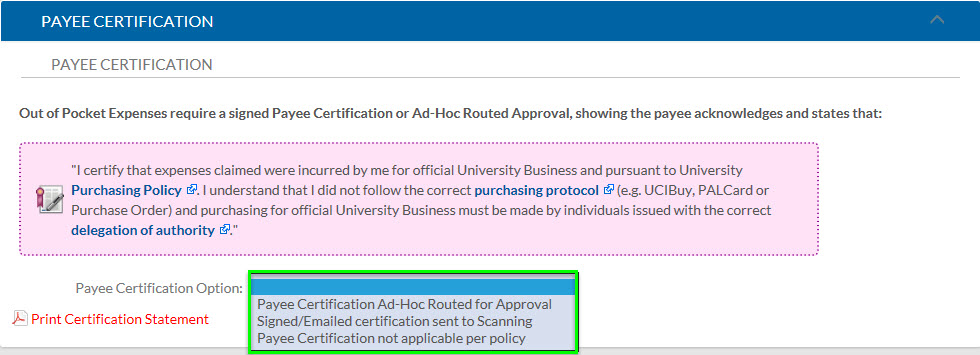
This new tab only appears when payment codes B or Z are selected and requires the Initiator to select a Payee Certification Option from a drop-down menu. The tab includes the text of UCI’s certification statement and offers three options for certification. Using the drop-down, you can choose to:
- Manually ad-hoc route the document to the employee payee for approval. When this option is selected the initiator must go into the ad-hoc tab and add the payee as an ad-hoc recipient. Ad-hoc requests are not sent automatically.
- Print a PDF certification statement for the payee to sign and then upload it to the scanned images tab.
- Indicate that payee certification isn’t applicable per policy.
If you plan to use the paper certification statement, be aware that the link to the PDF does not appear in the Payee Certification tab until after you’ve filled out the Payment Information tab and saved the DV. The Payee Certification Option can be changed later by the Fiscal Officer or Accounting Reviewer.
Contact Information
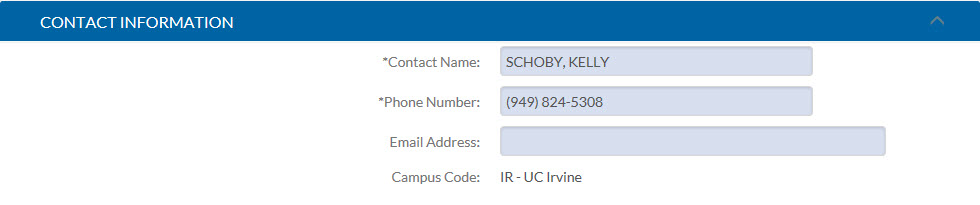
The Contact Information tab contains contact information for the reimbursement, which is why it is prefilled with the DV Initiator’s information. Users can also override data (ex: nickname, etc.). If a user has multiple phone extensions, or the Phone Number field does not transfer from a copied document, users need to manually input text.
AP Specific Tabs (should be left blank)
Special Handling Users should not enter data in this tab. Special handling options are chosen using the Special Handling dropdown in the Payment Information Tab.
Nonresident Alien Tax and Non-California Resident State Tax Tabs will be filled out by the campus Tax Manager or Accounts Payable, if the payee is foreign or qualifies for non-resident tax based on their vendor/employee file.
Wire Transfer Users should not enter data into this tab. Instead, the Wire Transfer Request Form should be completed and uploaded to the Image Scanning Tab.

Pre-Disbursement Processor Status Tab
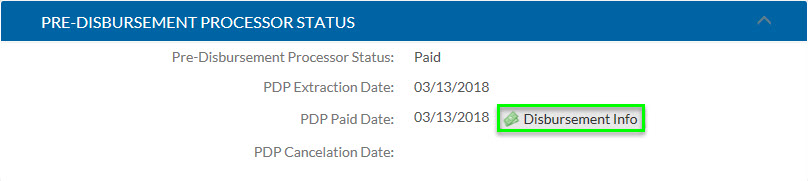
The Pre-Disbursement Processor (PDP) Status tab is system-filled with payment information. This tab should be referenced if users have questions about whether the payee has been ‘paid’.
| Status Information | Description |
|---|---|
| Pre-Disbursement Processor Status: Pre-extraction | The Pre-Disbursement Processor (PDP) Status field will say “pre-extraction” during routing approvals of the DV, and up until the DV has been processed during the nightly batch job schedule, once it hits final/processed status. |
| Pre-Disbursement Processor Status: Extracted | “Extracted” means a payment has been processed into PDP on a finalized document and is scheduled to go out (whether check or ACH). |
| PDP Extraction Date | The PDP Extraction Date is the Date when the document became final and was first eligible to be paid out via the batch job schedule. |
| PDP Cancellation Date | PDP Cancellation Date only populates if the payment was canceled at a later date, centrally, by Accounts Payable. |
| Disbursement Number | The Disbursement Number is the check/ACH number. |
| PDP Paid Date | PDP Paid Date is the date that the eDoc is final or the due date chosen in the eDoc, whichever is later. |
| PDP Disbursement Date | The Disbursement Date is the date that Check or ACH or Foreign Wire is issued. |

Ad Hoc Recipients Tab
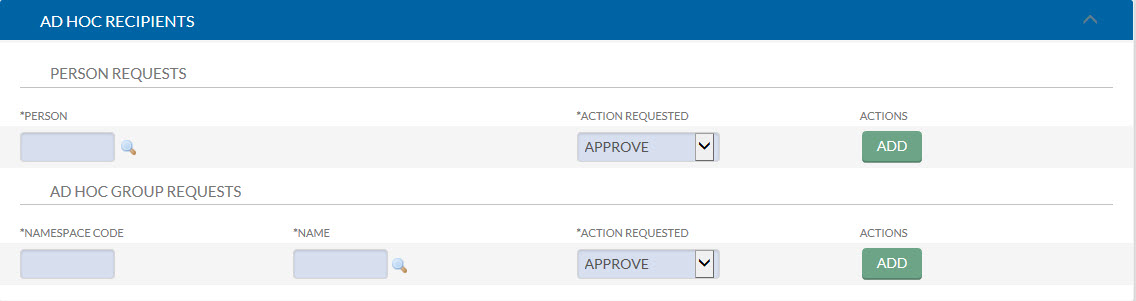
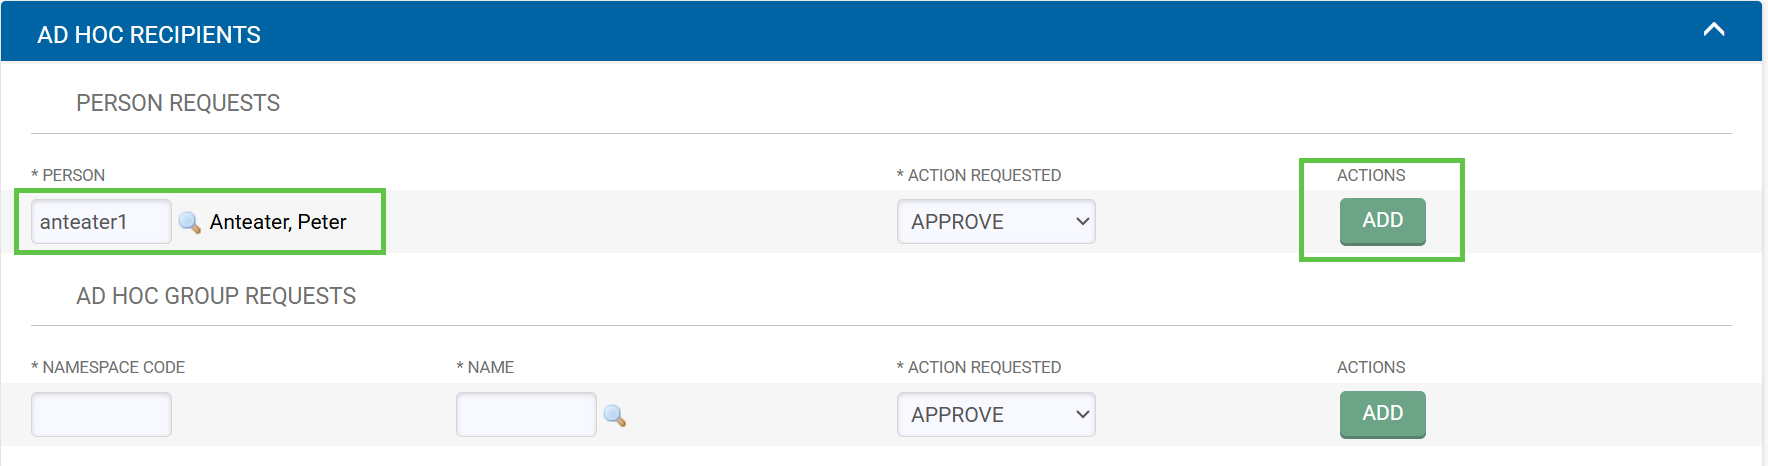
The Ad Hoc Recipients tab allows users to add a person or group to the normal workflow of a KFS document. Users can select whether they want a Person or Group to ad-hoc a request by looking up the Person or Group Name and then clicking the ‘add’ button when done.
Person Requests
Users can add individual employees to the routing of the DV document for exceptional approval. Only employees who have Role 54 in KSAMS can receive an approval request via Ad Hoc routing.
Select the magnifying glass next to the *Person field
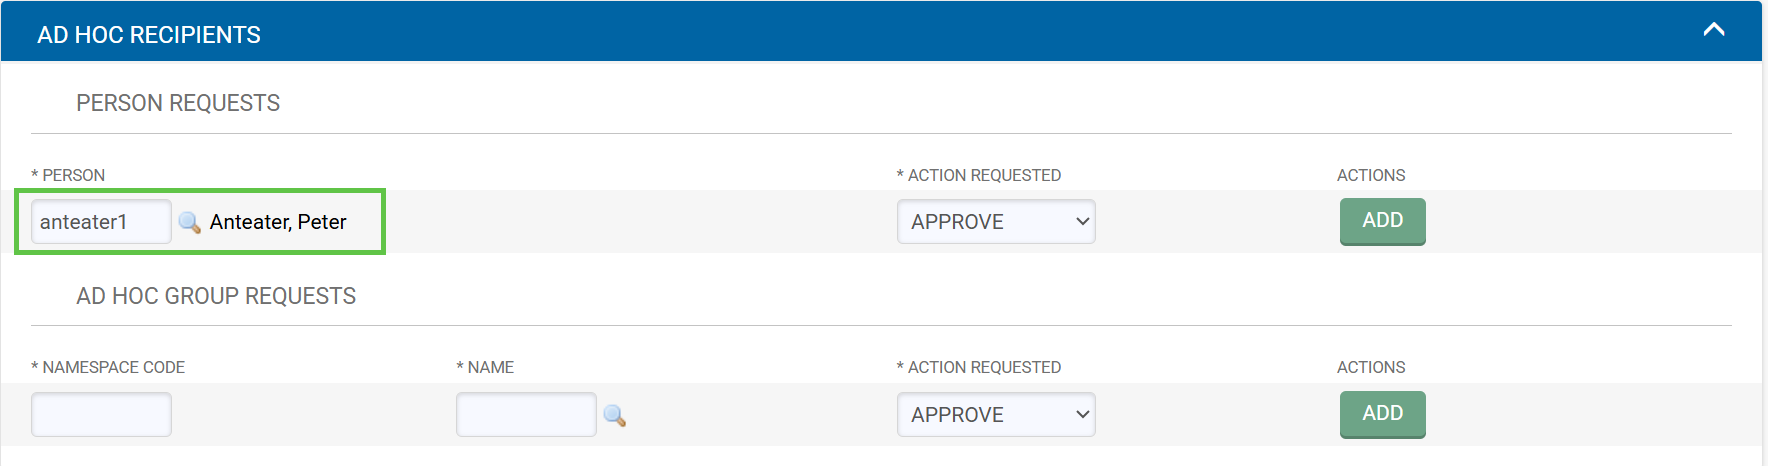
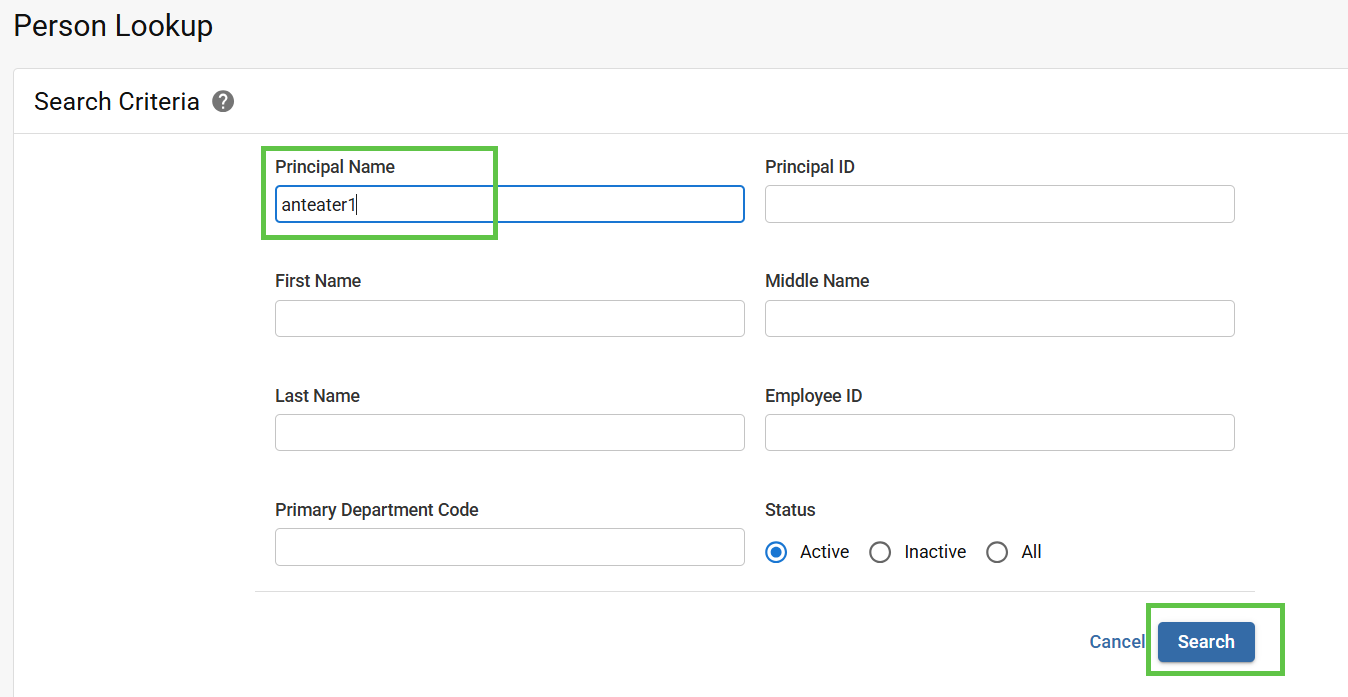
Enter the Last Name of the person you want to send an Ad Hoc request to, then select the Search button. Once you find the correct person, select the Return Value link.

Select the Add button
Ad Hoc Group Requests
Users can add a group to the routing of the document by entering the group name and selecting the add button.
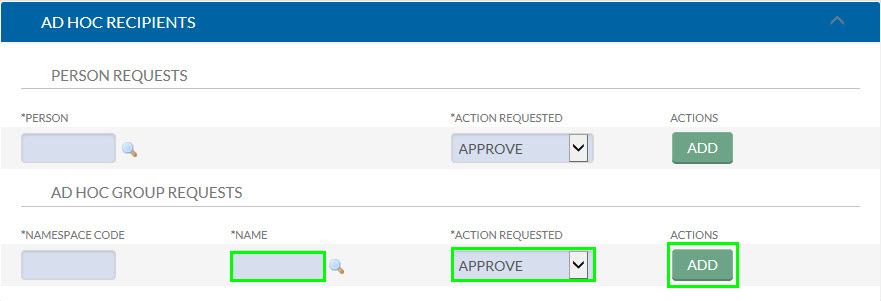
Adding someone who was not originally on the electronic workflow could potentially hold up a DV eDoc. However, this additional approval step can be used for DVs that require Exceptional Approval authority. Department/unit users should check with their unit managers/directors to see if their "exceptional approver" is using KFS. Users can include a signed/certified exceptional approval with their original supporting documents in the Image Scanning Tab.
Notes and Attachments
The Notes and Attachments tab displays user notes, attachments, or system-generated information about the document. This tab is optional.
The maximum allowable attachment size is 5MB. PDFs or simple Excel document types (.csv, .xls, .xlsx) are allowed.
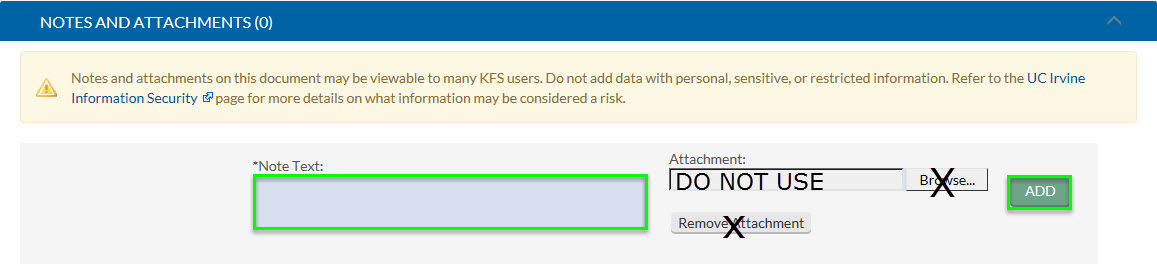
Notes and Attachments CANNOT be deleted by the user. DO NOT upload supporting documentation into the Notes and Attachments tab. All supporting documentation should be uploaded to the Image Scanning Tab.