Navigating KFS and KFS Buttons
Contents
KFS Home Page Navigation
The Side Menu can be used to navigate to eDocs and lookup pages. To open the Side Menu, select the white arrow located on the left side of the screen.
My Favorites
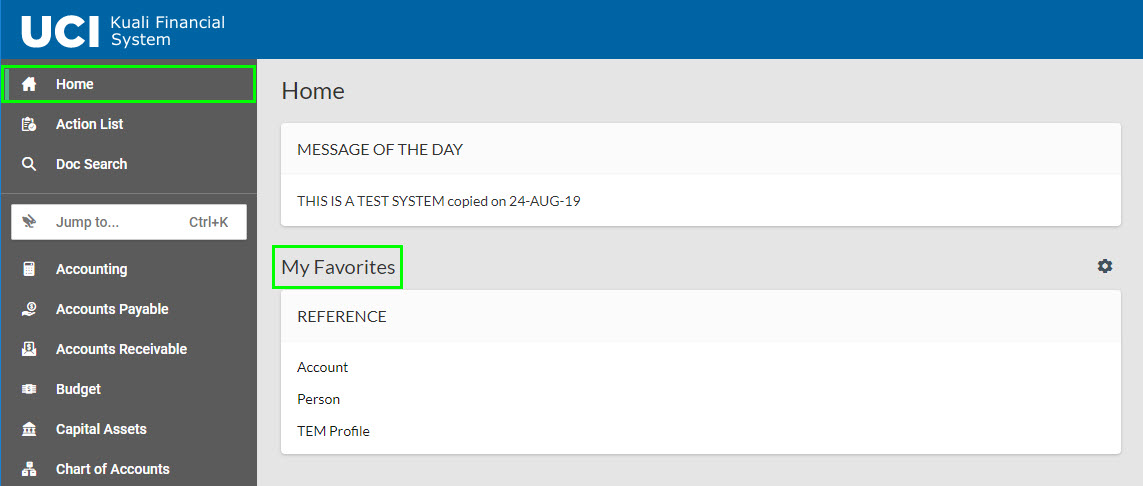
KFS users can create a custom portlet with the eDocs and Lookups that they use most using the My Favorites feature. The My Favorites feature can be found by clicking on the Home portlet.
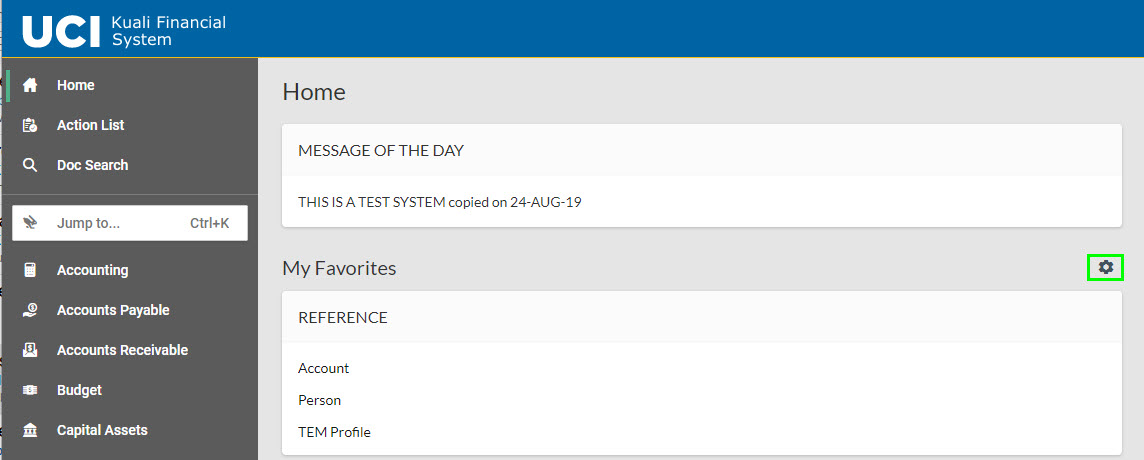
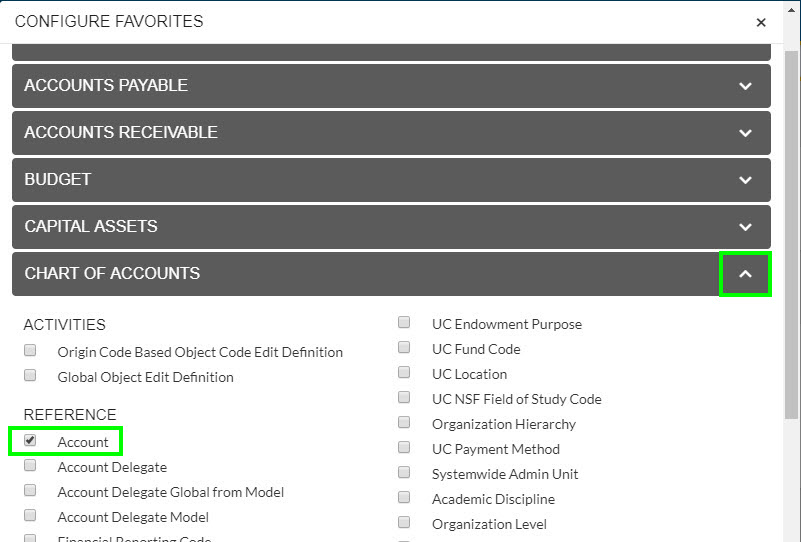
Selecting the Configuration icon will open the Configure Favorites menu which contains a tab for each portlet found in the side menu. Users can open these tabs by clicking on the down arrow located on the right side of the tab. Once the tab is open users can check the box next to the document or lookup that they want to have in their My Favorites portlet.
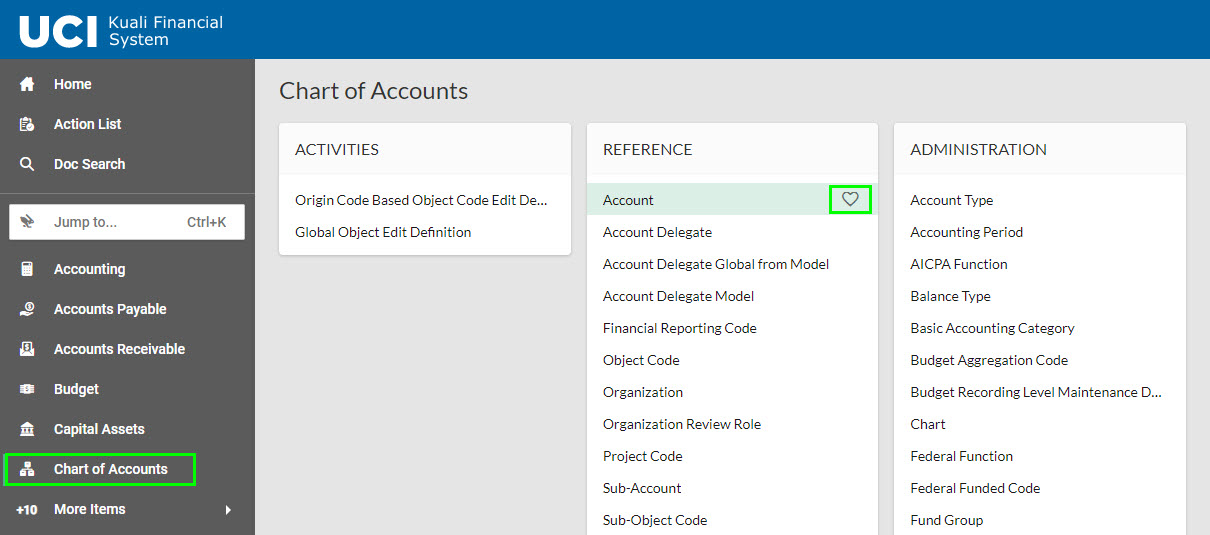
Another way to select favorite documents and lookups is to open a portlet and click the heart that appears when the user’s mouse hovers over the item.
Users can remove items from their My Favorites portlet by selecting the delete icon next to the item they want to remove.
Collapse Navigation
The Collapse Navigation button will collapse the side menu to give users a wider workspace.
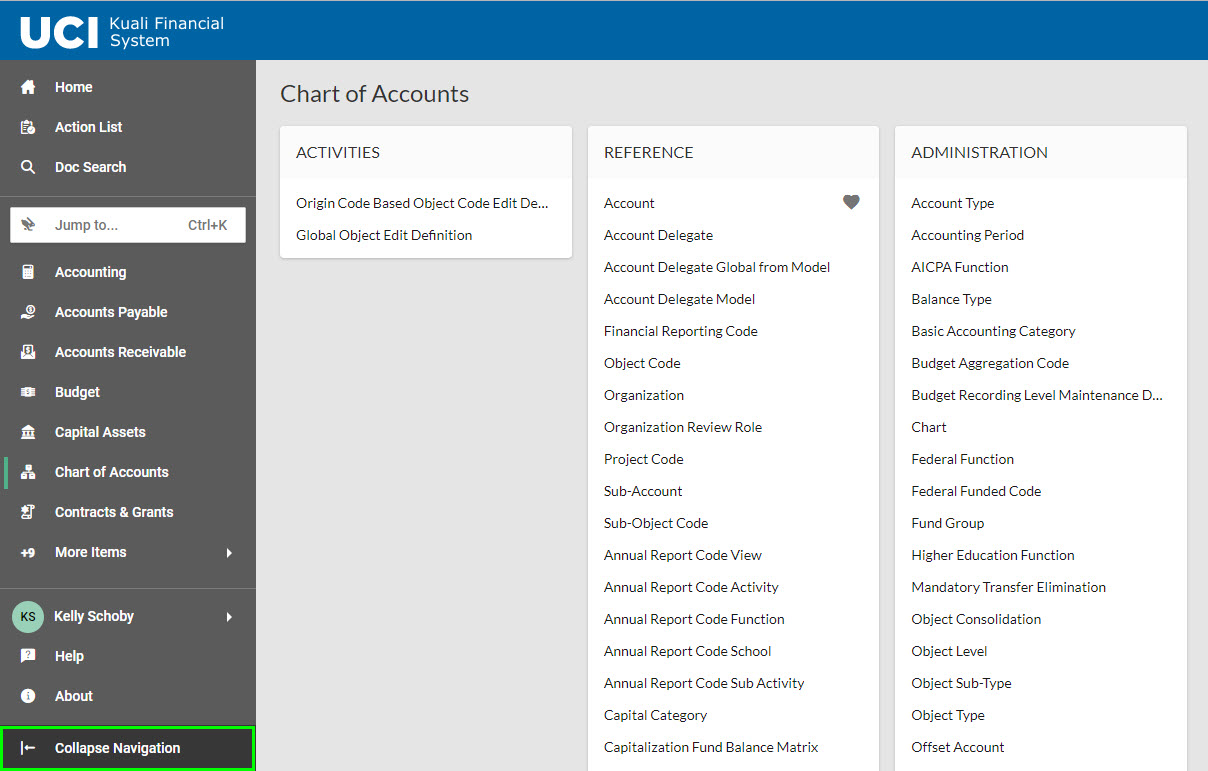
Once the side menu is collapsed the white arrow can be clicked to show portlets.
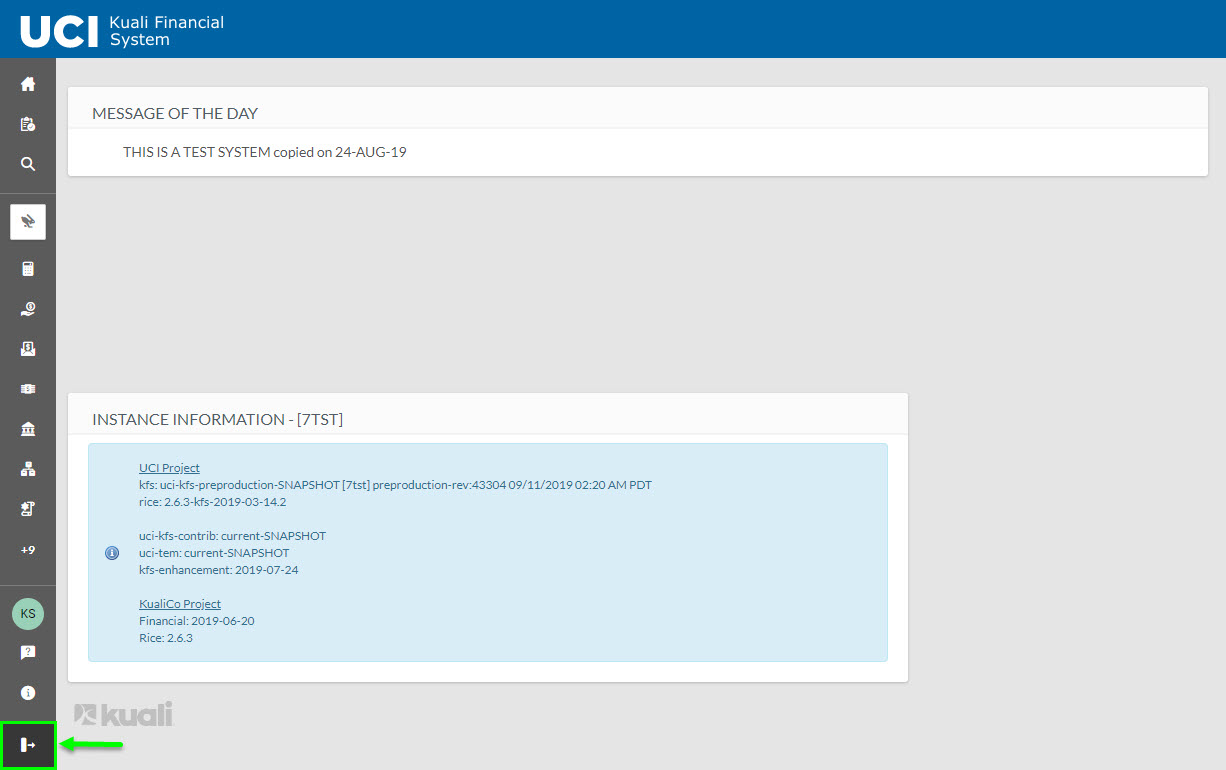
Refresh Menu
If a portlet is missing from the Side Menu users can select the Refresh Menu link to restore any missing portlets.
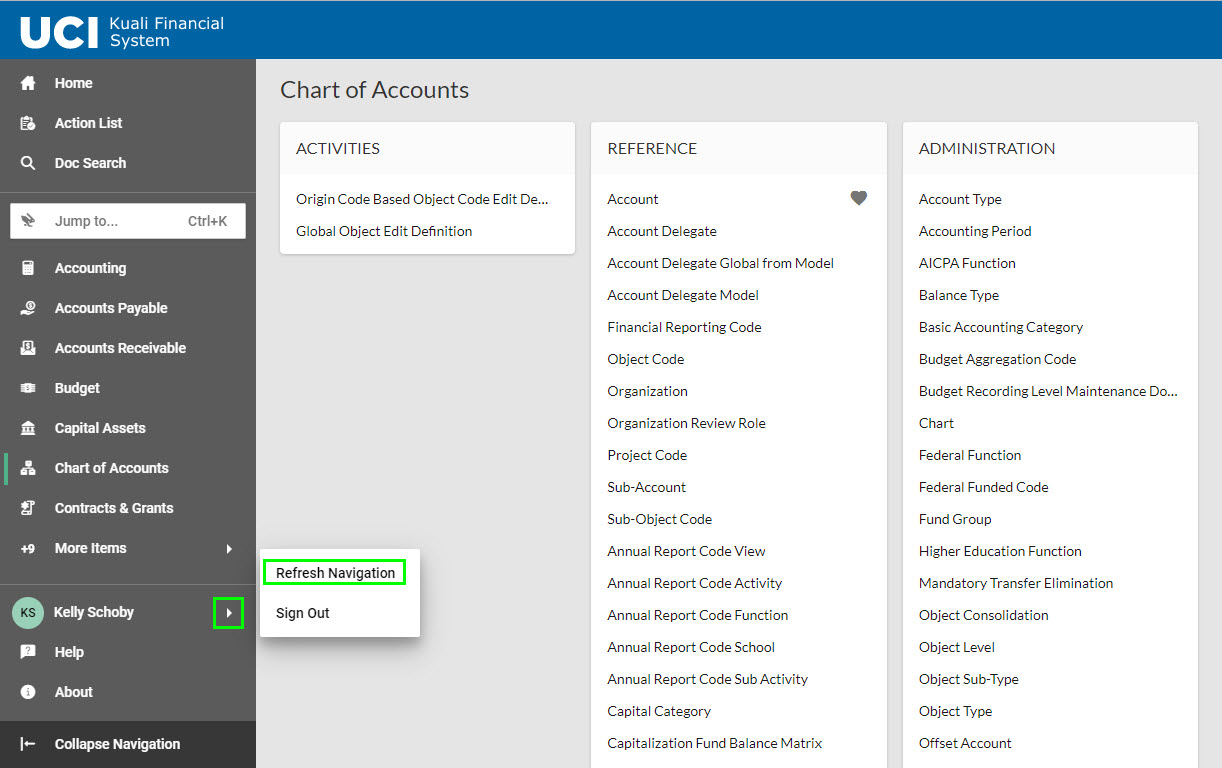
Message of the Day and Helpful Tools
The middle of the screen will display a Message of the Day. Action List and Document Search links can be found at the top of the side menu.
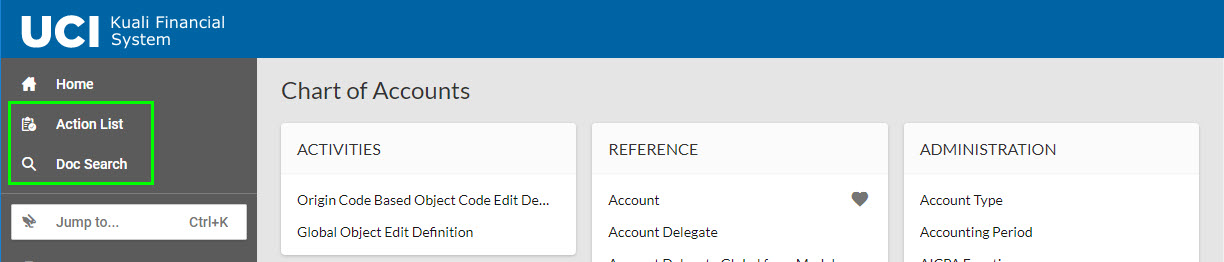
Action List
The Action List enables users to view and act on eDocs that require completion by way of Acknowledge, Approve, and FYI action requests.
Document Search
The Document Search allows users to search for KFS eDocs.
Sign Out Button
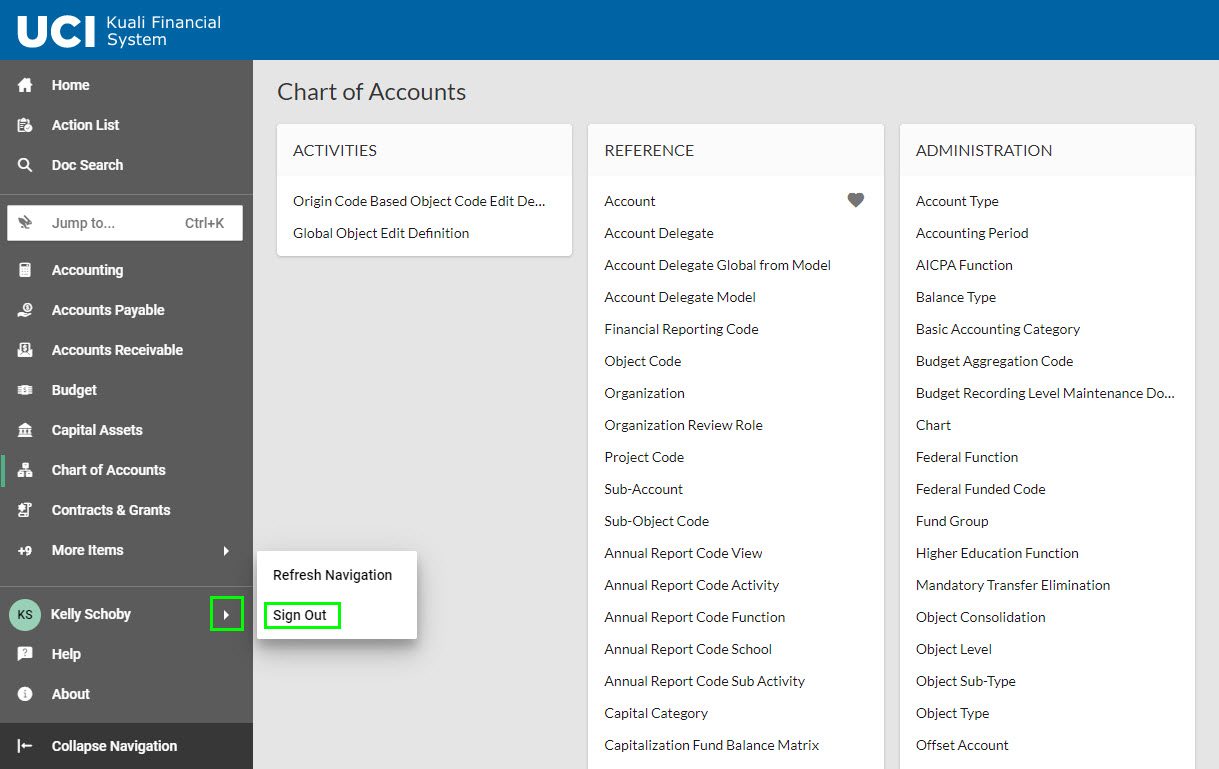
KFS Buttons and Lookups
Action Buttons

Most KFS documents have the following action buttons:
| Button Name | Button Function |
|---|---|
| Submit | The Submit button will send the document to the first approver in the route log. The Submit button should only be selected once all required information has been entered into the eDoc. |
| Save | The Save button will save any work that has been done in an eDoc. It is advised that users select the Save button after completing each tab of an eDoc. |
| Reload | After an eDoc has been saved the Reload button will appear. The Reload button will refresh the document. In the event that the user receives a message stating that “Another user is taking action on this document” or “Page is already being processed by the server” the Reload button can be selected to remove those messages. Please note that the Reload button will restore the eDoc to the last saved status. Any data that has not been saved will be lost. |
| Close | The Close button will close the eDoc. Any work that has been saved will remain in the eDoc. |
| Cancel | The Cancel button will close and void the eDoc. Documents that have been canceled cannot be edited. |
| Copy | The copy button should only be used if the original eDoc has been disapproved. Once the disapproved document has been copied, a new document will be created with the same information and expenses as the disapproved document. The initiator can then make changes to the eDoc and resubmit it. Some eDocs such as the General Error Correction do not have a Copy button. |
Picking Dates with the Calendar Icon
The calendar icon will pop up a small calendar to help you pick a date. If you’ve ever booked a flight online, it works much like that. When you pick a date, it will be populated into the field with the correct format.
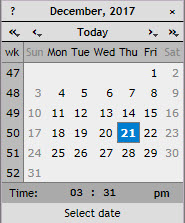
| Button | Function |
|---|---|
| < | Will move the calendar back one month. |
| > | Will move the calendar forward one month. |
| << | Will move the calendar back one year. |
| >> | Will move the calendar forward one year. |
The time at the bottom of the date selector can be changed by clicking on the hour and minute.
Using the Magnifying Glass Icon
The magnifying glass icon is there to help you look up a valid attribute – like an account number, organization code or UCINetID – and return that value back to a document or search. For example, if you don't know someone's Principal Name, you can select the magnifying glass to search for a valid Principal Name. Selecting the icon will open a new lookup screen. If you were already in a lookup screen, you will be taken to a new lookup screen within your current lookup. This can be confusing because it will look a lot like the last one but with different fields. From the new lookup screen, you can find the appropriate search term and return the value back to the original document or lookup.
In this example, the user is in the TEM Profile Lookup but does not know the Principal Name (UCInetID) of the person who’s TEM profile they’re looking for. Selecting the Magnifying Glass next to the Principal Name field will take the user to a Person Lookup.
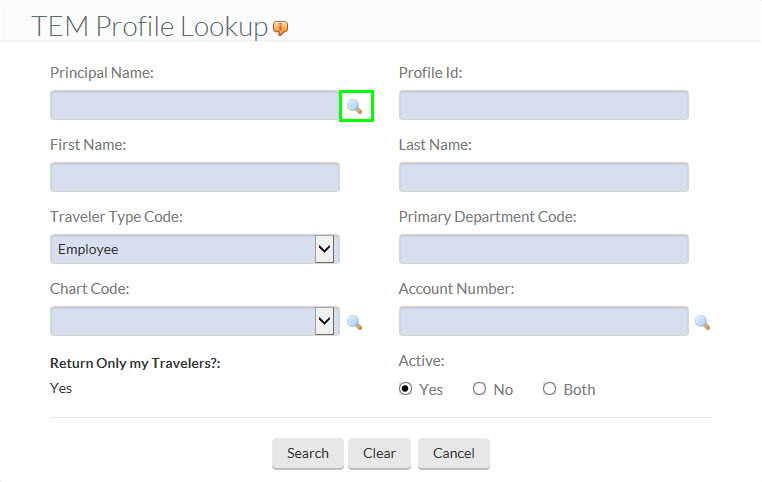
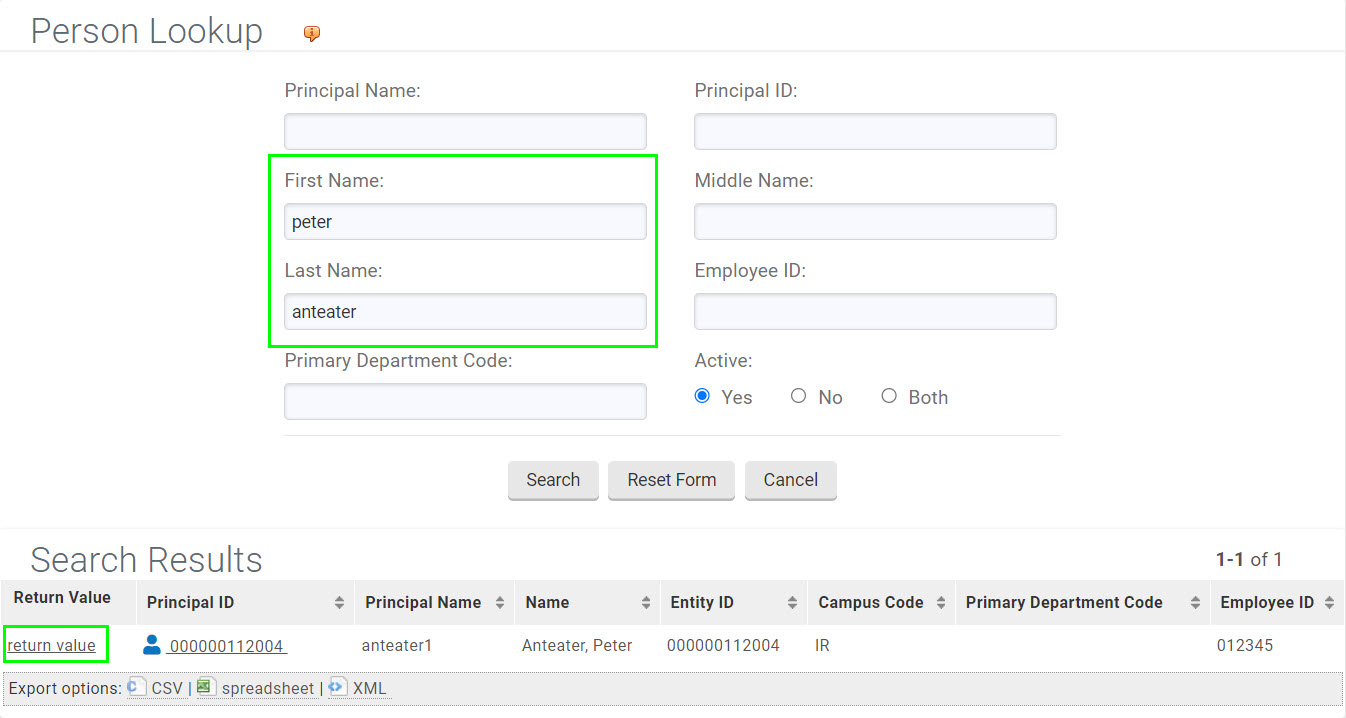
In the Person Lookup, the user can enter a first and last name and select the search button to find the Principal Name (UCInetID) of the person they’re looking for. Clicking the UCInetID here would take the user to the KFS record for that person - not to their TEM Profile. Instead, the user must select the return value link, which will send them back to the TEM Profile Lookup with the Principal Name field now populated.
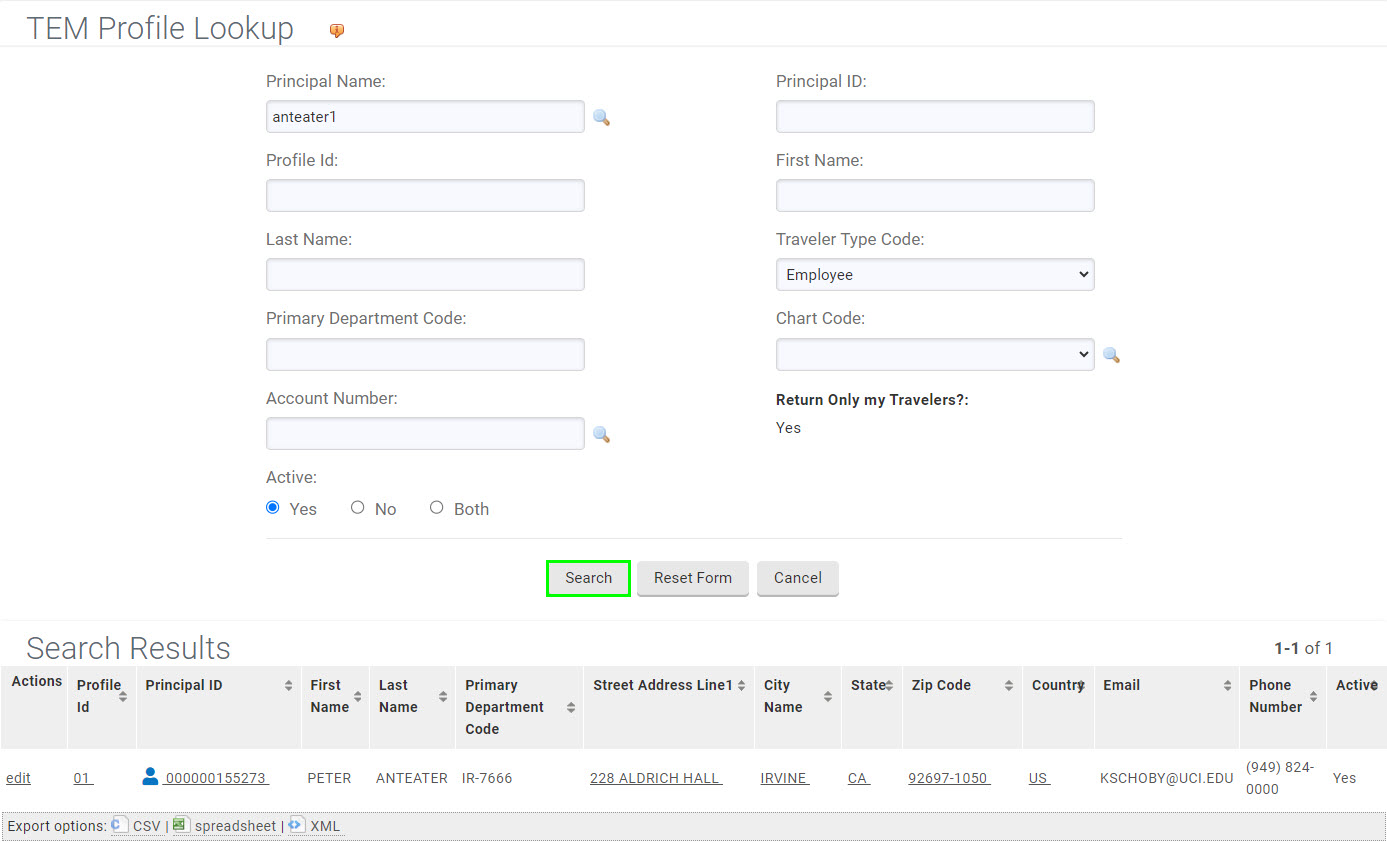
Once the desired search criteria has been populated into the TEM profile lookup, the search button can be selected to find the TEM profile.
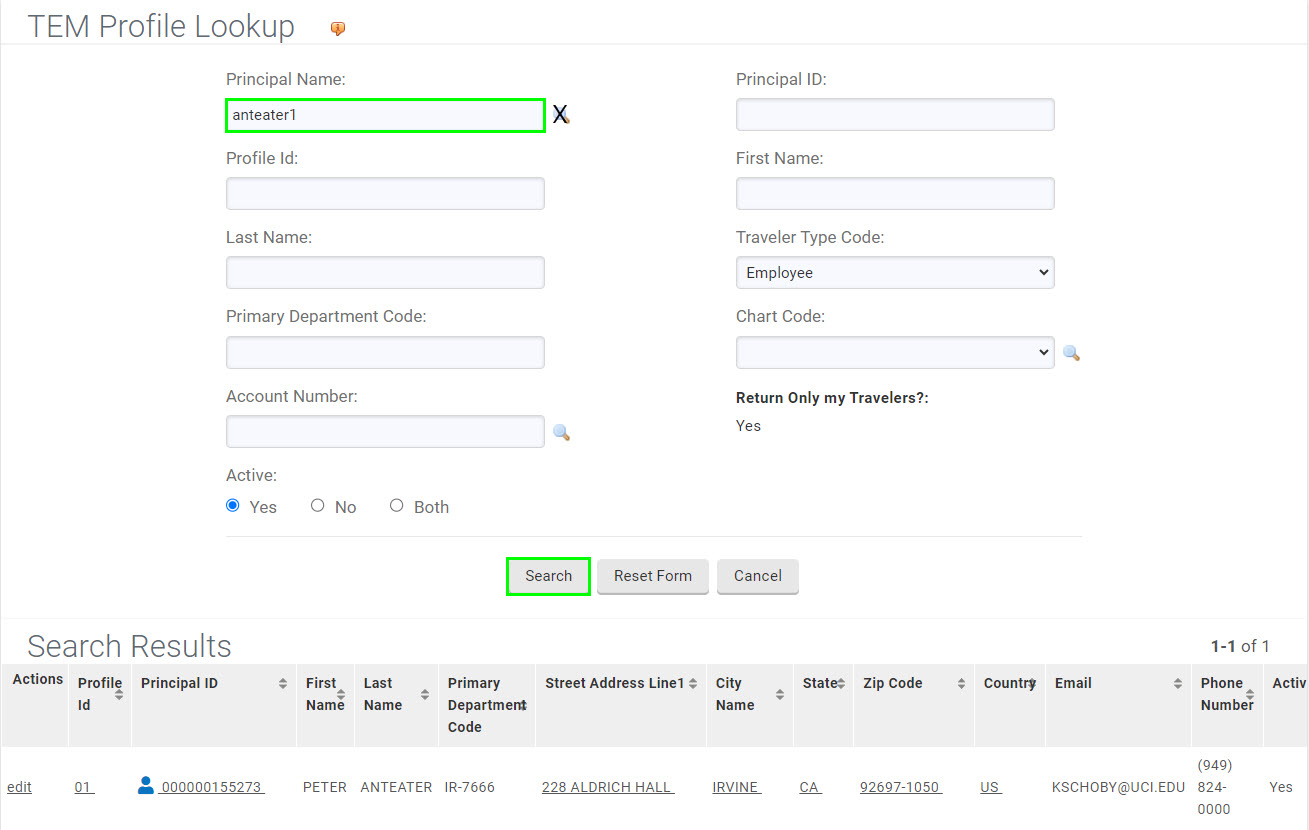
Alternative Method: If you already know the UCInetID of the person who’s TEM profile you are looking for, you can simply type it into the field and skip the magnifying glass altogether. Just enter the UCInetID into the Principal Name field and select the Search button at the bottom of the window. You don't need to use the Magnifying Glass if you already know a valid attribute for the field.
Special Characters
The wildcard character (% or *) can be used when just a portion of your search criteria is known, such as the beginning letters of a name or the ending digits of an account number. For a full list of special characters, visit Searching in KFS.