Using the GEC
This page explains how to complete a basic General Error Correction in KFS. Your department or school may have policies or procedures that pertain to processing the GEC and should be followed if applicable.
Contents
Document Overview

| Field | Description |
|---|---|
| Description | Enter a description of the correction being made (appears in the action list). |
| Explanation |
An explanation of why the correction is needed, how the error occurred, and why the transaction belongs on the newly identified account should be entered. C&G Account note: Leave this field blank if any accounts used in the GEC involve a C&G Account. For C&G Accounts, a more detailed explanation will be required in the Error Certification tab on this eDoc (later tab). |
| Organization Document Number | This is an optional field and will show up in its own column on General Ledger. |
| Accounting Period | The Accounting Period drop-down will appear during the five business days of a new calendar month but before the prior period closes. During this time, either period can be chosen. If the prior period is selected, the transaction must go through final approval before the close date to post to the prior period. |
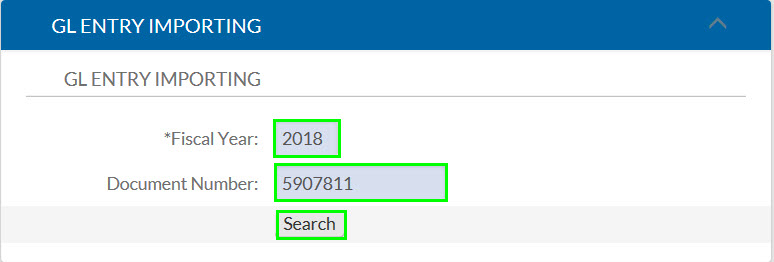
GL Entry Importing
The GL Entry Importing Tab allows users to import and search for transactions that need to be corrected.
If the Fiscal Year and Document Number are known, users can enter them, then select the search button.
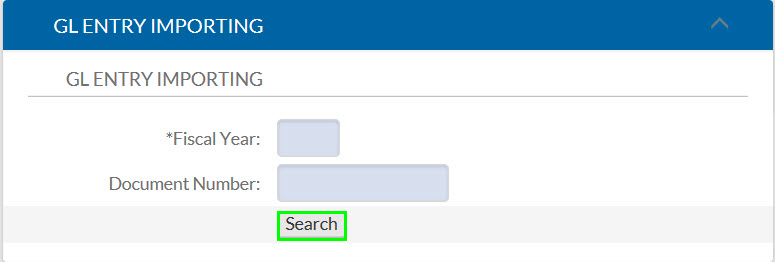
Users can select the search button to open the General Ledger Entry Lookup if the Document Number is unknown.
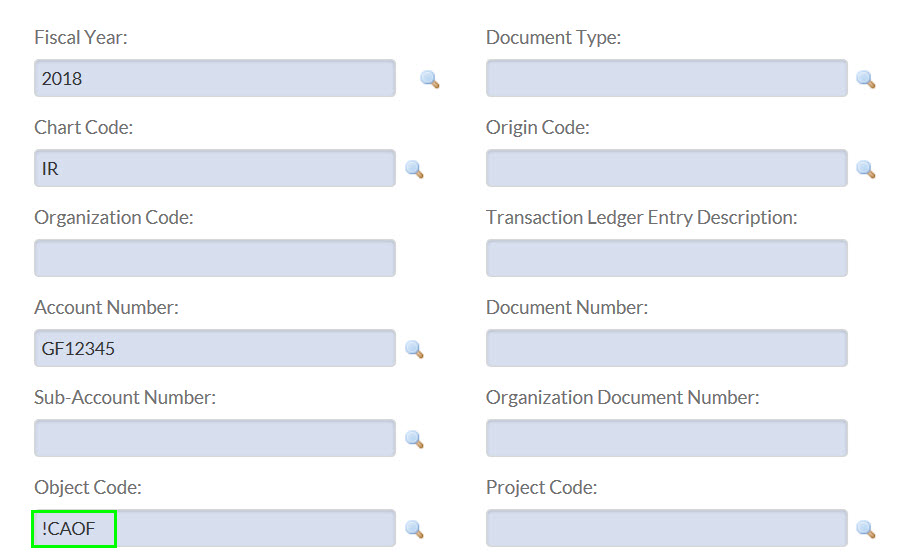
How to Search With Wildcards
KFS special characters or “wildcards” can help narrow down a search. For example, using an exclamation point will exclude data that follows it. If a user doesn’t want to see lines with the CAOF object code, they can enter “!CAOF” in the object code field.
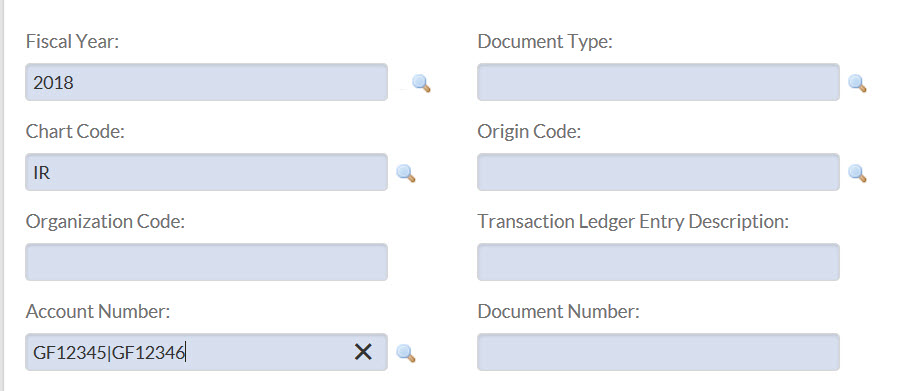
If a user knows that a transaction was processed using either account number GF12345 or GF12346, the user can enter GF12345|GF12346 into the account number field.
Please see our wildcard web page to see more wildcards and how they can be used.
Best Practices
Here are some helpful tips to keep in mind when searching for entries to import.
When searching for a payment made on a PO, it’s important to remember the PO is a contract, not the payment. When an invoice is processed for a PO, a PREQ pays the invoice. In the General Ledger Entry Lookup, the PO number can be entered into the Reference Document Number field to find the PREQ.

Entries that are processed using a feeder system do not have KFS Document numbers. Using the Origin Code can help users find entries that are fed to KFS. Users can also click on the Origin Code to view contact information and request supporting documentation for the entries.

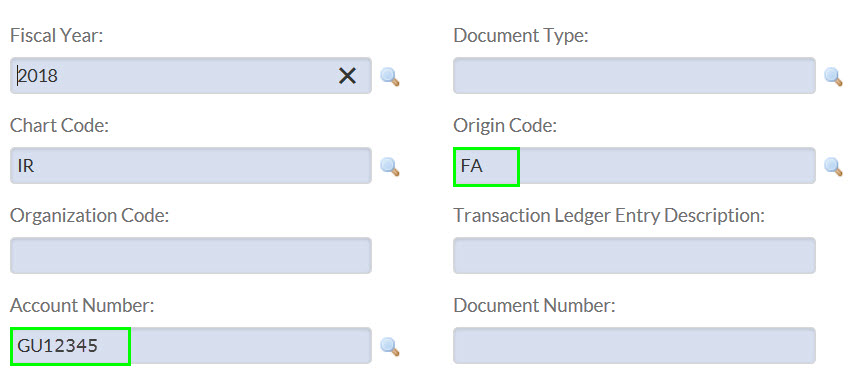
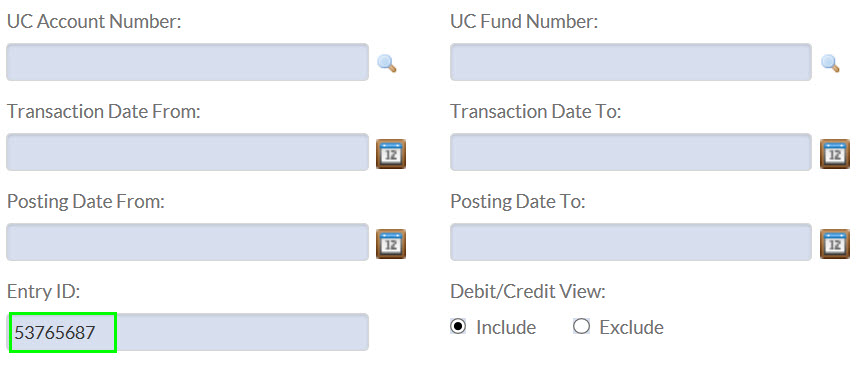
Another way to find entries without a KFS Document Number is to use the Ledger Entry ID. Using the Ledger Entry ID will allow users to find the exact entry they are looking for.

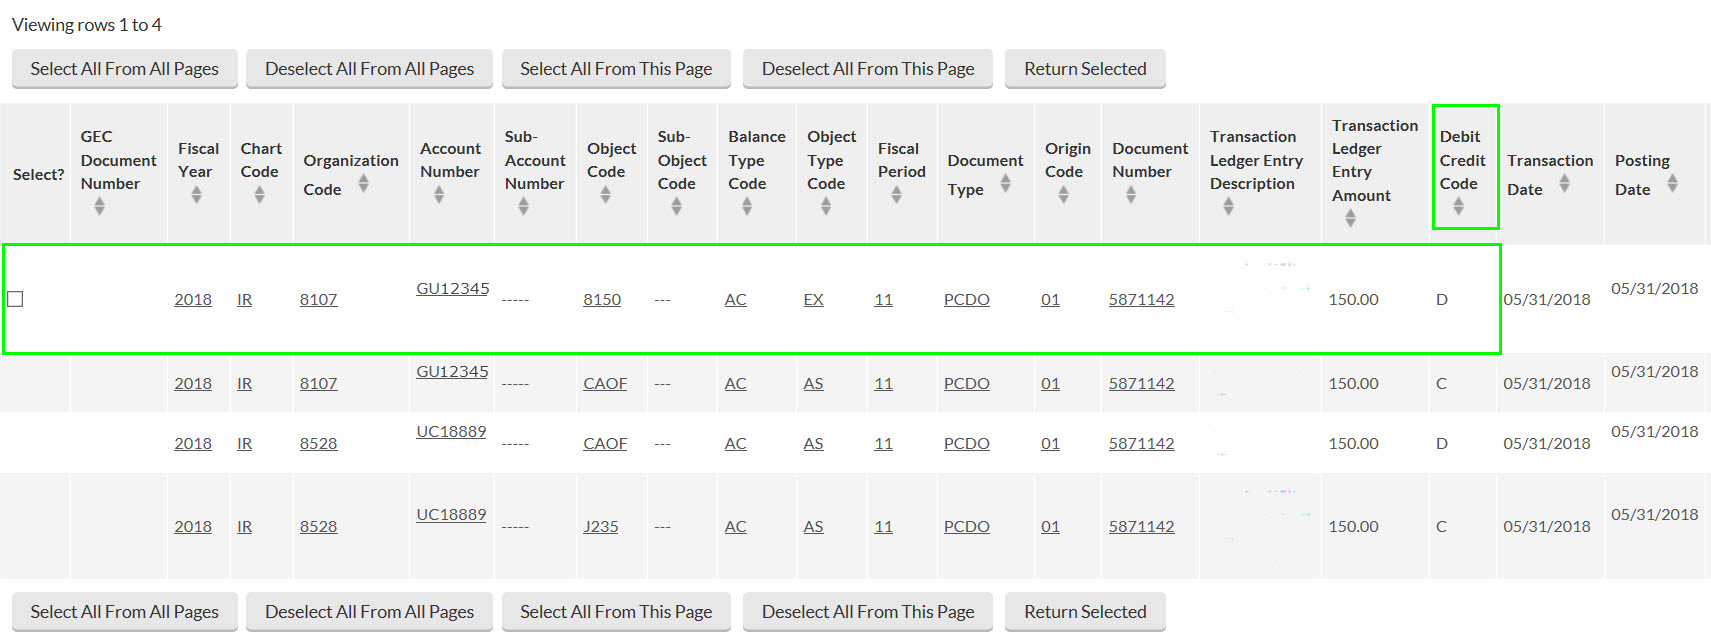
When searching by document number, it’s important to know that there may be debits and credits that appear in the General Ledger Entry Lookup for the same document number. Not all entries that appear should be imported into the Accounting Lines of a GEC. In most cases, only the entry that shows a debit in the Debit Credit Code column should be selected. The other lines are for Central Accounting use only.
Selection Buttons
Once one or more entries that need to be corrected are found, users can use the selection boxes and checkboxes to select entries to import into the From section of the GEC.
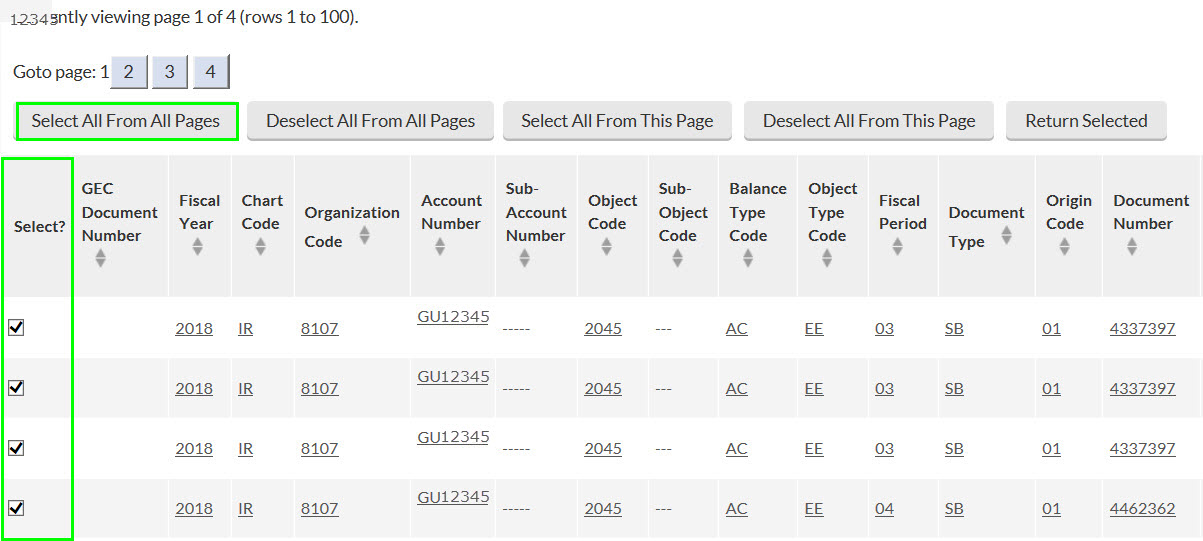
Some searches may produce multiple pages of entries. The Select All From All Pages will select all of the entries from every page of the search results.
The Deselect All From All Pages button will deselect all of the entries from every page of the search results.
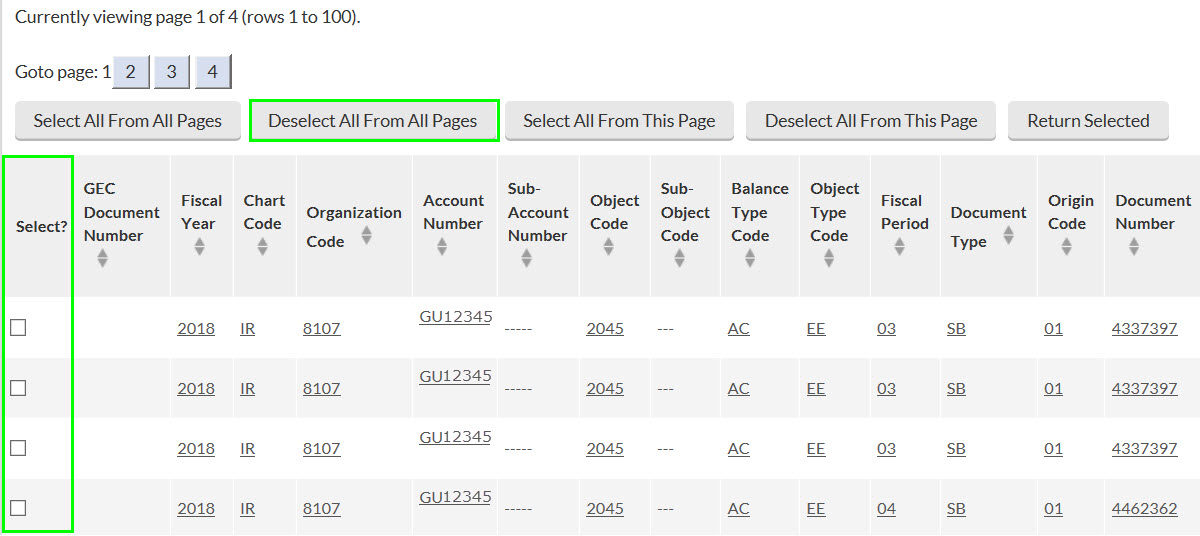
The Select All from This Page button will select all of the entries from the current page of the search results.
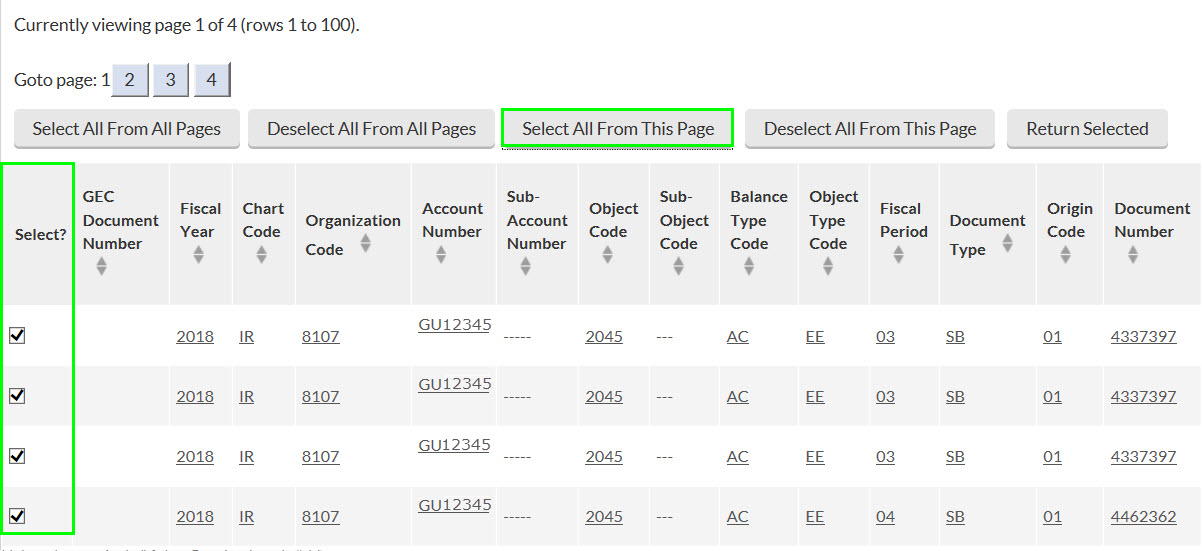
The Deselect All From This Page button will deselect all entries from the current page of the search results.
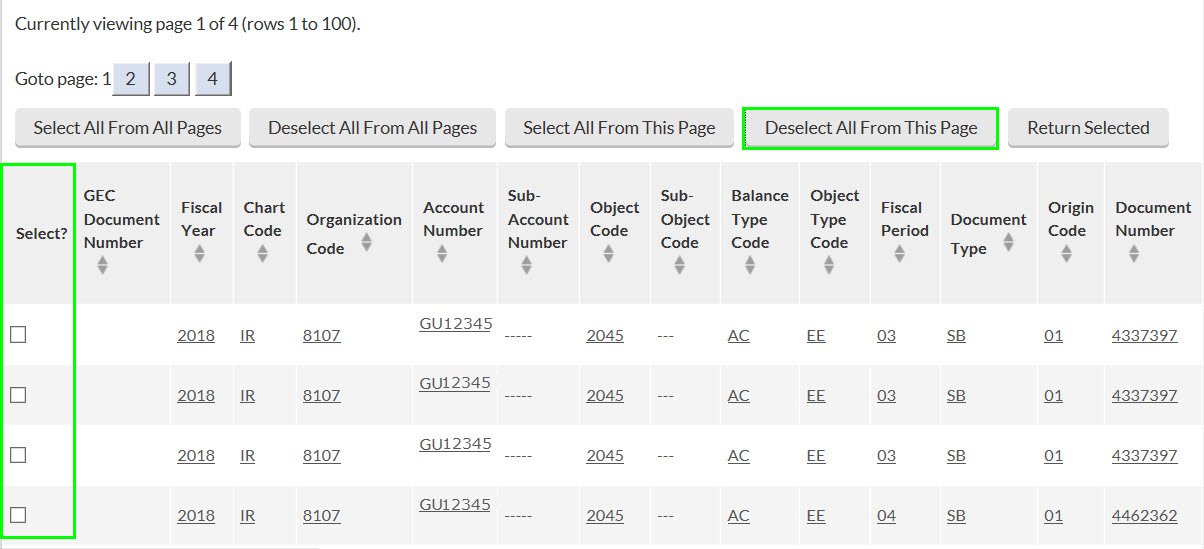
Users can select entries one at a time by checking one or more “Select?” checkboxes and then selecting the Return Selected button.
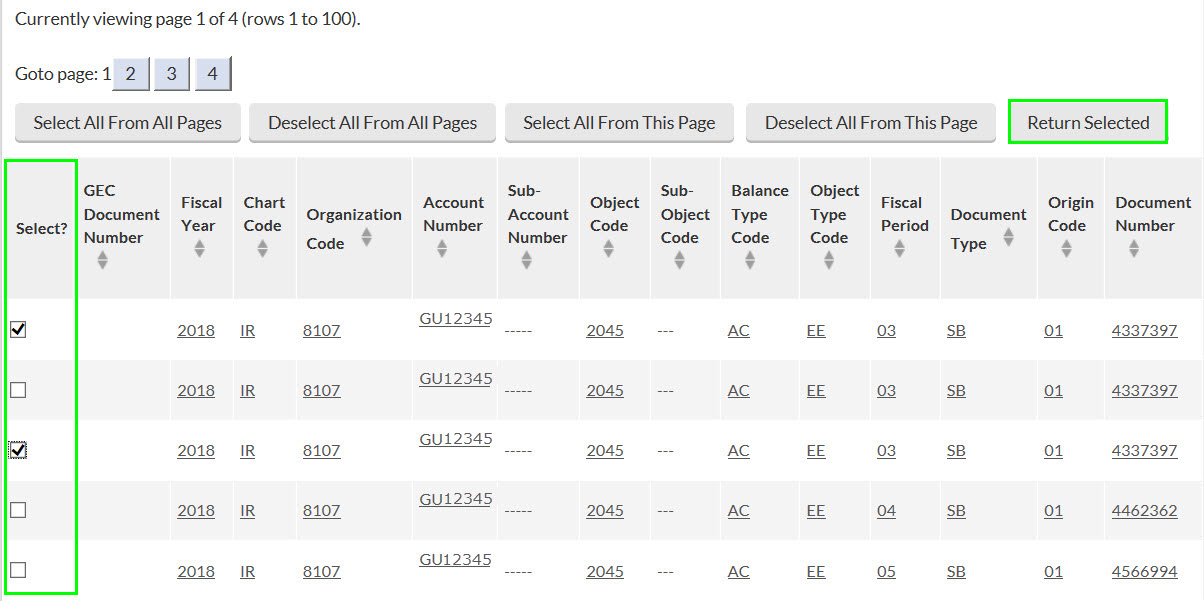
Using the Selection Buttons will populate the selected entries into the From section of the Accounting Lines.
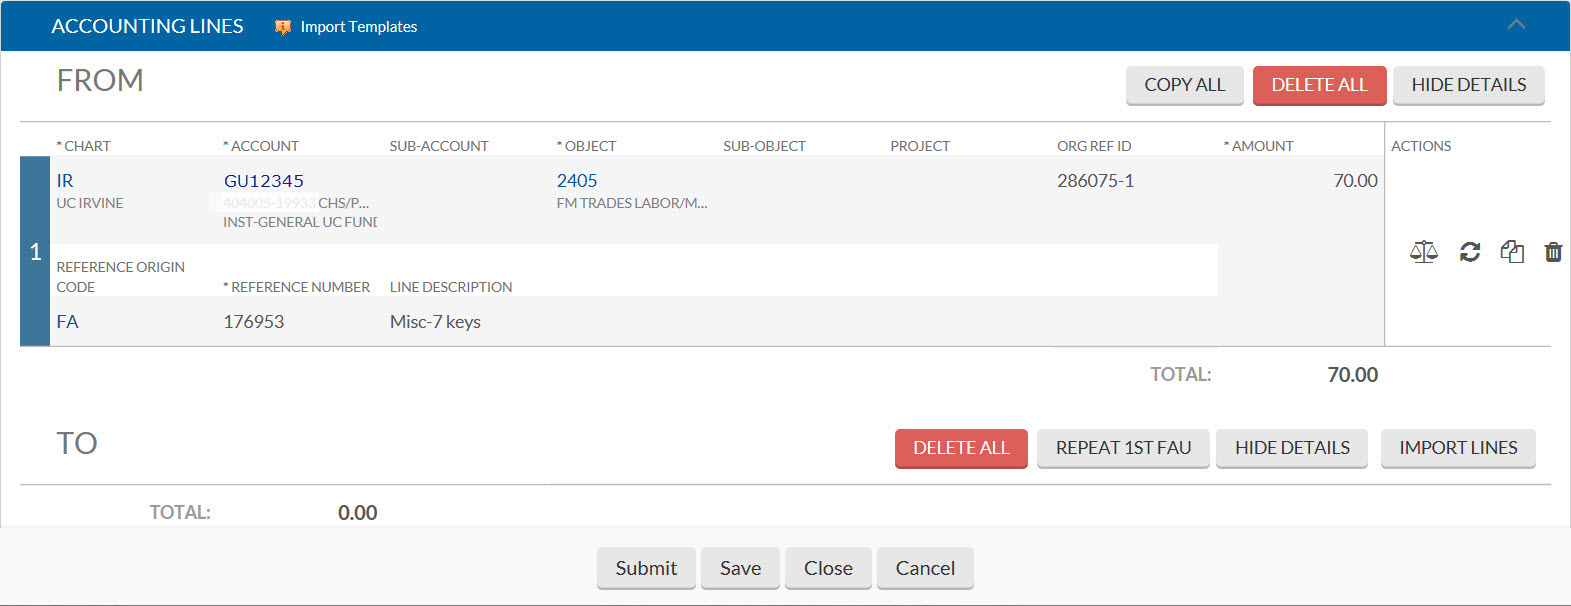
Accounting Lines
Buttons
| Button | Description |
|---|---|
 |
The Copy All button will copy all entries that appear in the From section and populates them into the To section of the Accounting Lines. |
 |
The Delete All button will delete all of the Accounting Lines. |
 |
The Hide Details button will hide the Reference Origin Code, reference number, and line description in all accounting lines. When the Hide Details button is selected, it becomes the Show Details button. Users can view the details by selecting the Show Detail button if the details have been hidden. |
 |
The Balance button will direct users to the Balance Inquiry Report Menu. In this menu can be used to view the balance of the account, open encumbrances, and other financial information. |
 |
The refresh button will refresh the line you click the button for. |
 |
The Copy Down button will copy one line in the From section and populate it into the To section. |
 |
The Delete button will delete one line. |
 |
The Repeat 1st FAU button will copy the Full Accounting Unit from the first line in the To section and populate it into the rest of the lines in the To section. Lines must be copied into the To section before the FAU can be applied to lines in the To section. |
 |
The Import Lines button can be used to import accounting lines from an excel spreadsheet. This feature can be helpful when a large number of lines are being imported. More information and templates can be found on our Importing Accounting Lines page. |
 |
The Add button will add a line and split the amount of one line. For example, if the amount on line 1 is $100.00, the Add button will add a new line and make the amount of both lines $50.00. You can adjust the amounts as long as the total of the splits add up to the original amount. |
Notes and Attachments
Backup documentation for both the original transaction and support for the transfer must be attached in the Notes and Attachments tab. When transfers of expenses are used to redistribute charges, the department must maintain and retain all internal records and logs for audit. This should include detailed information to support the transfers. Records/logs and copies of the expense eDocs and supporting backup should be attached to the GEC before submission to allow department and central approvers access to the records. Records may show the date, full accounting unit, name of user(s), etc. (but should not show private or identity information).
The maximum allowable attachment size is 5MB. PDFs or simple Excel document types (.csv, .xls, .xlsx) are allowed.
Capital Assets
Procurement Services has prepared a guide for processing a GEC with a Capital Asset. Please contact Procurement Services with questions regarding Capital Assets.
Procurement: procurement@uci.edu
PALCard transfers and Reversing Use Tax
Procurement Services has prepared a guide for reversing use tax. Please contact palcard@uci.edu with questions regarding use tax.
If a GEC is performed on a PALCard transaction, the user must go into the original PALCard/PCDO document and update the Notes and Attachments section of the PCDO with the GEC document number and review date.