Using the Entertainment Reimbursement (ENT) eDoc
Contents
- Document Overview Tab
- Reports Tab
- Entertainment Overview Tab
- Entertainment Information Tab
- Image Scanning Tab
- Attendees
- Actual Expenses Tab
- Importing Corporate Card Charges
- Special Circumstances Tab
- Accounting Lines
- Payment Information Tab
- Pre-Disbursement Processor Status Tab
- Tying Multiple TEM Documents to an Event
This page briefly explains how to complete a basic Entertainment Reimbursement (ENT) in KFS. Your department or school may have policies or procedures that pertain to processing these reimbursements and should be followed if applicable. We recommend filling out the Entertainment Overview tab first, and then filling out the rest. Remember to consistently save your work.
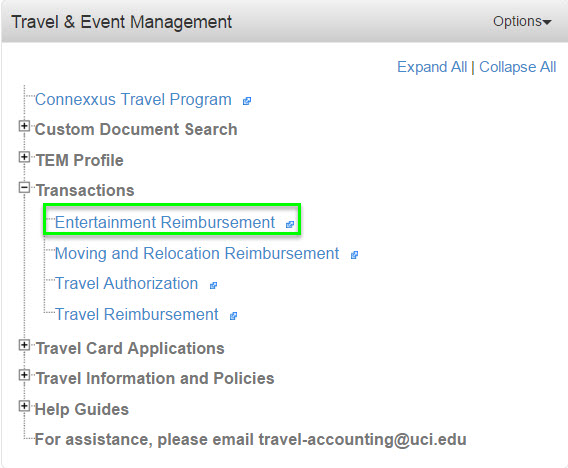
You can access the ENT in ZotPortal under the Travel and Event Management Portlet. Expand the Transactions menu by selecting the plus sign and selecting Entertainment Reimbursement.
Document Overview Tab
In the Document Overview tab do not edit the Description. After the document is saved with a Payee selected, the Description field will auto-populate with the payee's name.

Reports Tab
The reports tab will only appear in the ENT e-Doc after all required information has been entered and the e-Doc has been saved.

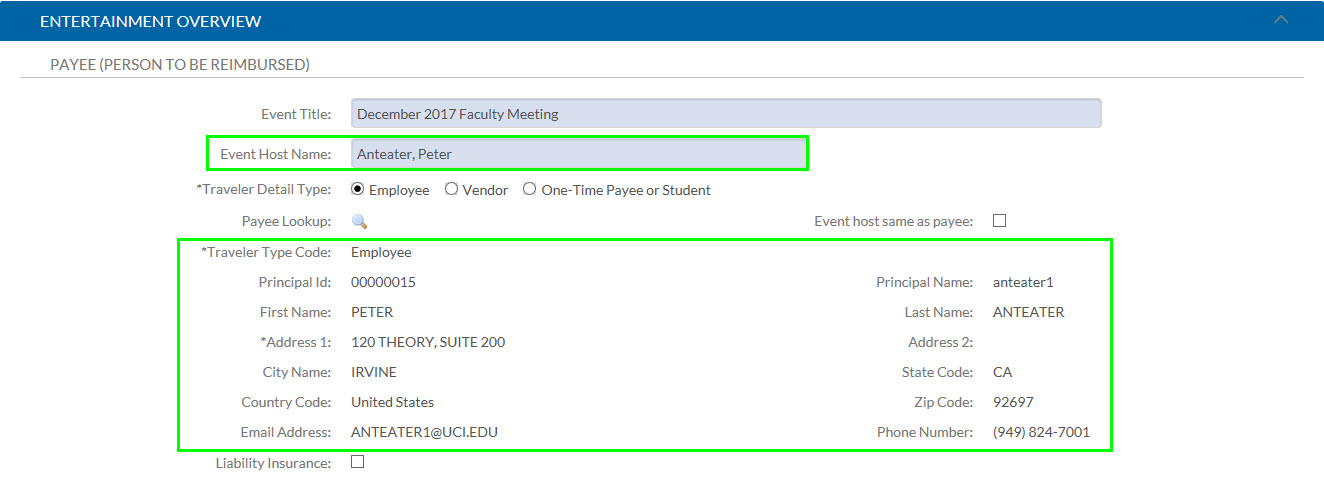
Entertainment Overview Tab
Every TEM document requires a payee. Entertainment Reimbursement eDocs require a payee and often times a Host. If the Host and payee are the same person, the Event Host Name must be completed and the Payee must be selected using the Payee Lookup magnifying glass icon.
Entertainment Information Tab
- The Purpose is the reason that the event is taking place. For details see the guide on What Events and Meetings are Reimbursable.
- The Certification of Official Host for Entertainment Expense Attached check box should be checked if a Host is required. This lets Accounts Payable know that the Host has signed the TEM Host Certification that can be found in the reports tab.
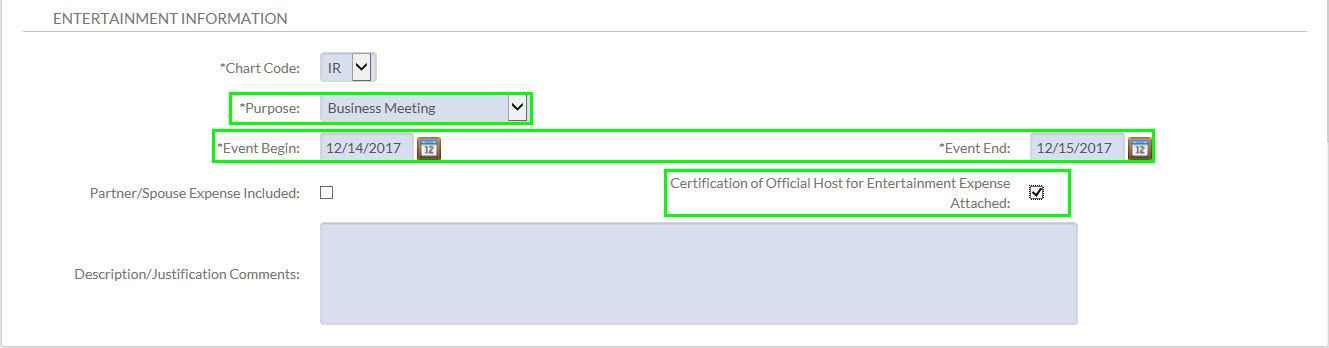
Image Scanning Tab
There are currently three options on uploading supporting documentation relating to the reimbursement. For more information on what supporting documents are required, see the Reference Guide.
The maximum allowable attachment size is 5MB. PDFs or simple Excel document types (.csv, .xls, .xlsx) are allowed.
Option 1: Upload Supporting Documentation Follow these steps to upload your supporting document images to FileNet:
- Upload is not available until document has been saved, submitted, or blanket approved.
- Before you upload any images, make sure that any sensitive or personal data is redacted. Files cannot be deleted after they are uploaded.
- Scan or photograph your documents into one of the following file formats: .pdf, .jpg, .jpeg, .bmp, .png, .tiff, or .tif.
- Go to the Image Scanning tab and click the Browse button to select the image from your computer.
- Click the Add button to upload your image to FileNet. No coversheet is needed.
- The Notes and Attachments Tab should never be used to upload supporting documentation items to a TEM or DV e-document.
Option 2: Link to Scanned Information on Another Document
- If your supporting documents were scanned into a previously completed TEM e-document that was subsequently disapproved, link that disapproved eDoc to the new one you are creating. Enter the document number of the disapproved document into the Scanned Document Number field in this section.
Option 3: Central Scanning:
- After the ENT document has been saved, select the link in this section to print an automatically generated coversheet. All supporting documents should be clipped to it. Send the cover sheet and supporting documents to Central Scanning. The e-document will be placed in a "scanning hold" until after documents are uploaded to FileNet by Central Scanning.
You can find more information on Image Scanning by clicking on the flowing link: Supporting Documentation Guide
Attendees
Users can either attach the Atendee List with the supporting documentation or input the event attendees in the "Add Atendee section." If the user decides to attach the Atendee List with the supporting documentation, be sure to indicate the number of Attendees and select the Reference Scanned Atendee List.
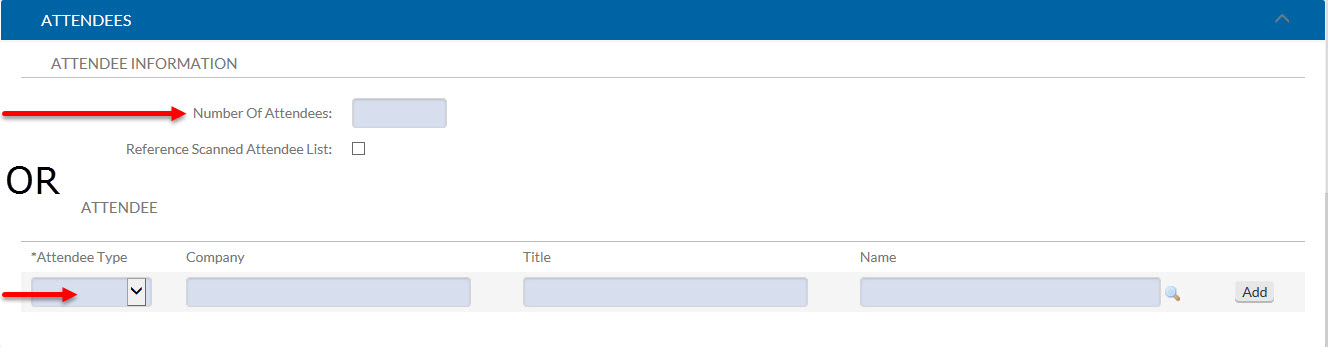
Either the Attendee Information OR the Add Attendee section should be completed. Do not complete both sections.

If users choose to use the “Add Attendee” section to manually add Attendees, they do not have to fill out the Number of Attendees or select the Reference Scanned Attendee List checkbox.
If using the Add Attendee section, Attendee Type, Name, Company, and Title are all required.

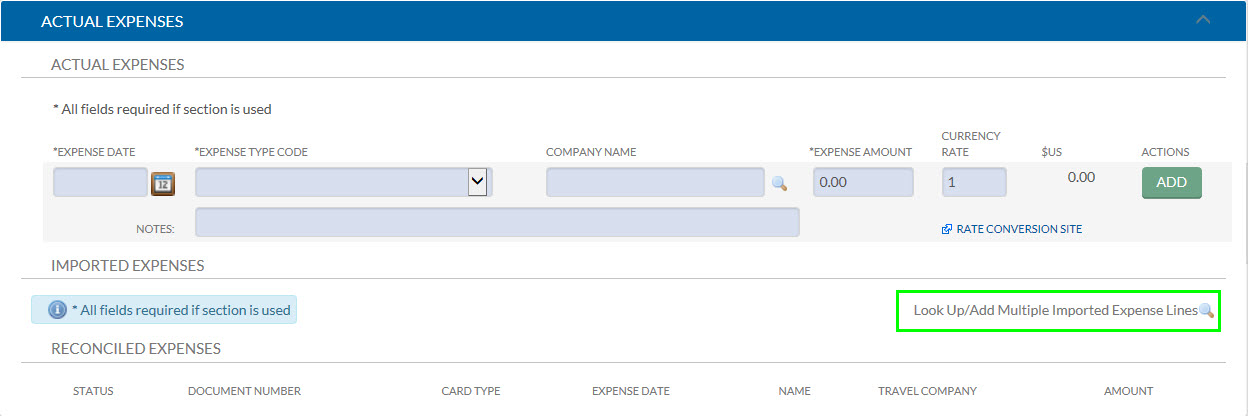
Actual Expenses Tab
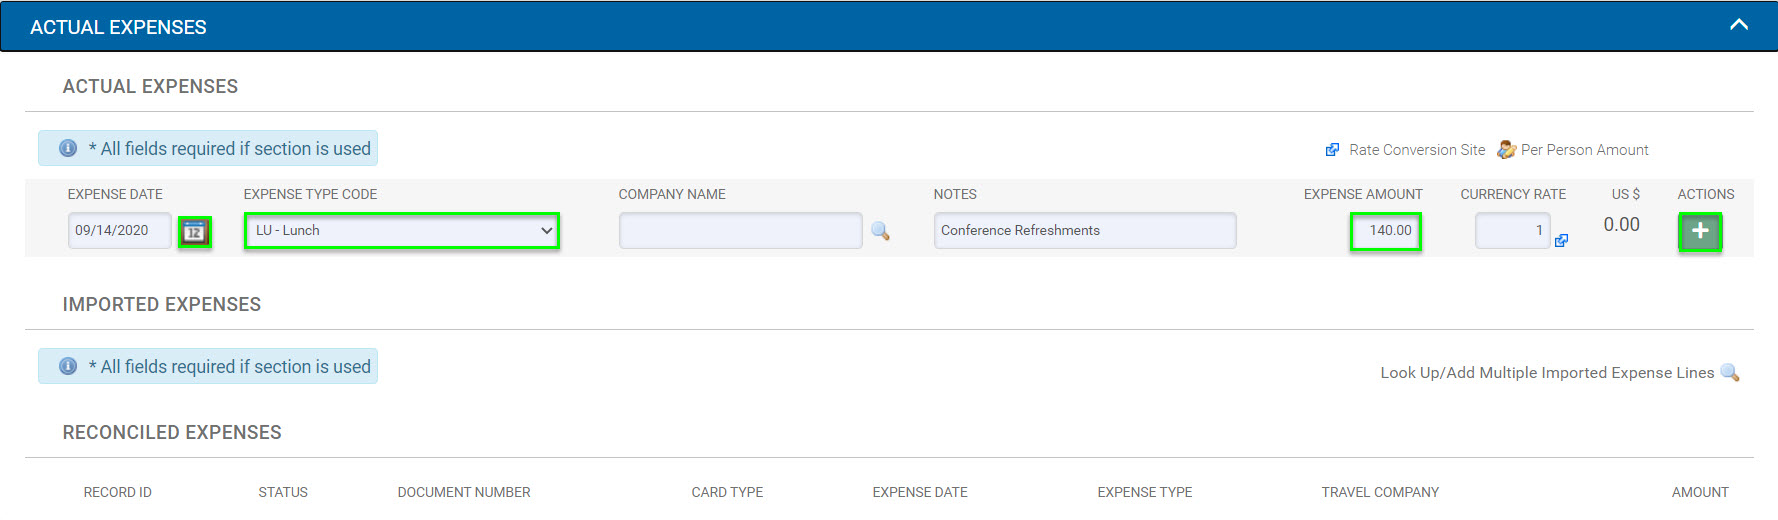
The Actual Expenses tab is where users can provide detail on the expenses relating to the event that need to be reimbursed. Once an expense has been added, a new blank line appears. Users can further break down receipts, if desired, underneath the Expense Type/Date.
- Step 1: Enter the Expense Date, Expense Type, and the total amount of all three receipts. Then select the Add button.
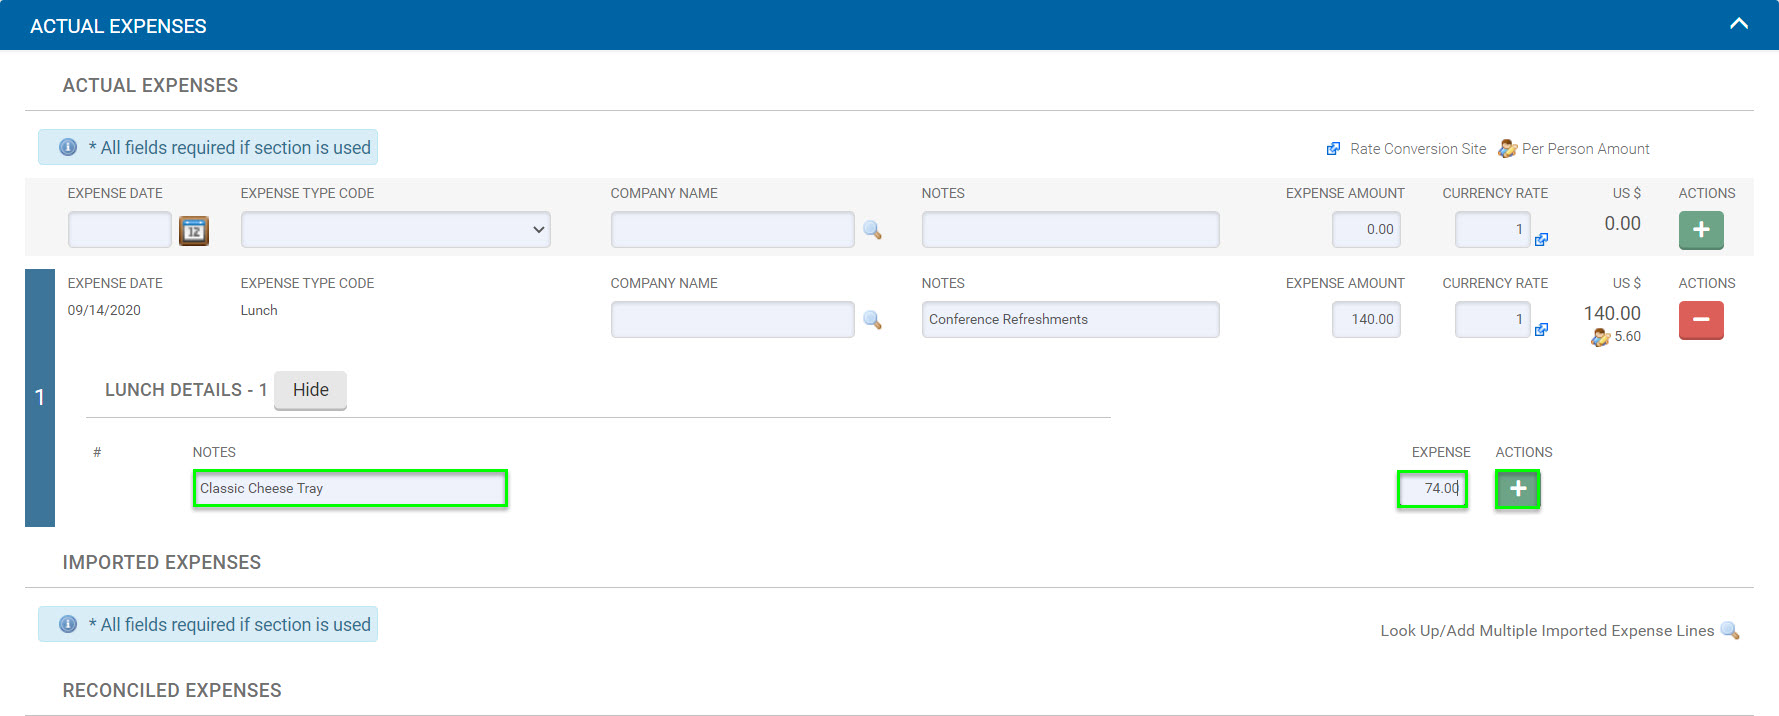
- Step 2: Select the "show" button under the notes field.

- Step 3: Enter the amount of the first receipt, then select the Add button.
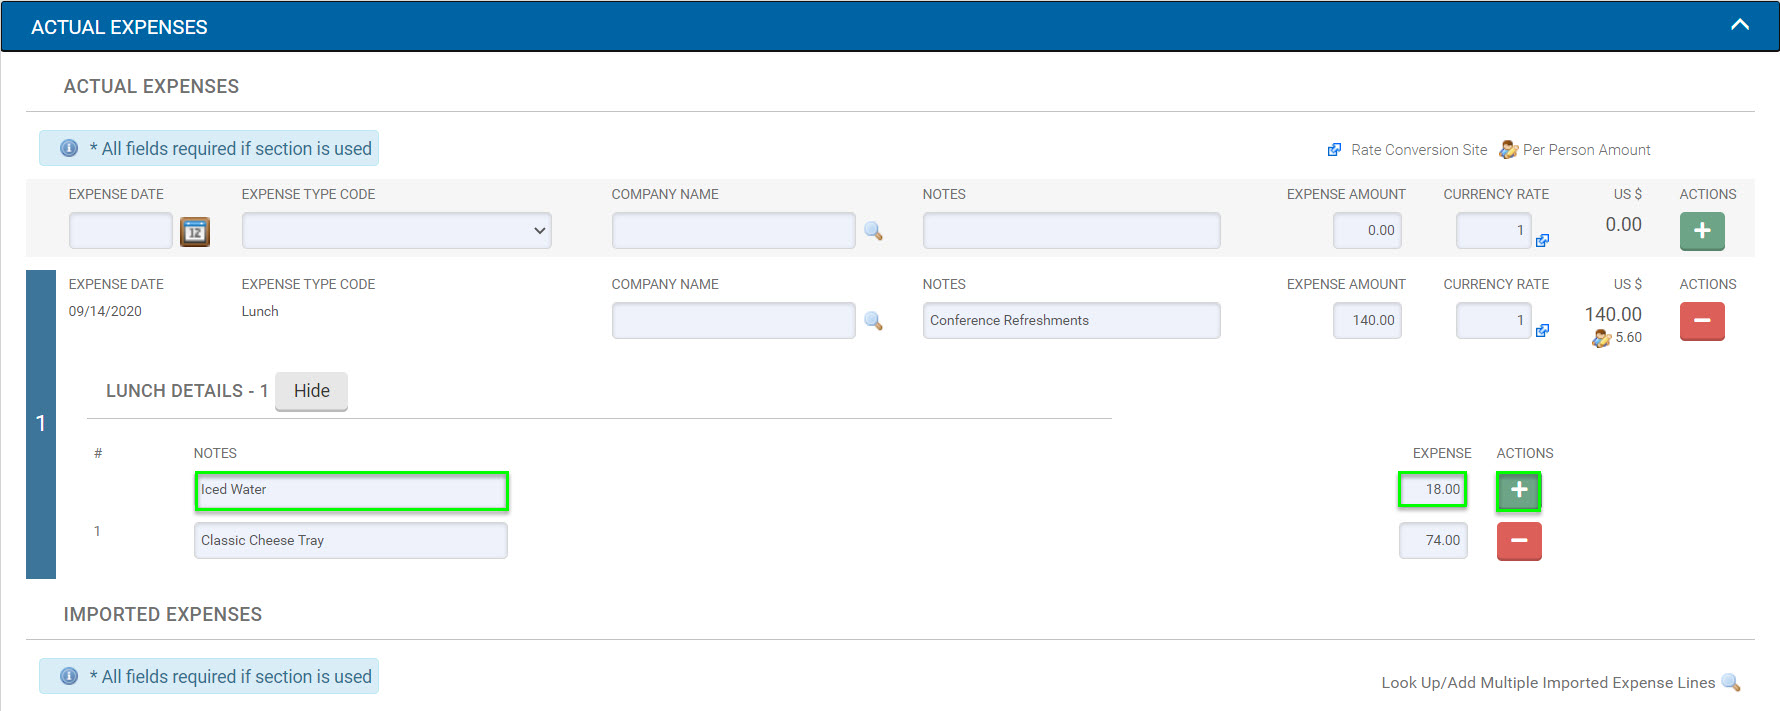
- Step 4: Once the first line is added a new line will appear above it with the balance of the total amount. Change the amount to the amount of the second receipt and select the Add button.
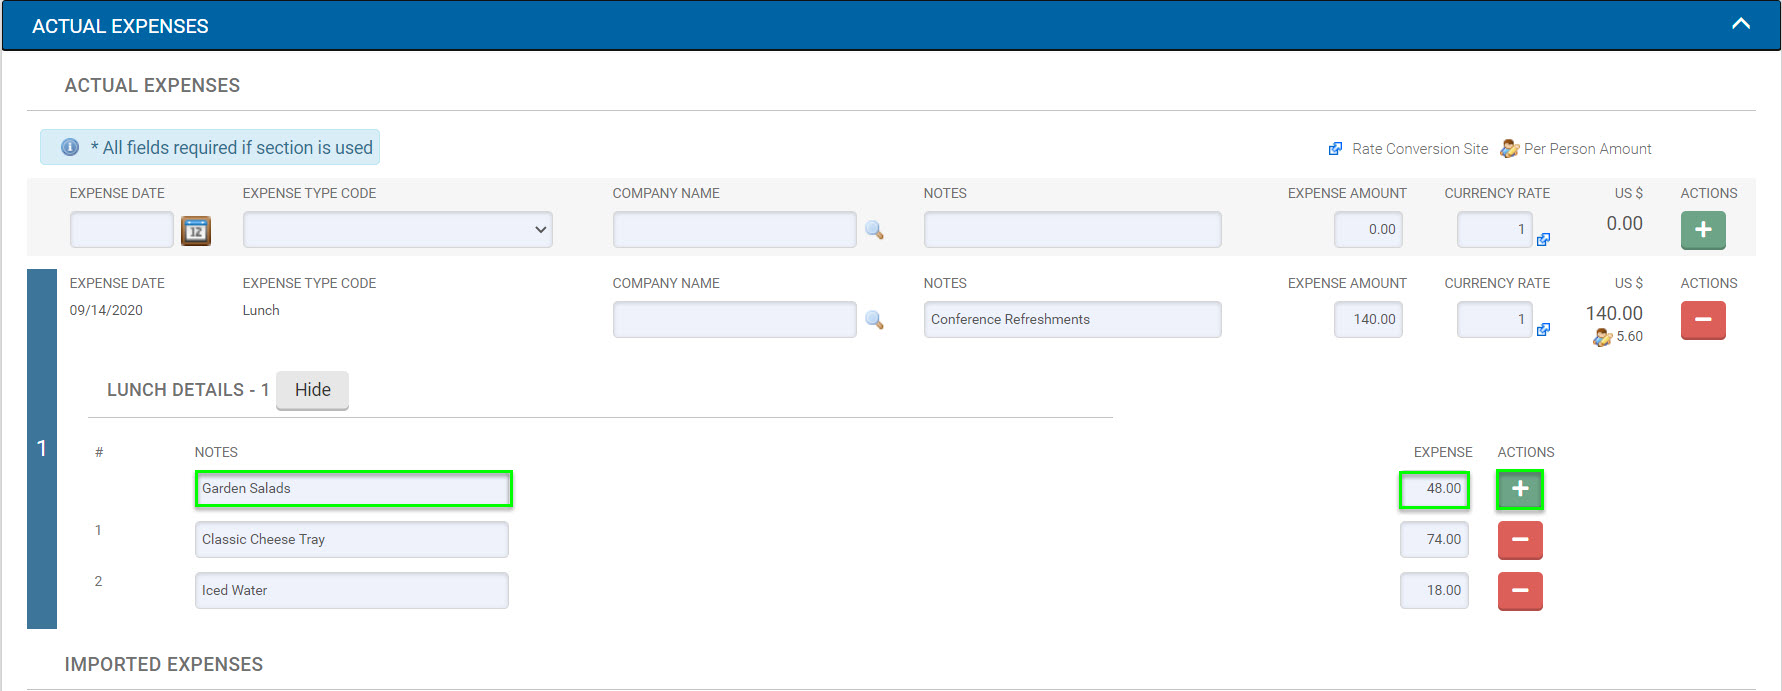
- Step 5: Add the third expense and select the Add button.
Importing Corporate Card Charges
Corporate Card charges can be imported and reconciled by selecting the Look Up/Add Multiple Imported Expense Lines icon.
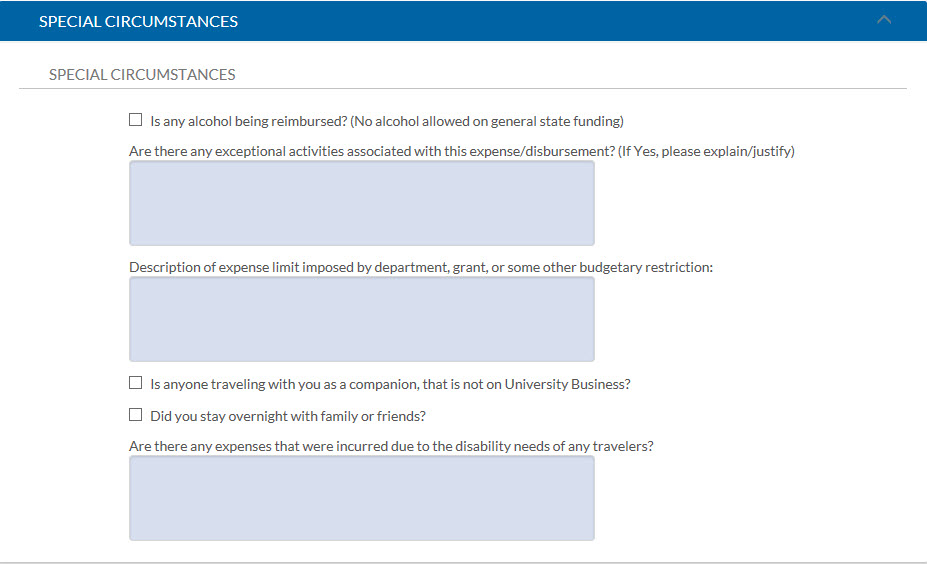
Special Circumstances Tab
The Special Circumstances tab includes key questions that may be asked by Accounts Payable reviewers. The question(s) should be answered ONLY if it pertains to the Entertainment Reimbursement. If not applicable, leave the section blank.
If alcohol was served at an event, even if alcohol is not being reimbursed on the e-Doc, please be sure to check the box to indicate alcohol was served.
If you are hosting an event that requires catering set up and service on-site, please review Regents Policy 5402, and Article 5 of the AFSCME SX and EX collective bargaining agreements.
Instructions for compliant contracting for food services, along with all documentation required before any contracting for food services can take place, contact Enterprise Workforce Relations (EWR) directly at ewr@uci.edu.
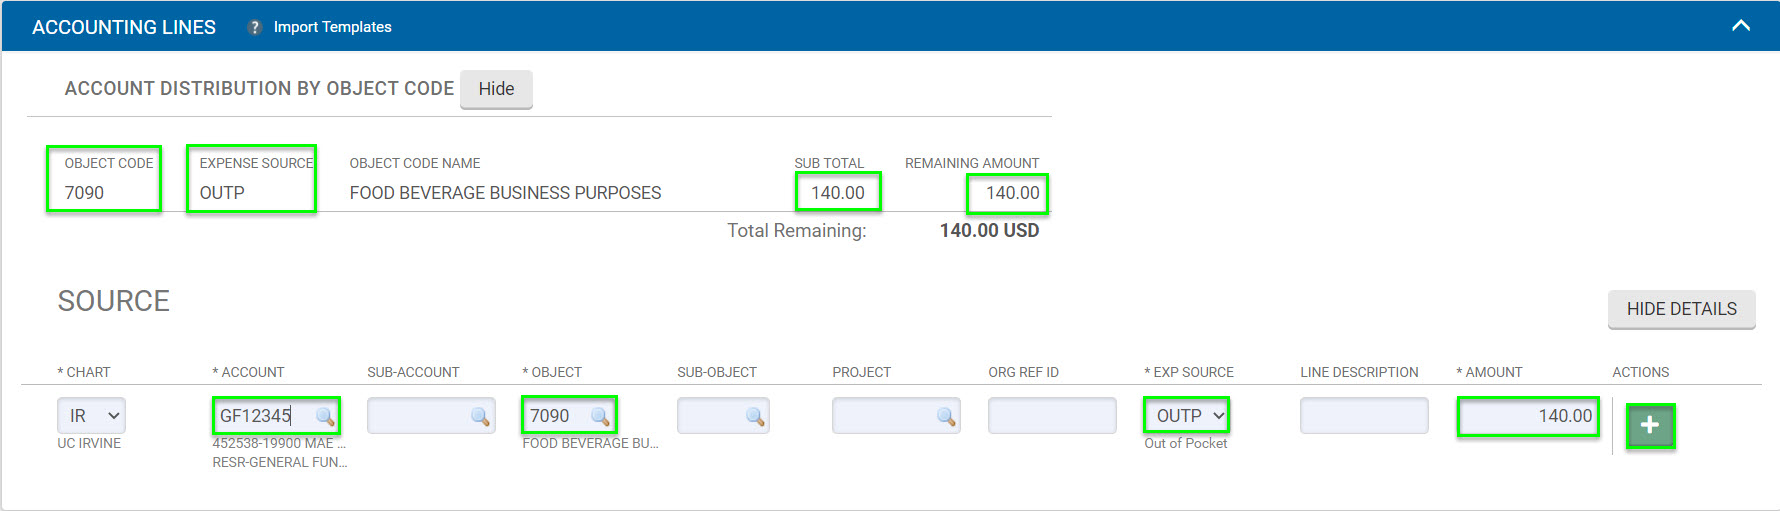
Accounting Lines
Account Number, Object Code, Expense or Encumbrance, and Amount are required fields. Check the Account Distribution by Object Code section to see how the Object Code and Expense or Encumbrance fields should be completed. The add button must be selected for an accounting line to be added.
Each accounting line has a Line Description field. Information entered into the Line Description field will show as the document description on the General Ledger. If the Line Description is left blank, the General Ledger will show the description that appears in the document overview tab.
The Account Distribution by Object Code section of the “Accounting Lines” tab lists the acceptable KFS Object Codes to be used for this reimbursement. These object codes were determined by the expense types identified in the Actual Expenses tab. No other Object Codes may be used on this eDoc, and users will get a warning/error if they try to input a different object code in the Accounting Lines.
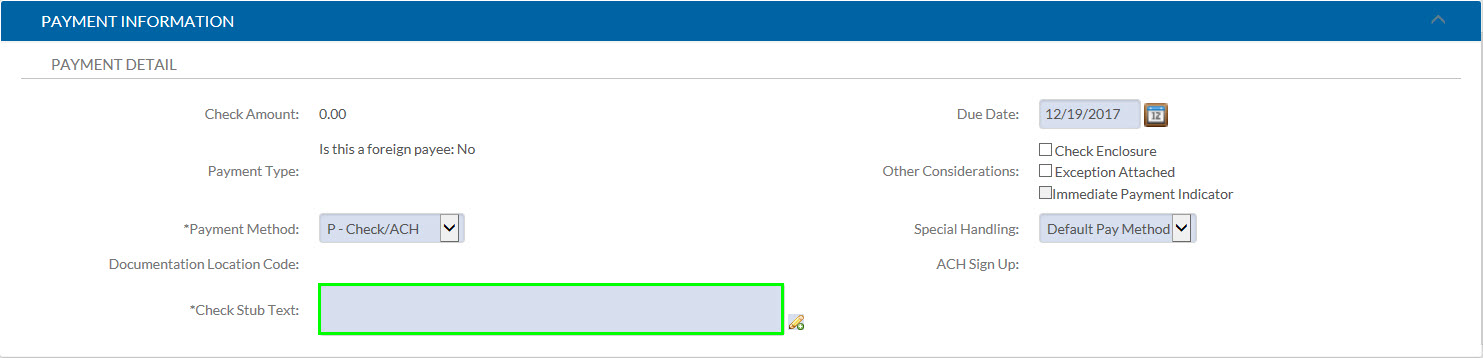
Payment Information Tab
Payment Method
The Payment Method drop down allows you to choose how the payee receives payment. In almost all cases, you should select P- Check/ACH (EFT). With this option selected, the payee will either:
Receive a check sent to the address in the Traveler Section of the Trip Overview tab or
Receive a direct deposit (ACH and EFT stand for direct deposit).
The Wire Transfer (Foreign BANK Only) option can be selected if the payee does not have a bank account in the U.S. Reimbursement payments may be sent via foreign banks in U.S. dollars or in foreign country currency to individuals or to vendors.
Individuals must submit the completed and typed, Wire Transfer Request form. The completed form is required documentation and must be uploaded to the image scanning tab of the reimbursement.
Check Stub Text
The Check Stub Text will be printed on the payee's check. When paying a vendor, it is very important to type in details in the Check Stub Text field:
- Invoice number and invoice date – department will receive the vendor invoice
- Name of the event as listed on the vendor invoice or contract
- Date of the event
- Amount due
- Include vendor contact name if listed on the contract: Sales Manager, Event Coordinator, etc.
Special Handling
When creating a Travel Reimbursement e-document in KFS, users can select three special check handling options. You can enclose additional documents with a check, print a check for pick up at Financial Services in Aldrich Hall, or force a check to be printed when the payee has ACH direct deposit set up.
- Enclose additional documents with a check (i.e., invoice, letter).
- Print a check for pick up at Financial Services in Aldrich Hall.
- Force a check to be printed when the payee has ACH direct deposit set up.
Please see Accounts Payable's Check Enclosures and Special Handling Guide for details.
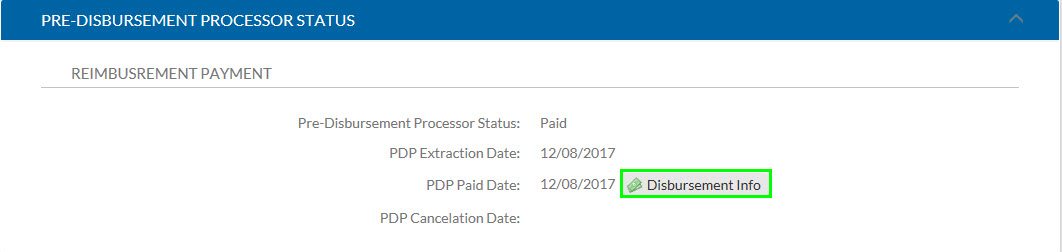
Pre-Disbursement Processor Status Tab
Users can open the Pre-Disbursement Processor Status tab in the ENT eDoc to see if the check has been extracted, cleared, or the deposit has been sent.
Tying Multiple TEM Documents to an Event
In the cases where there are multiple reimbursements for the same Event, TEM Doc Numbers can be used to link two or more reimbursements. This helps with tracking and can ensure an efficient audit process. Once the document is final a new TEM Document can be created with the same TEM Doc Number.

An ENT can be processed to pay a facility rental deposit before the event. After the event a second ENT can be processed with the same TEM document number to pay the balance of the facility rental and the cost of light refreshments.
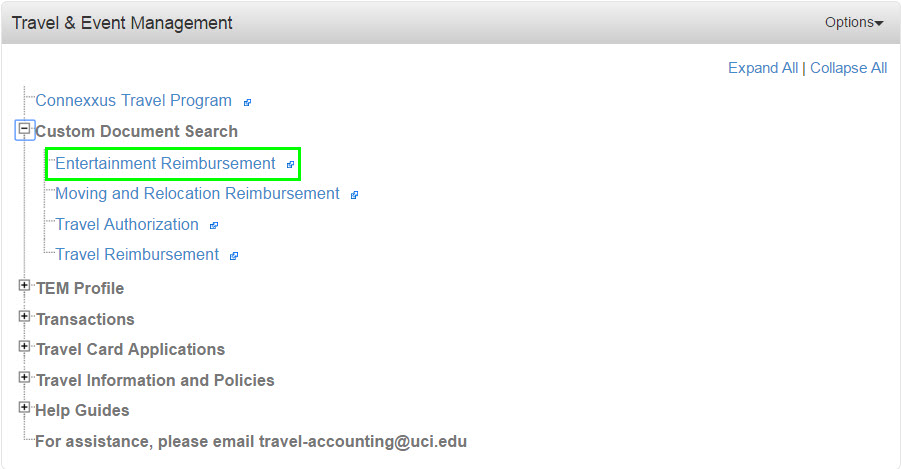
- Step 1: Select the Entertainment Reimbursement Custom Document Search link in the Travel and Event Management portlet.
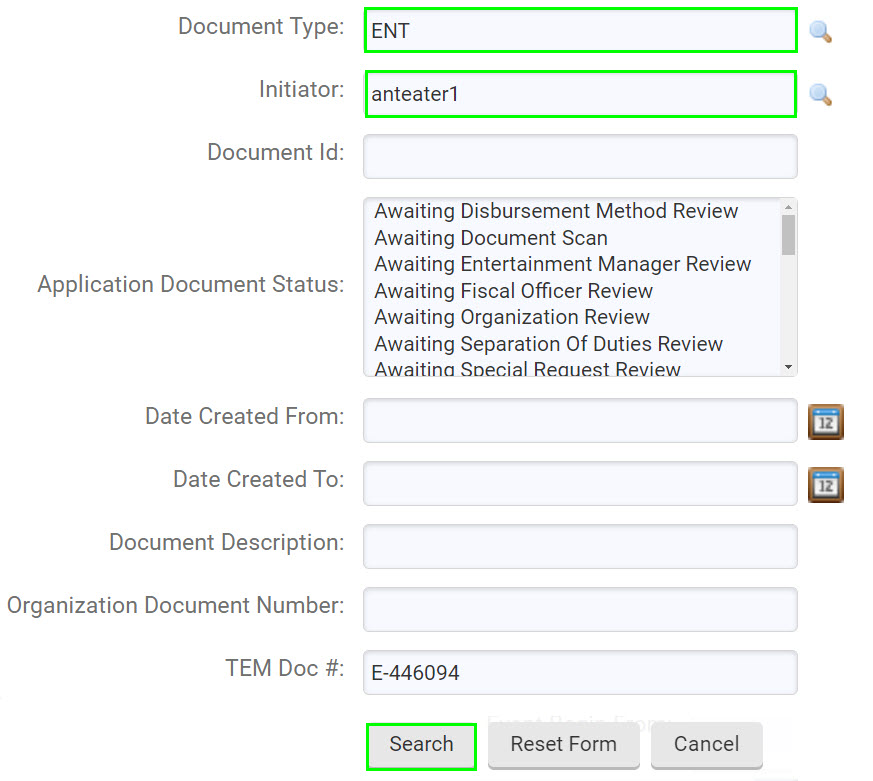
- Step 2: Enter the TEM Doc Number of the first reimbursement.
- Step 3: Open the Final ENT eDoc.

- Step 4: Select the New Reimbursement button.
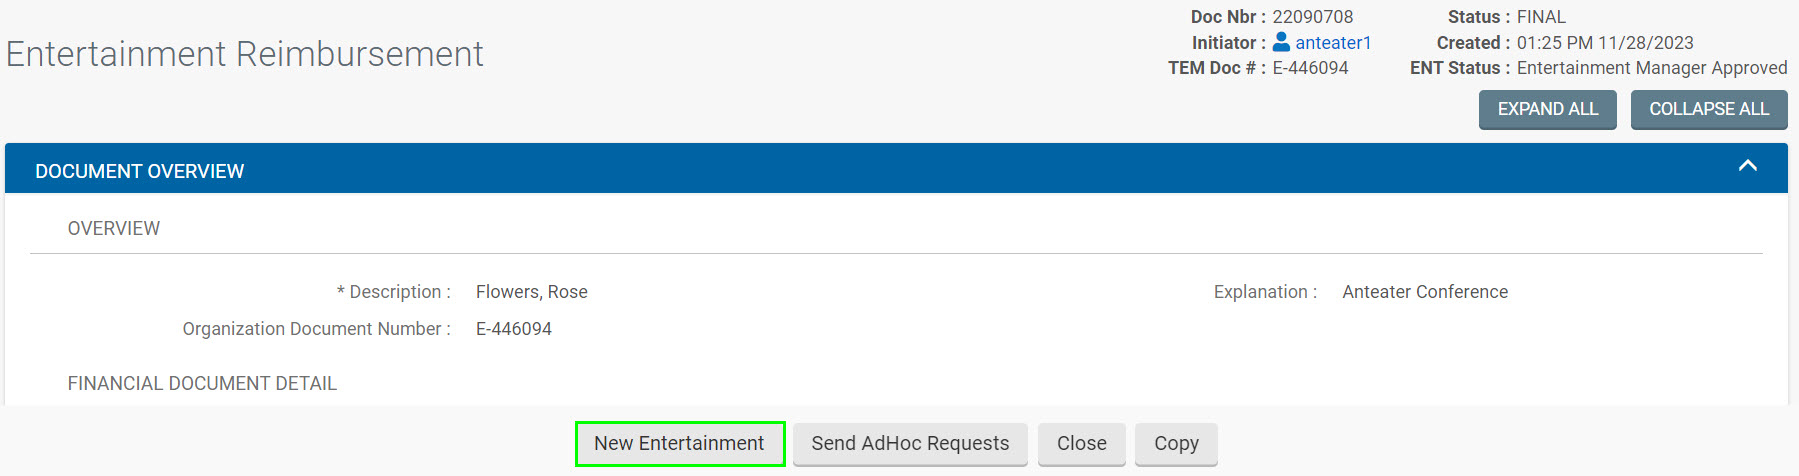
A new document will open with the same TEM Doc Number as the first ENT. Remove any expenses that were paid on the previous ENT and add the remaining expenses. Once all required information has been entered, save and submit the document.
