Corporate Card for the ENT: Importing and Reconciling

If the Employee who is being reimbursed has used their Corporate Card for expenses, Arrangers can look up their expenses and import them onto the ENT eDoc.

Step 1: Select Magnifying Glass Lookup Icon

Complete the Payee Information in the Entertainment Overview tab first. To import expenses, Arrangers can select the magnifying glass lookup icon, to the right of the Imported Expenses section.
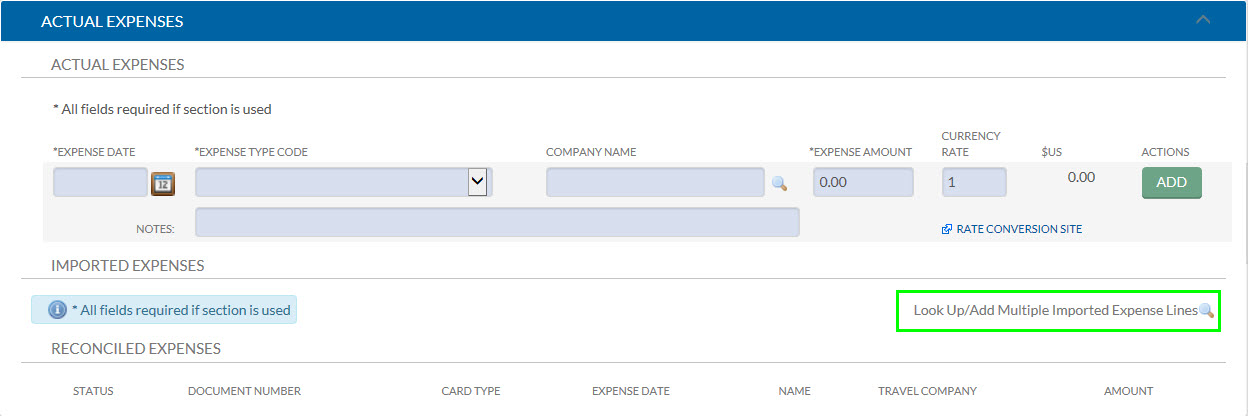
ENT eDoc Entertainment Overview tab showing the magnifying glass lookup icon to the right of the Imported Expenses section
The magnifying glass lookup icon located to the right of the Imported Expenses section in the Entertainment Overview tab; click this icon to begin searching for Corporate Card expenses to import onto the ENT eDoc.

Step 2: Searching for Expenses

When Importing Card Expenses, users must select CORP as the type of card. Additionally, users can narrow down their search criteria by Company, Transaction Date, etc. Searching without qualifiers for Corp Card expenses will bring up all expenses from the Corporate Card.

Results for expenses will be displayed below the search. Check boxes are available on the left to mark expenses to be imported into the document. Users must select the “return selected” button when they have identified all items to import.
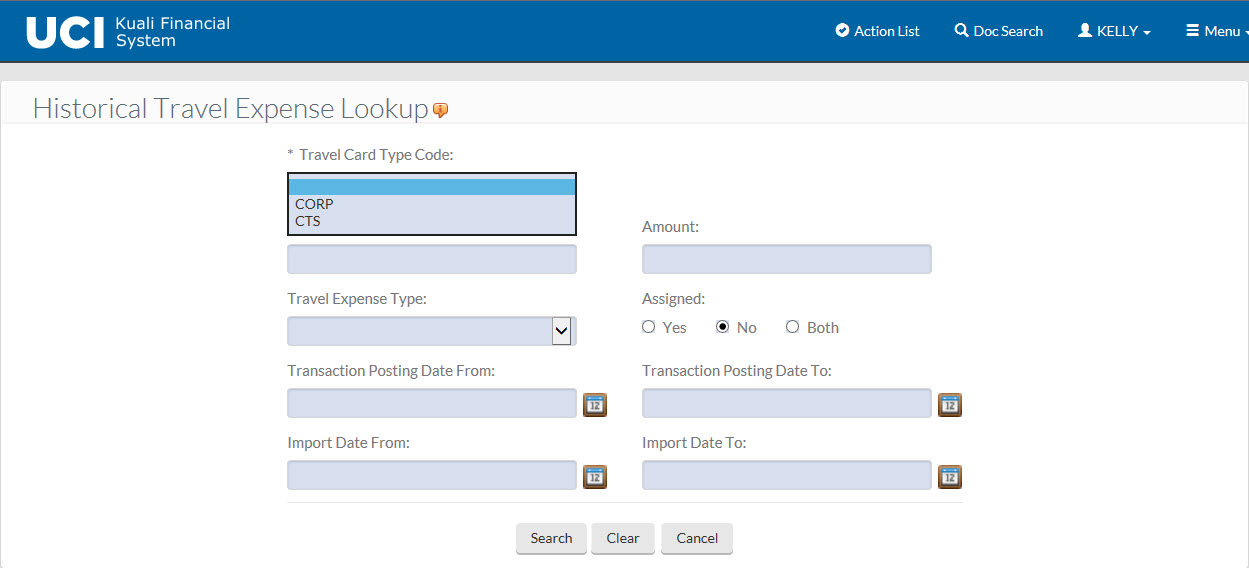
Corporate Card expense import search screen with CORP selected as the card type, optional search criteria fields such as Company and Transaction Date, expense results with checkboxes on the left, and a Return Selected button
The card expense import search screen where users must select CORP as the card type, optionally narrow results by criteria such as Company or Transaction Date, check the desired expenses from the results list, and click Return Selected to import them into the ENT eDoc.

To see Corporate Charges that have already been Reconciled or assigned to a reimbursement.

  • Use the Assigned radio buttons to see which card charges have been reconciled.
  • When the Yes button is selected, only card charges that have already been imported into a TEM document will show. There are no check boxes to select these charges because they have already been reconciled.
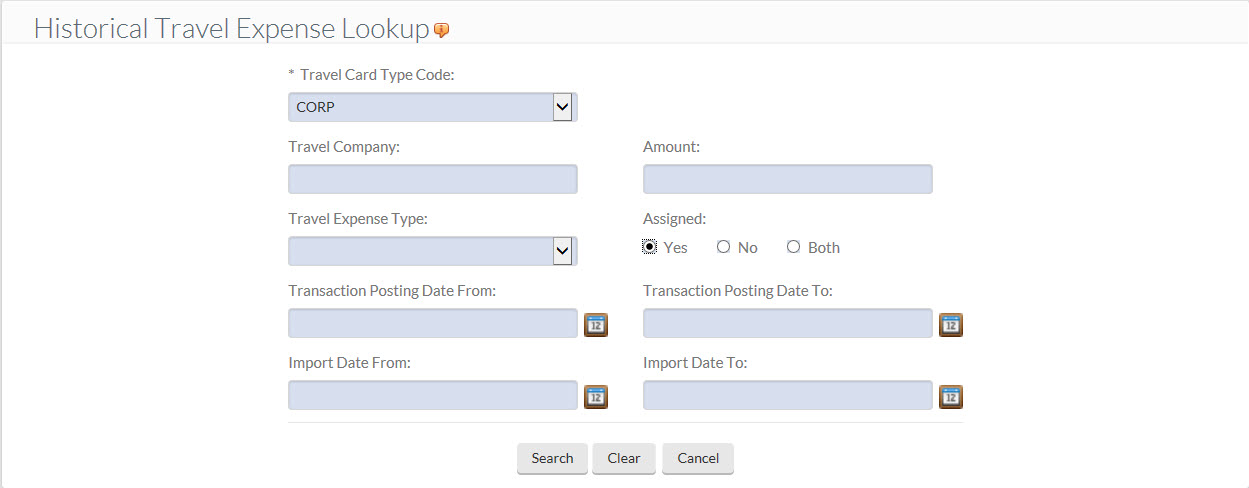
Card expense search screen with the Assigned radio button set to Yes, filtering the search to show only charges already imported into a TEM document
Setting the Assigned radio button to Yes filters the card charge search to display only charges that have already been reconciled or imported into a TEM document.
Card expense search results with Assigned set to Yes, displaying previously reconciled charges listed without selectable checkboxes
Search results when Assigned is set to Yes, showing card charges already imported into a TEM document; these charges cannot be selected again as they have already been reconciled.
  • When the No button is selected, only card charges that have not been imported into a TEM document will show.
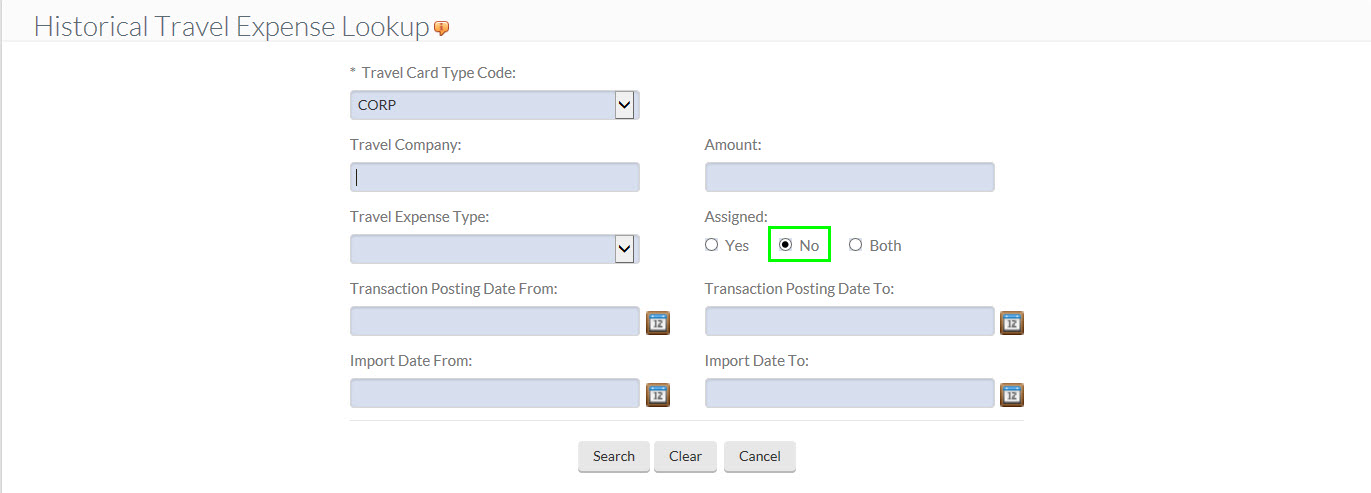
Card expense search screen with the Assigned radio button set to No, filtering the search to show only charges not yet imported into a TEM document
Setting the Assigned radio button to No filters the card charge search to display only charges that have not yet been reconciled or imported into any TEM document.
Card expense search results with Assigned set to No, displaying unreconciled charges with selectable checkboxes available for import
Search results when Assigned is set to No, showing card charges that have not yet been imported into a TEM document and are available to be selected and imported into the ENT eDoc.

Step 3: Return Selected Expenses

Upon entering search qualifiers or performing a blank search, users can individually select the expense to be imported by ‘checking’ it in the “Select?” field. If the expense has already been used or identified as personal, it may still appear, but it will not be selectable.

Users must select the “return selected” button when they have identified all items to import.

Card expense search results showing checkboxes checked in the Select field for chosen expenses, with the Return Selected button visible to confirm the import
Individual expenses are selected for import by checking the checkbox in the Select field next to each desired charge; click the Return Selected button to import all checked expenses into the ENT eDoc. Expenses already used or marked as personal will appear but cannot be selected.

Corporate Card Reference

UCI Corporate Travel Card Program (how to apply)

