Creating a TEM Profile
TEM Profiles are an essential component of the Travel & Event Management (TEM) function. They help with controlling whom can assist with your reimbursements and has access to view them. They also contain information for applying for Corporate Travel or the CTS card. Employees seeking reimbursement via TEM eDocs must have created their own TEM Profile, to be paid/reimbursed for TEM-related expenses. Access to initiating TEM eDocs also requires having or creating a TEM Profile. This guide will teach you how to create your own TEM Profile and add an arranger.
Important Access Note: Only employees with an active Employee Appointment in UCPath have access to KFS. Employees on a break or leave (incl.short work break) status, and Students who are not employees, should be reimbursed as a one-time payee or student.
Important Note: To access KFS and other secure UCI online systems, all users must use a UCI Internet Connection. If working off-site or remotely, you must download (one-time) OIT's Virtual Private Network (VPN) Software. You will need to log in and check that the connection is active before clicking on any KFS related links. View OIT's VPN instructions.
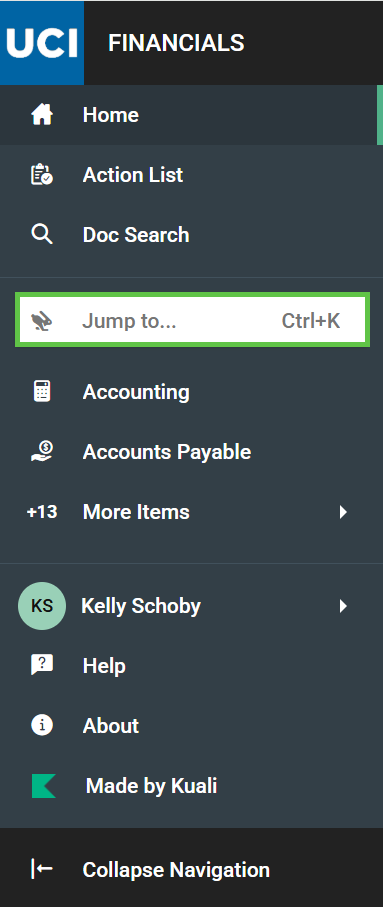
- Go to the KFS home page.
- Select the Jump To field
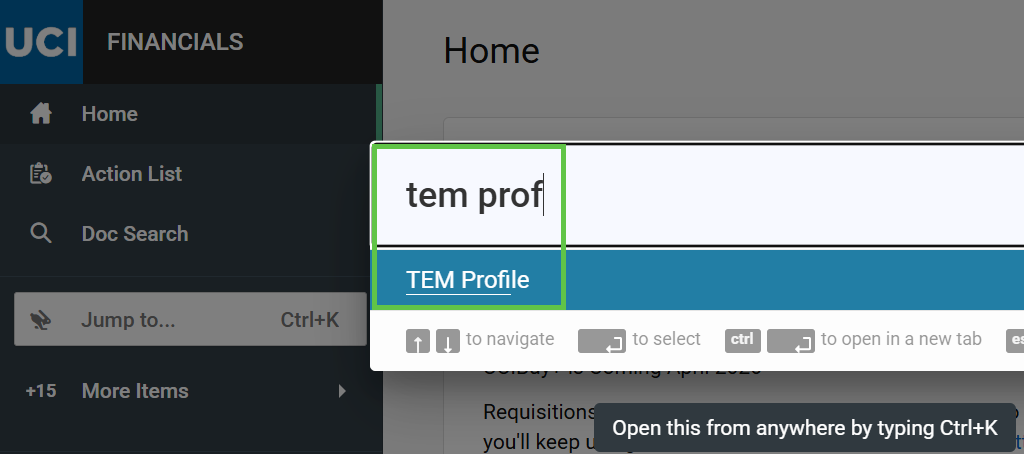
- Enter "tem profile"
- Select the Tem Profile link
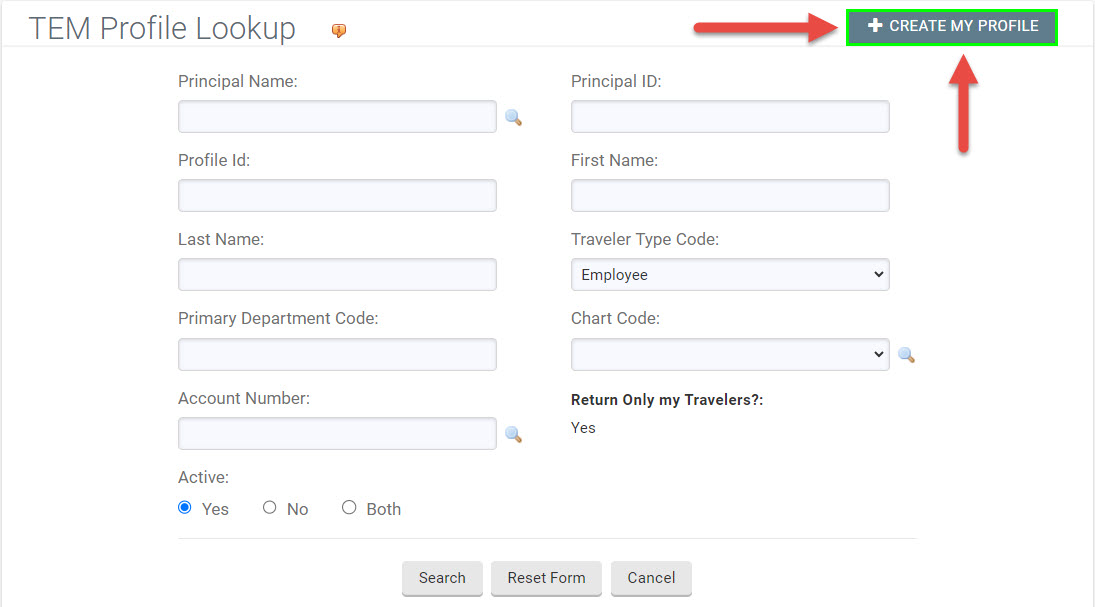
- Select the “Create My Profile” button to initiate your TEM profile. This will only appear if you have never created a TEM Profile before.
Helpful tip: Do not select the search button or the magnifying glass or enter data. If you have never created a Profile, there is nothing to search for. Instead, you should see the Create My Profile Button when the TEM Profile Lookup page opens in the upper right side of the TEM Profile Lookup screen.
The TEM Profile eDoc will automatically open upon creation.
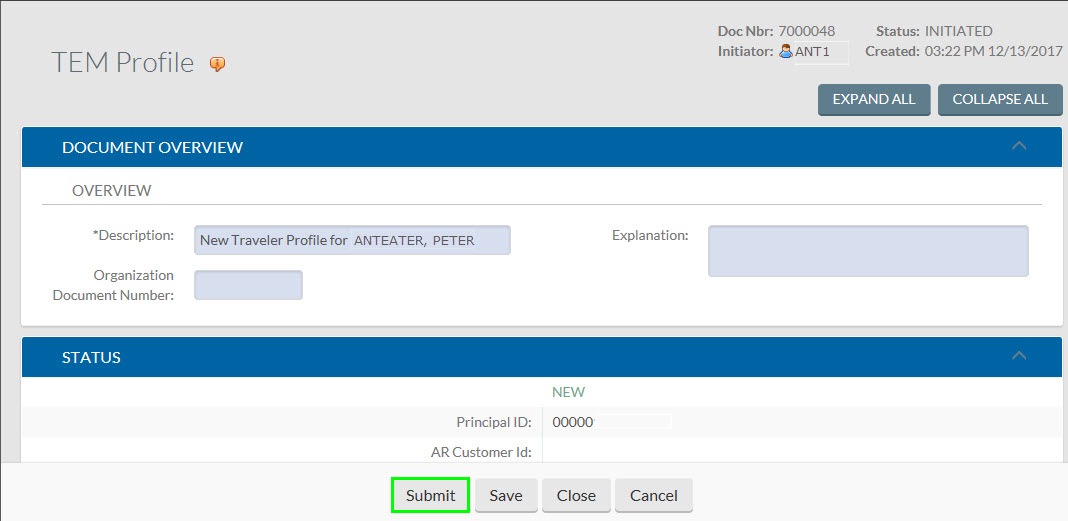
Select the Submit button if you do not need to add an arranger at this time. The document must be submitted on the same day that it is initiated.
If you do need to add an Arranger, follow these steps:
- Scroll down to the Arrangers tab and type in the UCInetID (or search if unknown) of the person that you want to add as an arranger into the Principal Name field.
- Check the Allow to initiate TA Document box.
- Check the Allow to initiate TR/RELO/ENT document box.
- The active box should already be checked. If it's not checked, go ahead and select it so that it has a checkmark.
- Select the Add button.
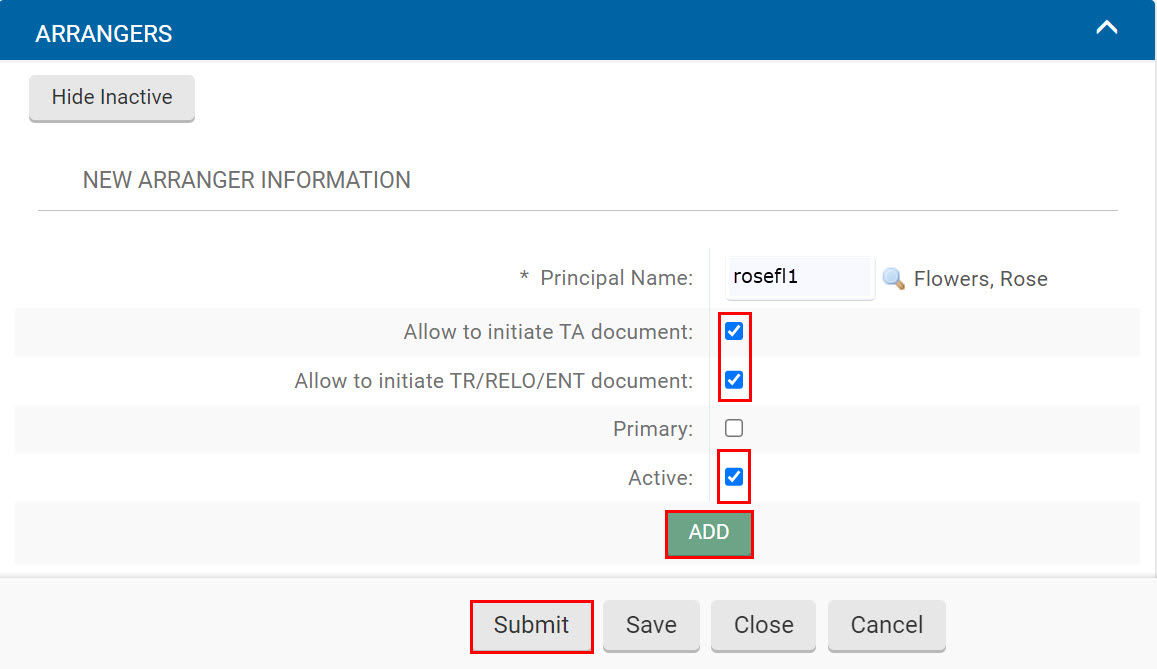
Once Arrangers have been added, and you have reviewed your information like Default Account (optional), you need to finalize the document to create your Profile. The button for saving and submitting the document is at the bottom of the window.
- Select the Submit button to create your TEM Profile and complete the process! The document must be submitted on the same day that it is initiated.
For more information, we have a guide on how TEM Profiles and TEM Arrangers work.