Using DWQuery Guide
Many long-time UCI employees will be familiar with this new interface in DWQuery. Below is a guide on the functionality of DWQuery. For more details on how to use the KFS-GL Query, see the DWQuery KFS GL Guide.
Accessing DWQuery
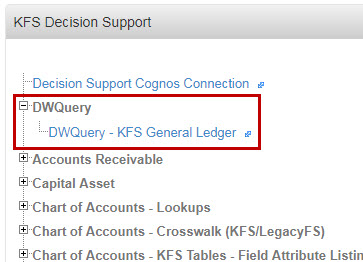
DWQuery is accessible on ZotPortal in the Finances/KFS Tab. Locate the KFS Decision Support portlet, expand the DWQuery section, and click the DWQuery - KFS General Ledger link.
DWQuery Action Buttons
At the top of each DWQuery, there is a list of Action buttons that allow you to load, save, view and run your query. There are also buttons to select columns on a tab to be returned in your results, set your column order, reset your query, and aggregate and distinct options for your query.

Load, Save, and View

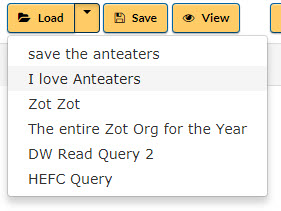
The Load button opens a window that allows you to load, delete, or view previously saved queries. Next to the Load button is a dropdown menu of the most recently saved queries for quick access.
- Users can enter their own UCInetID and then select the Get Queries button to view queries that they have saved.
- Users can enter someone else’s UCInetID to view queries saved by others.
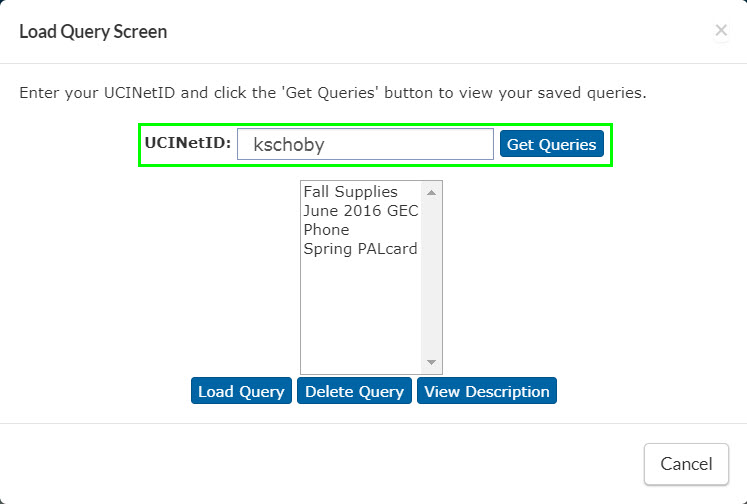
- Highlighting a query and selecting the Load Query button will load the previously saved query.
- Highlighting a query and selecting Delete Query button will delete the query. The query will no longer be saved.
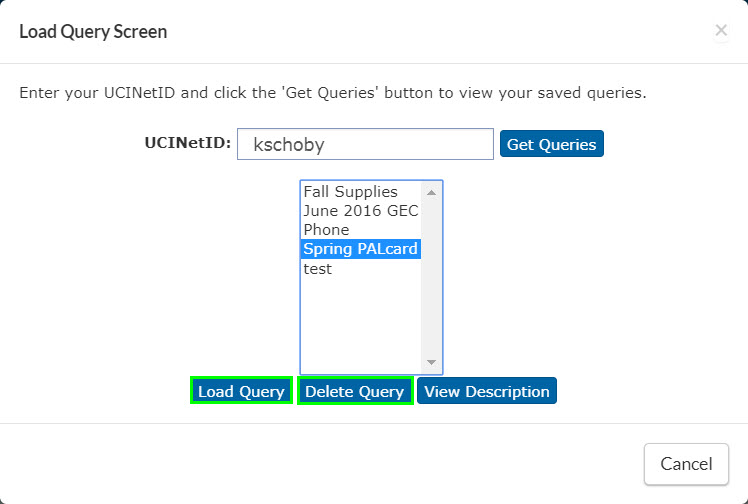
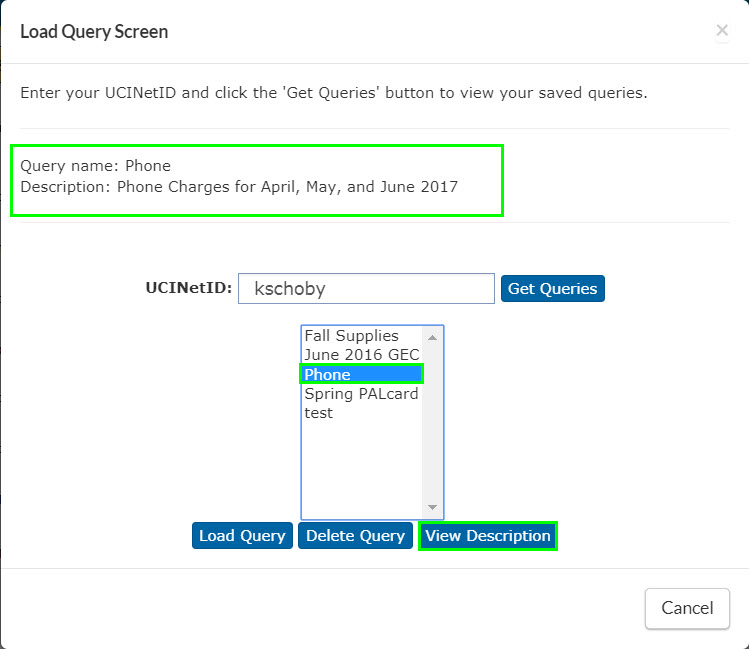
- Highlighting a query and selecting the View Description button will display the query description.
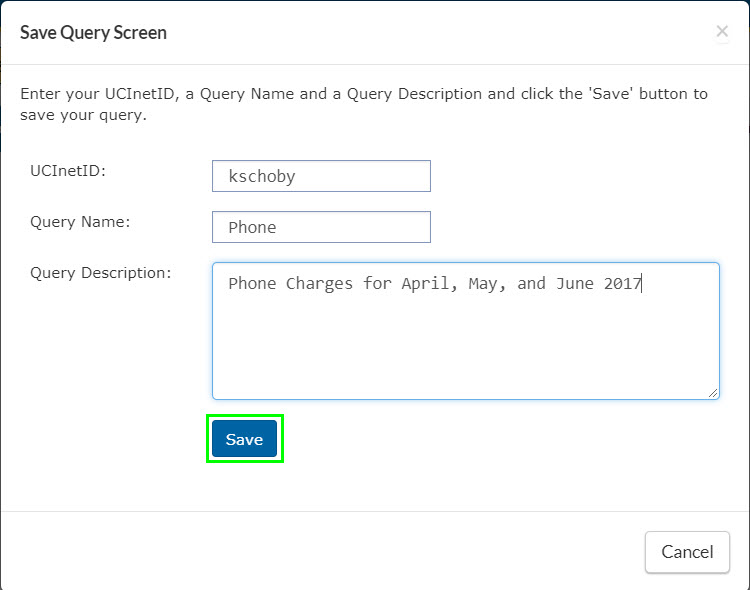
The Save button will open a window that allows you to save your current query. Enter your UCInetID, name the query, add a description and select the Save button.
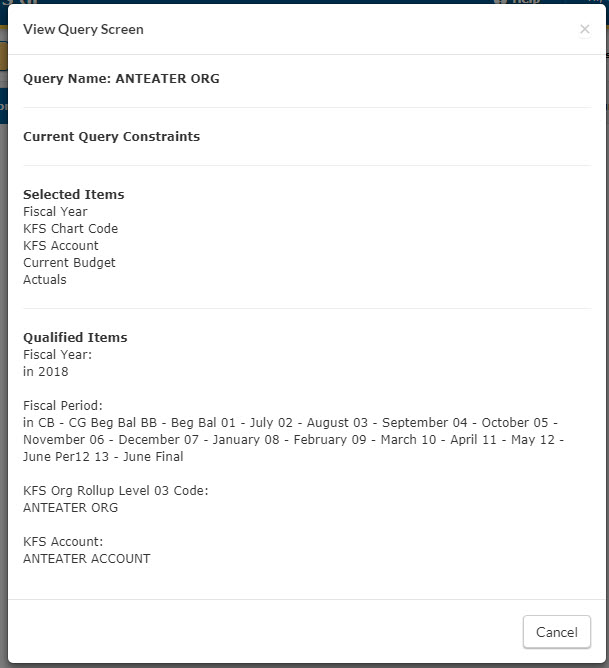
The View Query button will open a window that displays all the attributes you have selected.
Select/Deselect
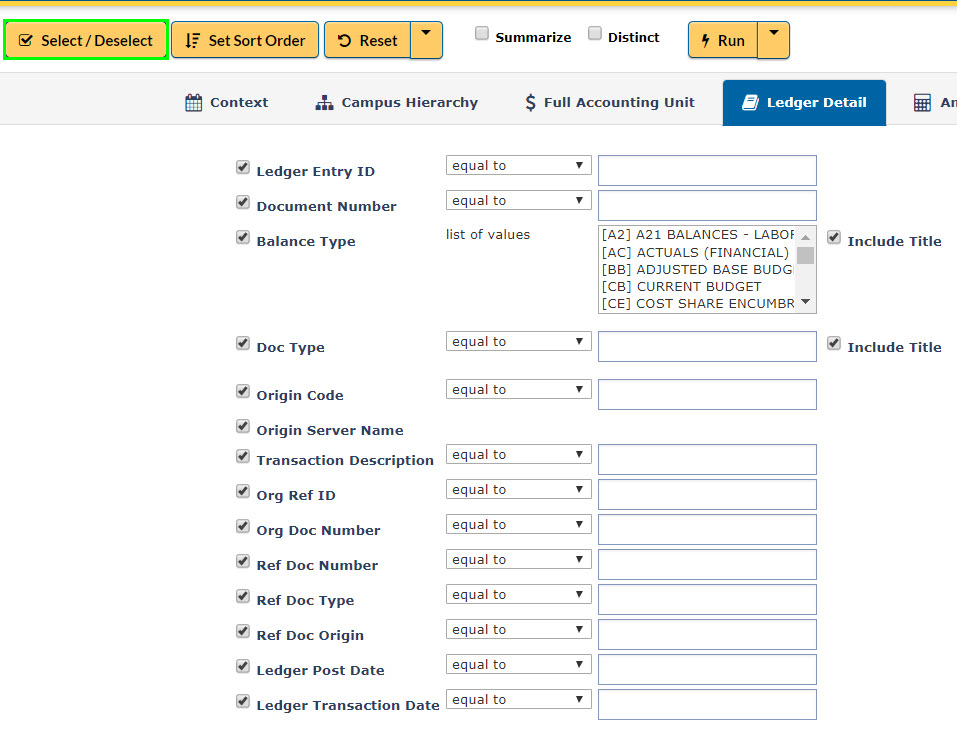
This button selects or deselects all the attributes on the current screen. Marking a checkbox next to an attribute indicates that you want that column to appear in your output.
When the Select/Deselect button is clicked once, all checkboxes in the open tab will become checked. Clicking on the button again will deselect all the checkboxes for that tab.
Set Sort Order
The Set Sort Order button allows you to choose which columns appear in your results and the order that they appear in.
Select the attribute that you want to appear first and then select the add selected items button
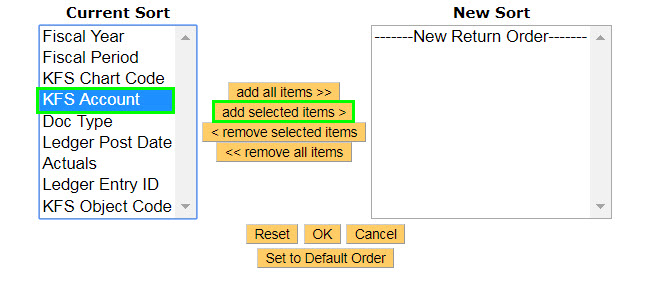

- The Add All Items button will add all of the attributes in the Current Sort field to the New Sort field
- The Add Selected Items button will add the attribute(s) that you select from the Current Sort filed to the New Sort field.
- Hold the Shift key down to select multiple adjacent attributes at once.
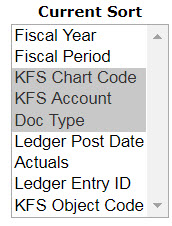
- Hold the CTRL key down to select multiple nonadjacent attributes at once.
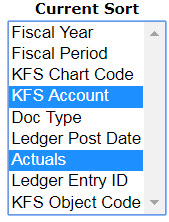
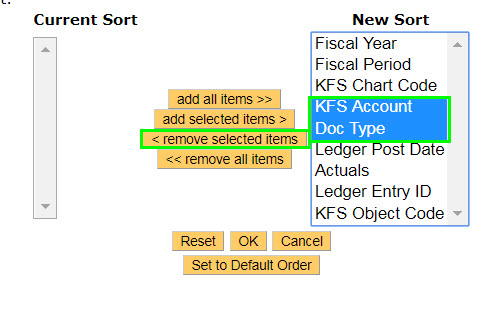
- The Remove Selected items will remove the attribute(s) that you select from the New Sort field and add them back to the Current Sort field.
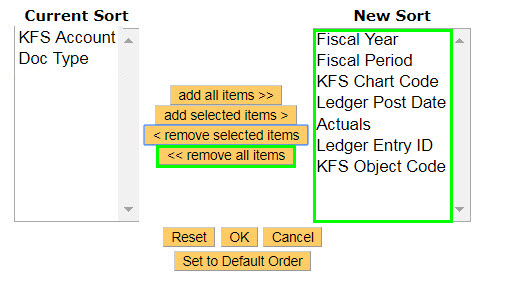
- The Remove All Items button will remove all attributes in the New Sort filed and add them to the Current Sort field.
- The Reset button will move attributes from the New Sort list back to the Current Sort list.
- Once you have put the attributes that you want in your query select the OK button
- The Cancel button will close the Set Sort order box. The list order of the Current Sort box will not change when the cancel button is selected. Any custom sorting will be saved until you exit ANTquery or select the Set to Default Order button.
- The Set to Default will set the current sort back to its original default order.
Reset
The Reset button will reset all the attributes on the current screen.
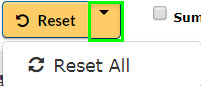
Selecting the dropdown menu and then selecting the Reset All button reset all of the attributes on all screens
Summarize
Summarize box allows you to display summarized results rather than full detail. For example, you may want to display the total amount for specific General Ledger transactions for a KFS account rather than all transaction details for that KFS Account. To summarize data, you must first select an attribute or attributes to summarize on (such as organization code, account number, and object code) by clicking the checkbox next to the attribute name. You must then unselect all other fields, except the amounts that you want to see summarized. To unselect a field, you will have to uncheck the respective attribute.
Information on how to use the Summarize feature is available on our Advanced Queries page (make Advanced Queries a link to the Advanced Query page
Distinct
By checking the Distinct checkbox, all duplicate rows will be eliminated from your query output. For example, if you are querying Travel Reimbursement information by Rollup Organization code, then the information would appear multiple times in the output. Checking “Distinct” eliminates this.
Run
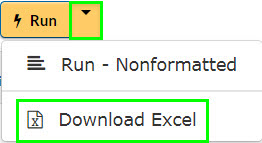
Selecting the Run button will allow you to view your query results in a formatted layout.

Selecting the drop down menu will allow you to download an editable excel spreadsheet containing your results.
DWQuery Tabs
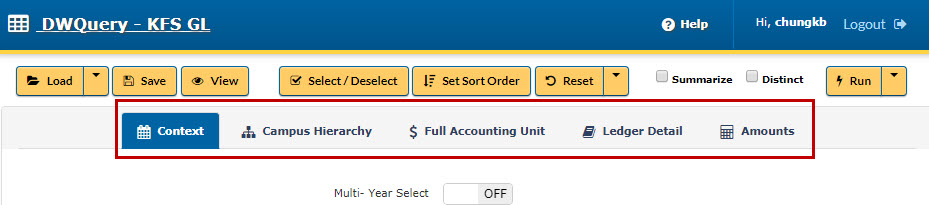
Below the Action Buttons, there are a list of tabs where users can filter and build their query. For more specific details on the KFS GL Query, see the DWQuery KFS-GL Guide.
DWQuery Lists
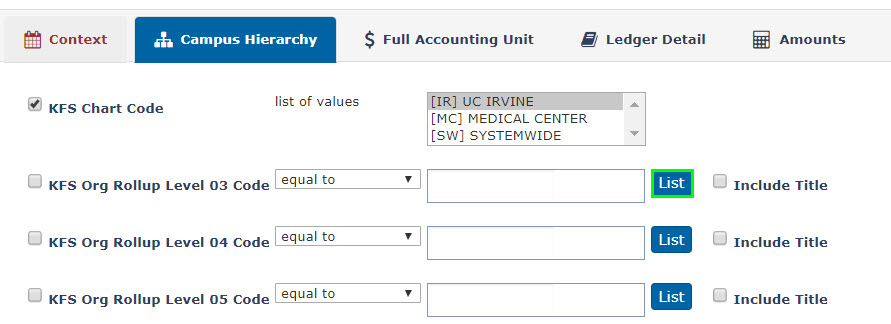
The Campus Hierarchy, Full Accounting Unit, and Ledger Detail tabs all have fields with a list button next to it. The list buttons will provide a list of attribute to choose from.
Example:
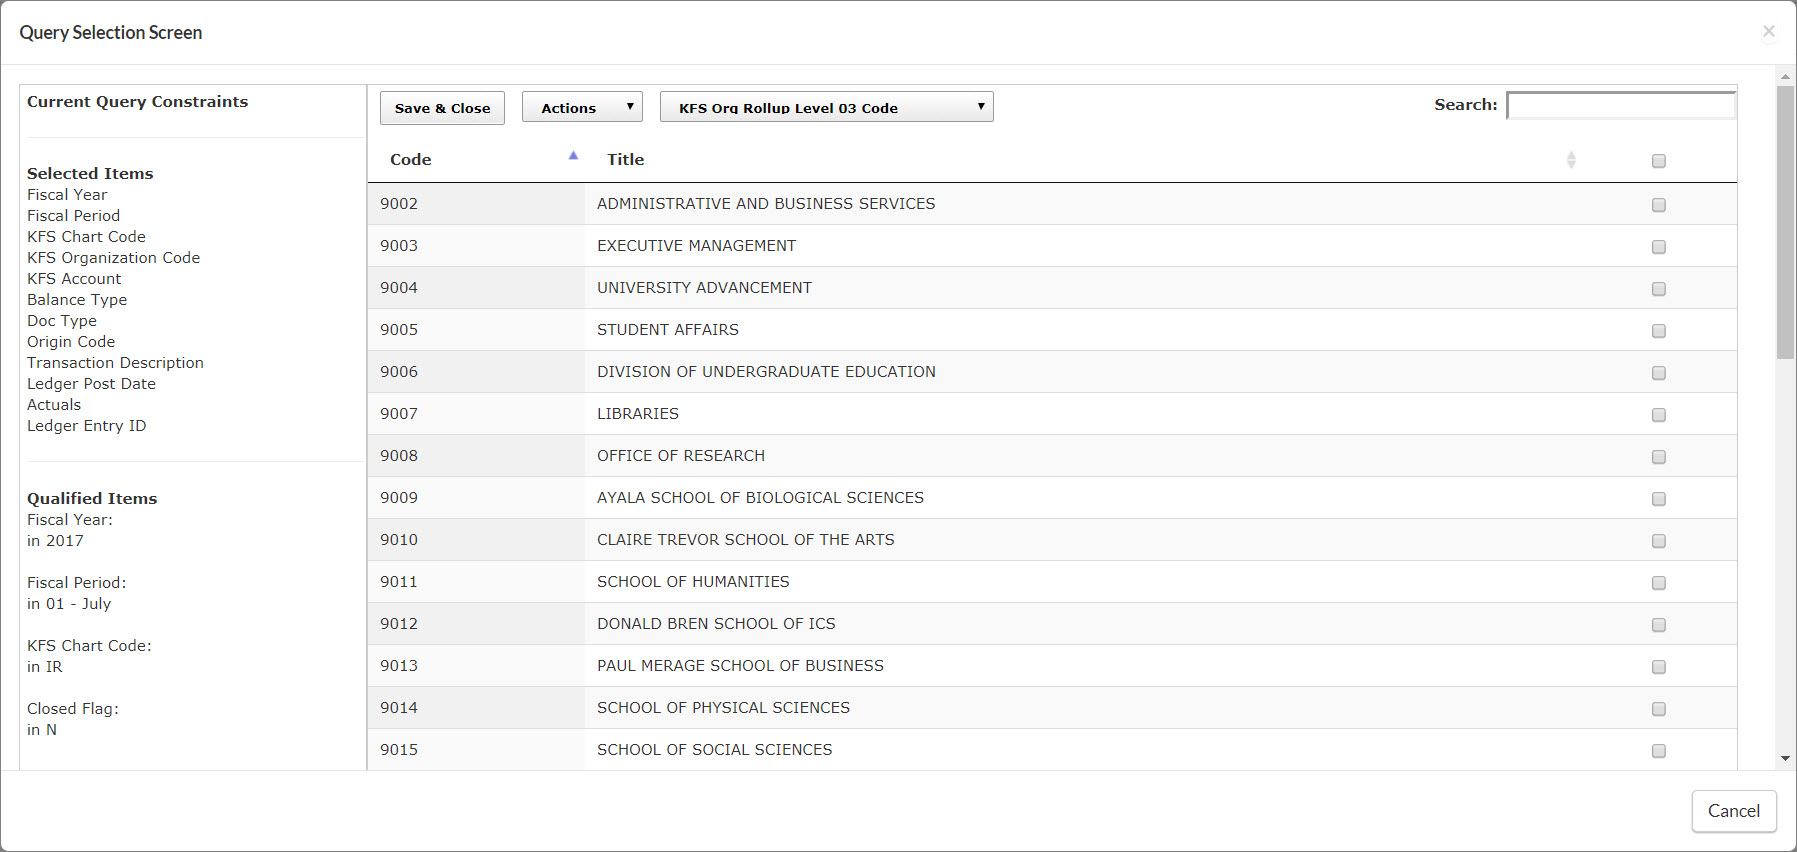
If you want to see a list of all Level 03 Organization Codes (9***) you can select the List button next to the KFS Org Rollup Level 03 Code field.
Save and Close
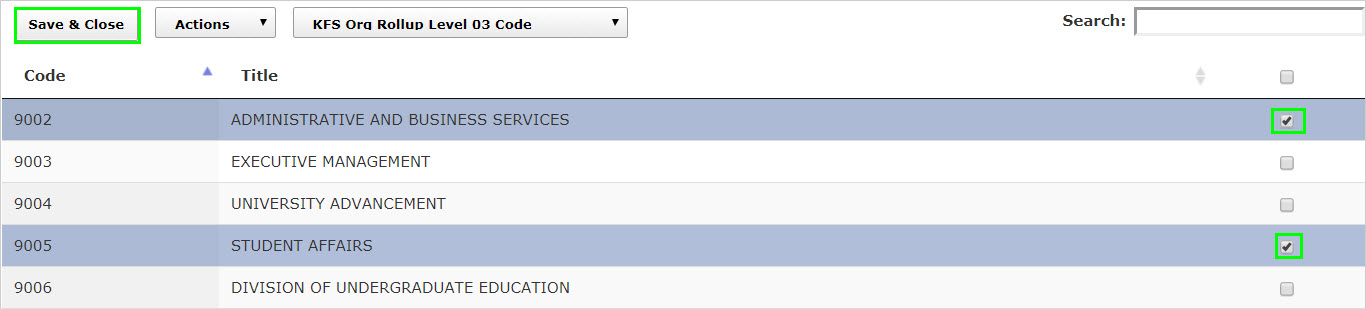
The buttons at the top of the Query Selection Screen allow users to choose attributes from the list and navigate to other lists.
Users can check the box of the attribute(s) to be pulled into their report. After the appropriate boxes are checked the Save and Close button will save checked items and close the Query Selection Screen.
Actions
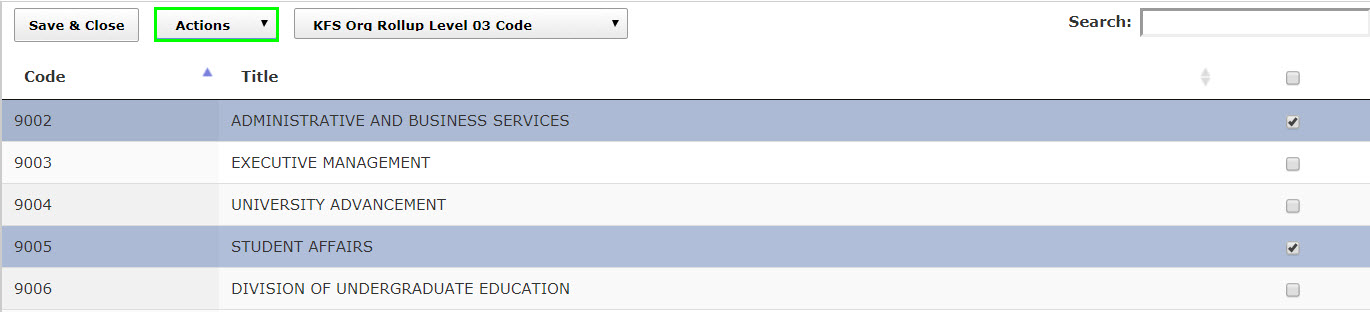
The Actions Drop Down allows users to choose or clear multiple checkboxes at once.
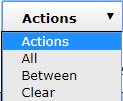
- Selecting “All” will check all of the boxes in the Query Selection Screen.
- Selecting “Between” will check all boxes that are between two boxes that have been checked by the user. In this example the user has checked 9002 and 9005. When the Between option is selected 9003 and 9004 will also be checked.
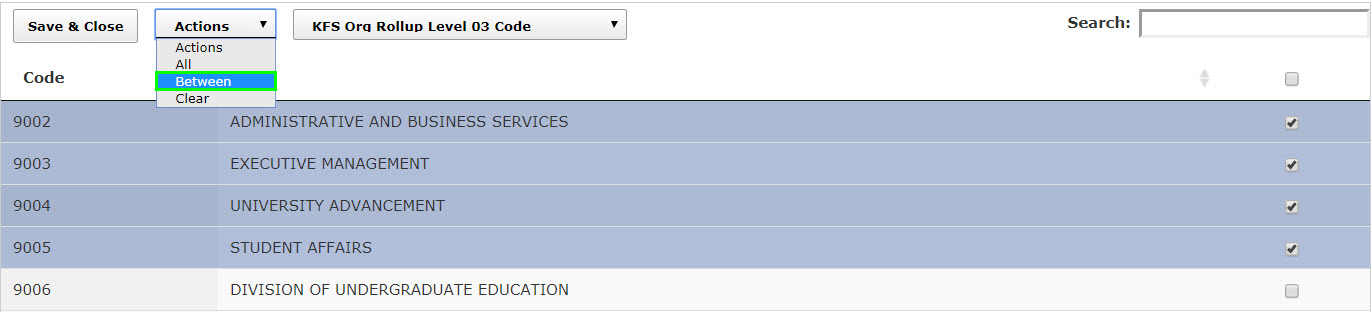
- Selecting “Clear” will unselect all checkboxes in the Query Selection Screen.
List Navigator
The drop down menu to the right of the Actions drop down menu allows users to move from one list to another without having to exit the Query Selection Screen. In this example we are going from the KFS Org Rollup Level 03 Code list to the KFS Account list.
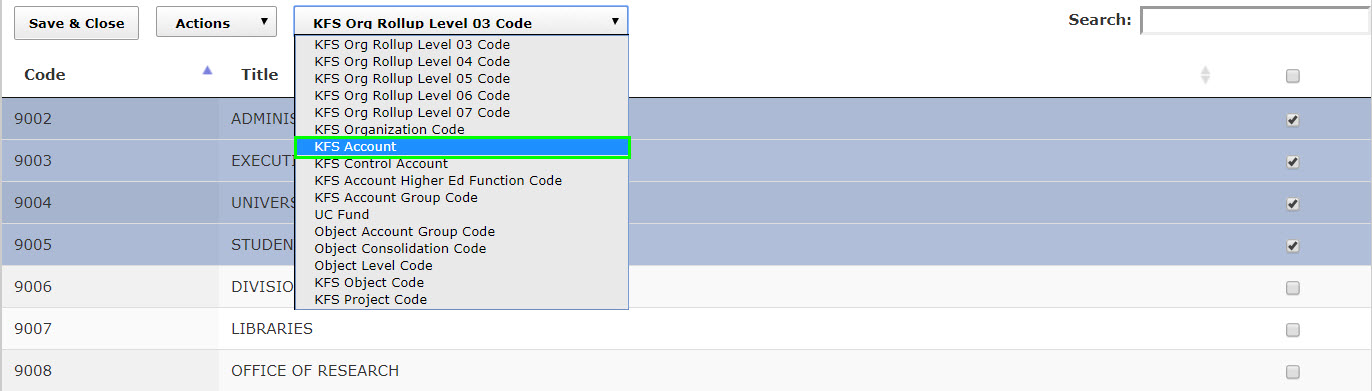
In the account list, only Accounts associated with the KFS Org Rollup Level 03 Codes selected in the previous list will be shown.

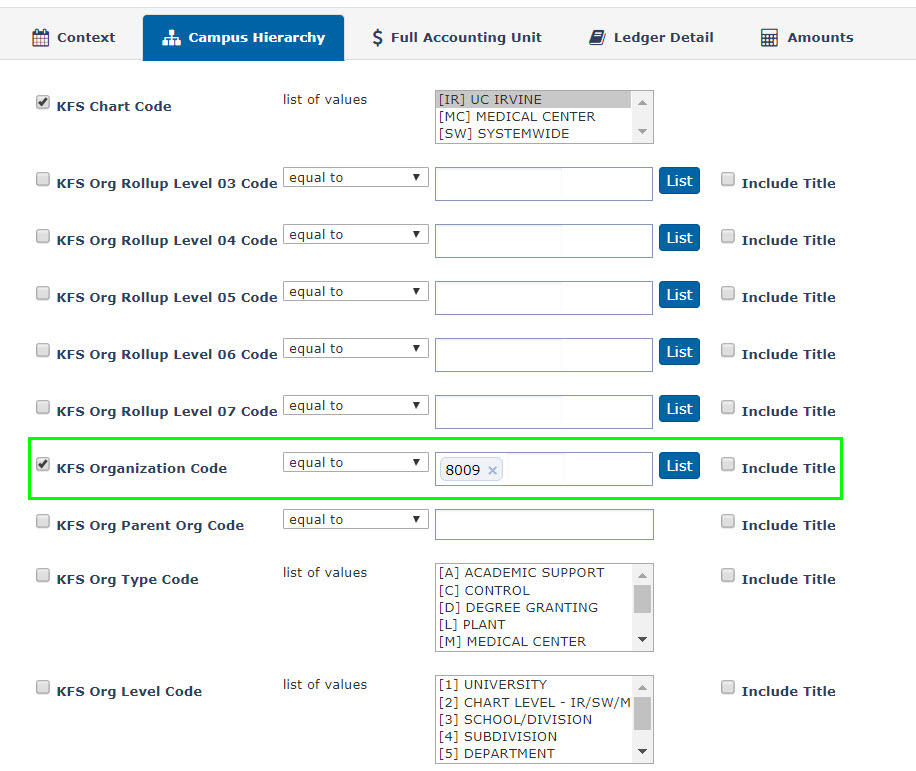
Some lists will require that you select specific attributes. For example, the KFS Account list button will require you to enter a KFS Organization Code, a KFS Control Account, or other attributes that will help identify the group of accounts that you’re looking for.
If you need to view all accounts in a specific Organization Code, enter the KFS Organization Code and then select the KFS Account list button.

Results Page
Report Search Fields
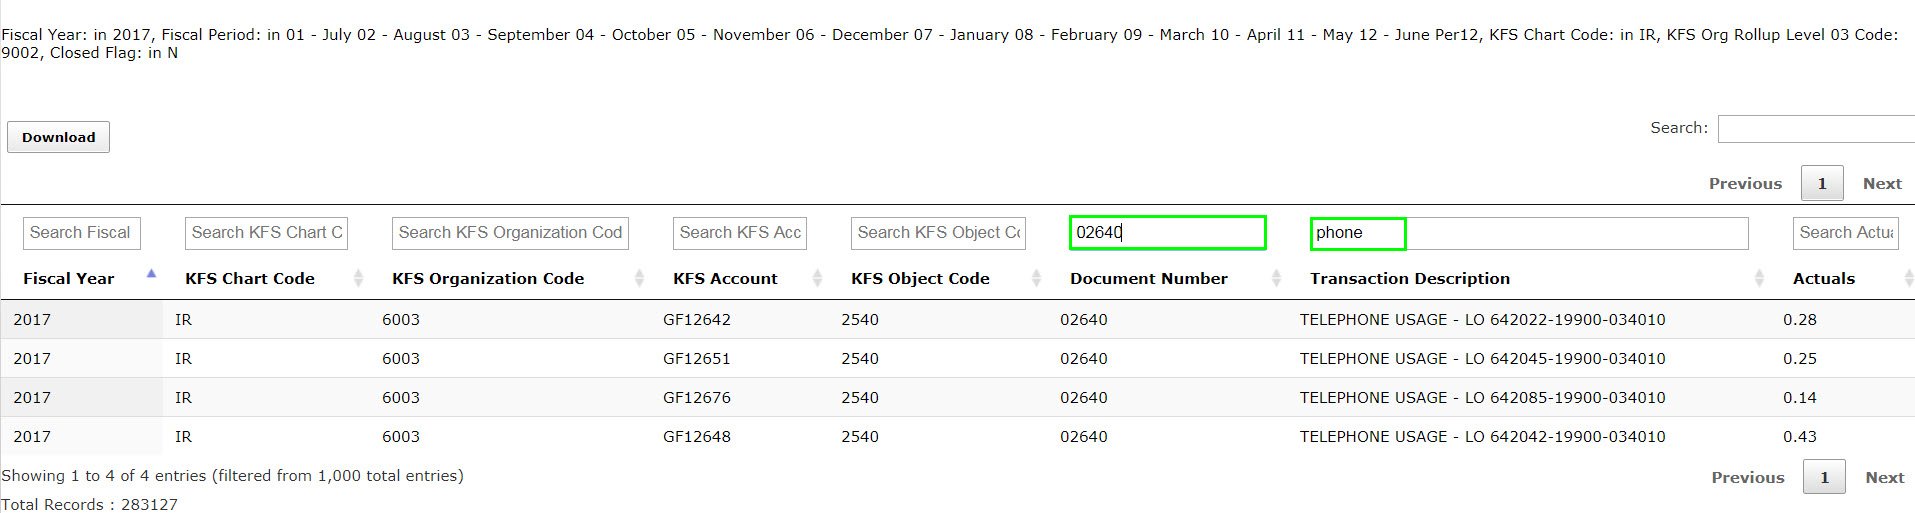
When a report is ran, each column will have search fields that can help find specific transactions.
In this example the word “phone” is entered into the Transaction Description to find all TELEPHONE USAGE transactions.
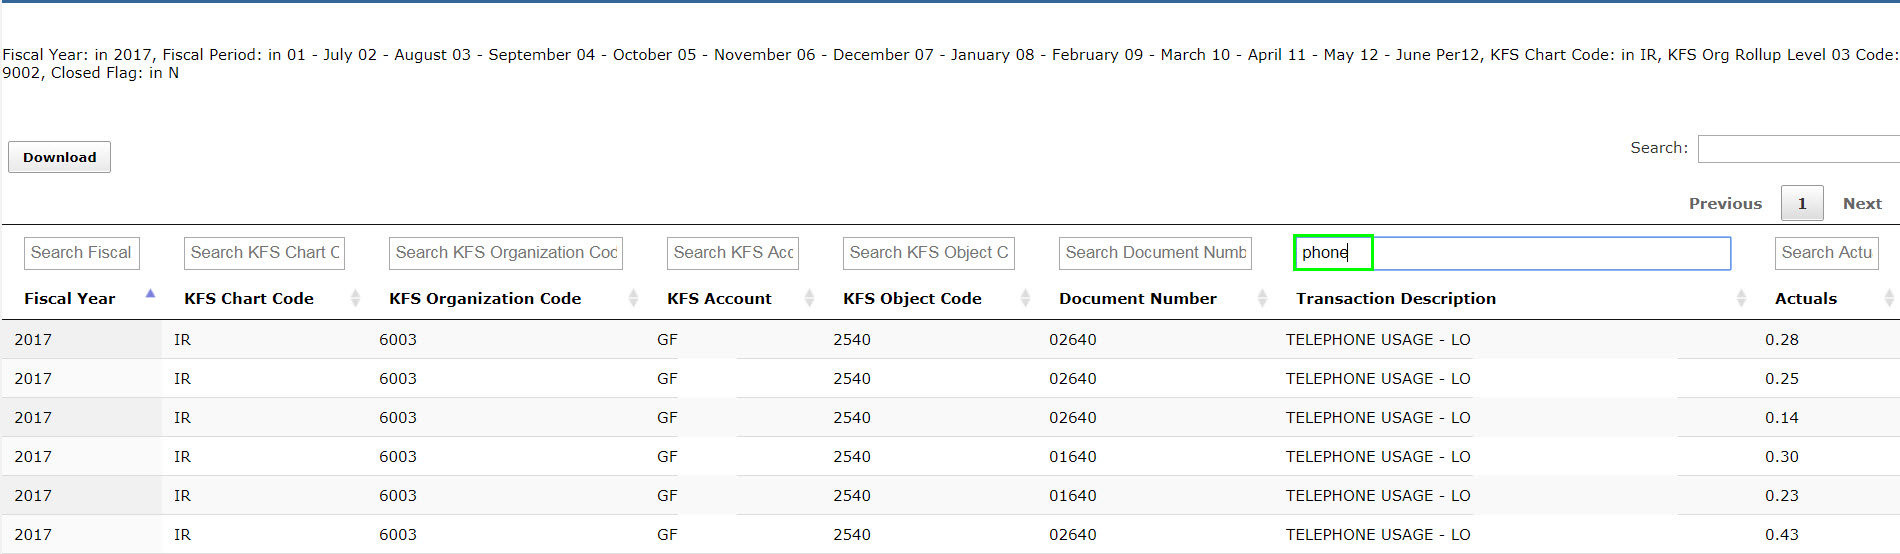
Multiple search fields can be used at once to find specific TELEPHONE USAGE transactions.